Chicken Stroganoff

chicken Stroganoff recipe with step by step picture tutorial

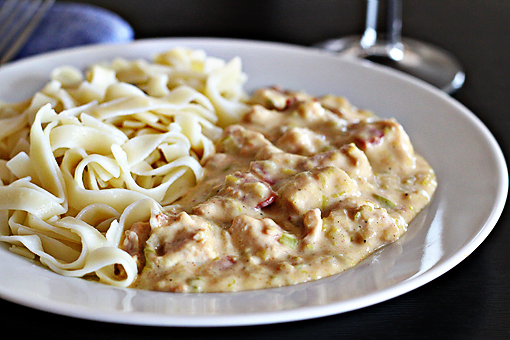
Chicken Stroganoff is a lovely variation of the well-known and famous Beef Stroganoff.


Beef or chicken, frankly, this dish is amazing.

Just imagine – tender chunks of meat covered with flavorful creamy sauce served over hot noodles.


And I haven’t told you everything yet.

Ladies and gentlemen… there’s bacon!

See?

You just have to make this…

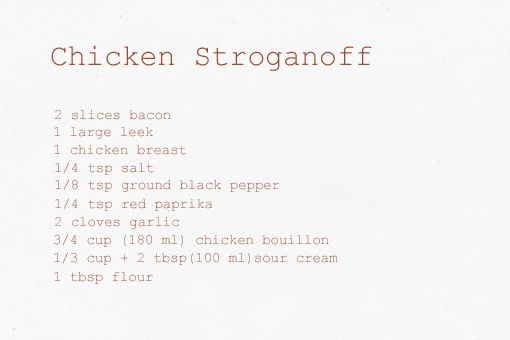
chicken Stroganoff recipe with step by step picture tutorial, ingredients

This is what you need.

Plus noodles.


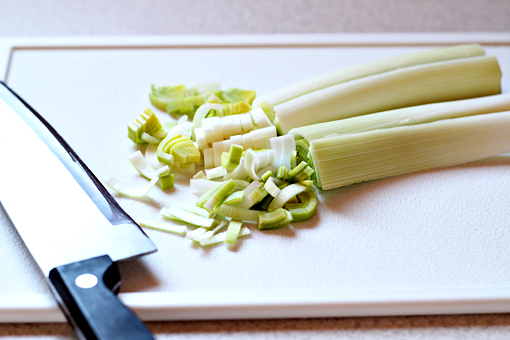
chicken Stroganoff recipe with step by step picture tutorial, chop the leek, you can use onion instead

1. First, chop the leek.

You can also use onion instead.
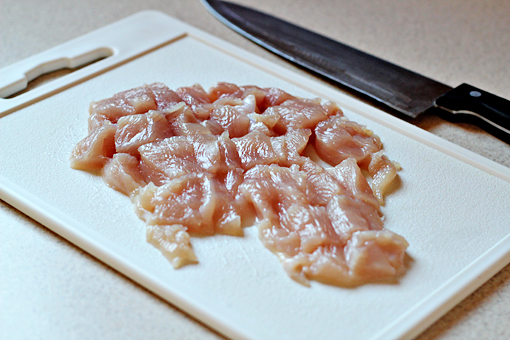
 

chicken Stroganoff recipe with step by step picture tutorial, cut the skinless and boneless chicken breast into strips or cubes

2. Cut the skinless and boneless chicken breast into strips or cubes, whatever you prefer.


I parted that chicken myself.

Early in the morning.

There’s nothing like parting a chicken while drinking coffee early in the morning.

There’s certain magic to it.

Horror magic.
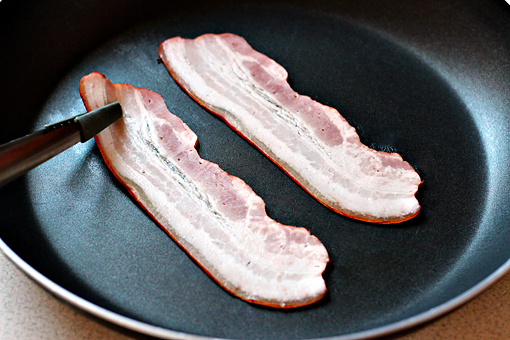
 

chicken Stroganoff recipe with step by step picture tutorial, in a large non-stick skillet or pan, fry the slices of bacon over medium heat until crisp

3. In a large non-stick skillet or pan, fry the slices of bacon over medium heat…
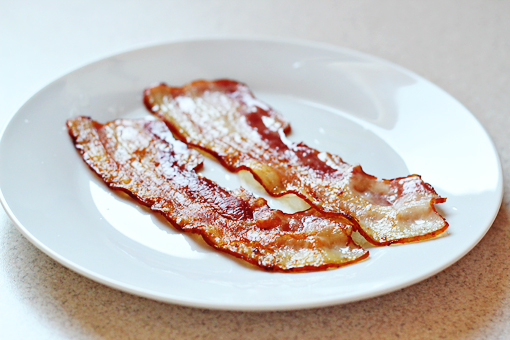
 

chicken Stroganoff recipe with step by step picture tutorial, in a large non-stick skillet or pan, fry the slices of bacon over medium heat until crisp, remove the bacon from the pan and cut it into small chunks, or crumble it

… until crisp.


4. Remove the bacon from the pan and cut it into small chunks (or crumble it).
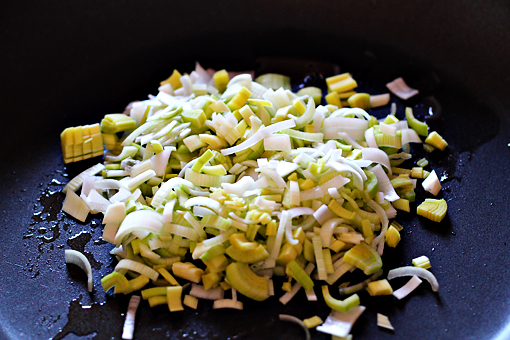
 

chicken Stroganoff recipe with step by step picture tutorial, add the leek to the drippings in the pan

5. Add the leek to the drippings in the pan.
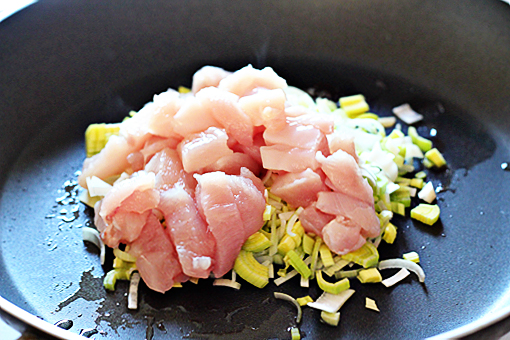
chicken Stroganoff recipe with step by step picture tutorial, then add the chicken cubes or strips

6. Then add the chicken cubes/strips.
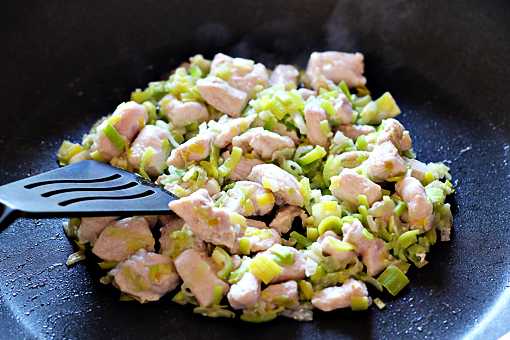
 

chicken Stroganoff recipe with step by step picture tutorial, saute together for about 6 minutes, stirring frequently

7. Sauté together for about 6 minutes, stirring frequently.
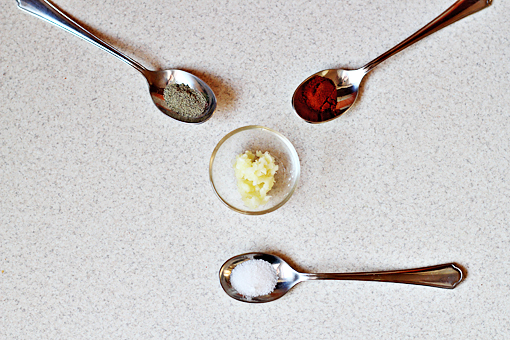
 

chicken Stroganoff recipe with step by step picture tutorial, spices - ground black pepper, red paprika, pressed or minced garlic cloves, and salt

8. Now we need our spices: ground black pepper, red paprika, pressed or minced garlic cloves, and salt.
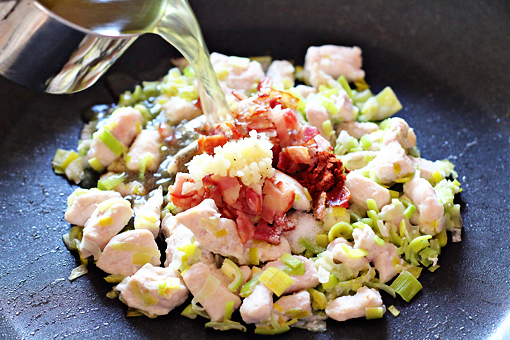
 

chicken Stroganoff recipe with step by step picture tutorial, throw all the spices into the chicken-leek mixture, add the bouillon and bacon, bring the mixture to a boil, cover, reduce heat, and let simmer for about 10 minutes

9. Throw all the spices into the chicken-leek mixture. Add the bouillon and bacon.


10. Bring the mixture to a boil. Then cover, reduce heat, and let simmer for about 10 minutes.


You may want to transfer the whole mixture into a smaller pot if you don’t have a lid that large.
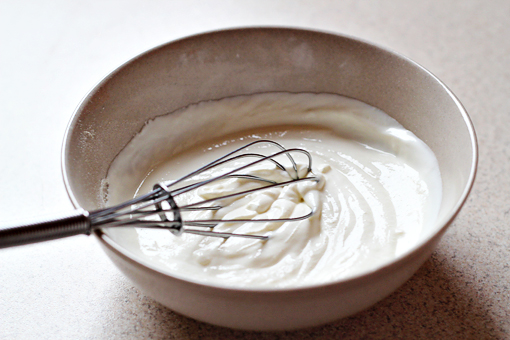
 

chicken Stroganoff recipe with step by step picture tutorial, in the meantime, you can cook the noodles, in a small bowl, combine the sour cream and the flour and stir until smooth

11. In the meantime, you can cook the noodles.


12. Also, in a small bowl, combine the sour cream and the flour and stir until smooth.
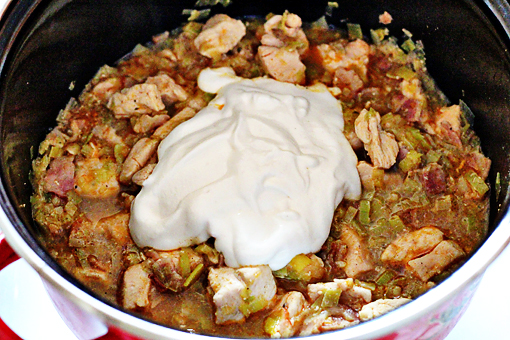
 

chicken Stroganoff recipe with step by step picture tutorial, add the sour cream mixture to the pan or pot, bring to a boil, then reduce heat and let simmer for about 2 minutes, stirring constantly, your sauce will become thicker and creamier

13. Add the sour cream mixture to the pan/pot. Bring to a boil.


14. Then reduce heat and let simmer for about 2 minutes, stirring constantly.

Your sauce will become thicker and creamier.


chicken Stroganoff recipe with step by step picture tutorial, serve the chicken Stroganoff over hot noodles

Serve your Chicken Stroganoff over hot noodles.


Enjoy, dear friends.


(This recipe makes 2 portions.)


Tea Cookies

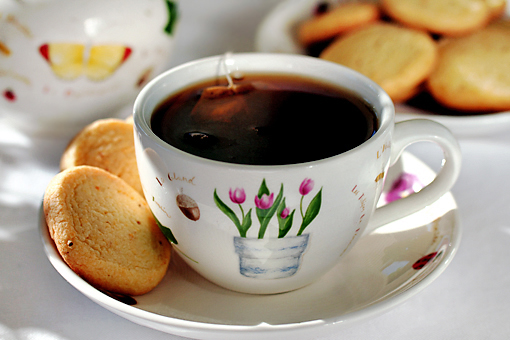
These bite-sized cookies are perfect for having with tea.

(Psst, coffee is all right too.)

They taste wonderful and are very, very simple to make.

I like to prepare them when my sugar craving strikes out of the blue. Or when friends call unexpectedly saying they will come soon.

These cookies just save lives.

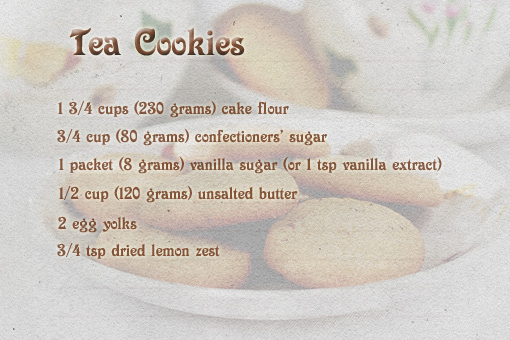
Here’s the list of ingredients.

1. To make your own Tea Cookies, first preheat the oven to 350 °F (175 °C) and line a baking sheet with parchment paper.


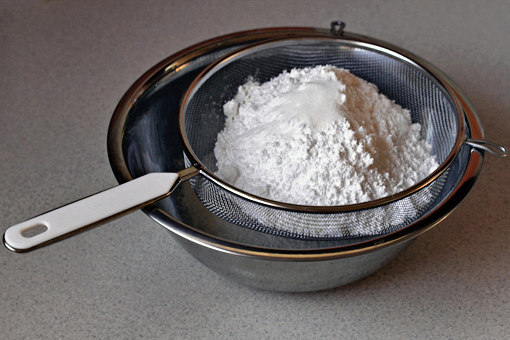
2. Sift the flour and sugars into a larger bowl.
 

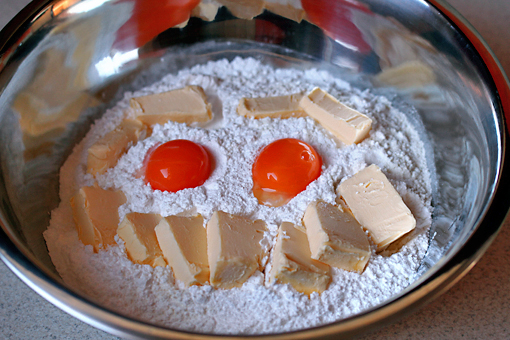
3. Add the softened butter, two egg yolks and lemon zest…
 

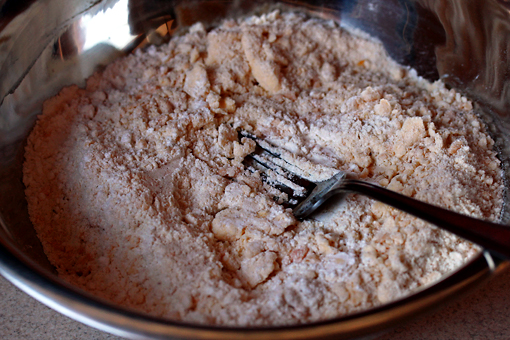
4. …and use pastry cutter or just a plain fork to turn the ingredients into a crumbly mixture.


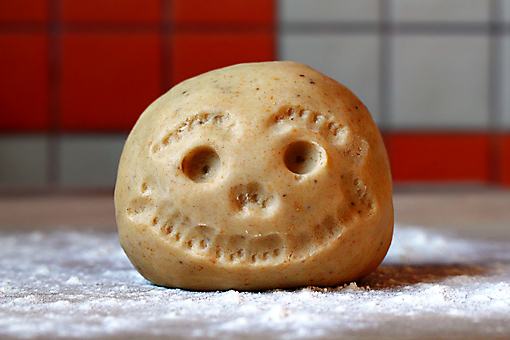
5. Then use your hands to form a ball.

Like this one.

Though creating a face is not necessary.

But it helps.

Kidding!

But it really does.

Kidding again!


Now I’d like to tell you this: Please, be patient when you find yourself in the phase in-between the crumbs and the dough ball. It only takes patience and trust that those crumbs will eventually come together. Give it five minutes or so and you’ll see success!
 

6. Place the dough ball on a very, very lightly floured surface.

This dough is almost not sticky at all so you really need very little flour, if any.

And besides that, the more flour you’d be using the firmer the cookies would get. And we don’t need that.


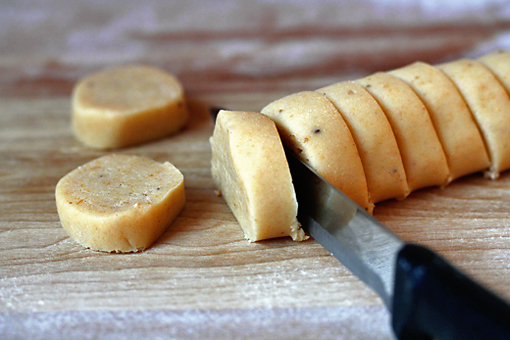
7. Using the palms of your hands, roll the dough until you form a log which is about 1.5 inches (3.5 cm) wide in diameter.


8. Then cut the log into about 1/2-inch (1 cm) thick rounds.

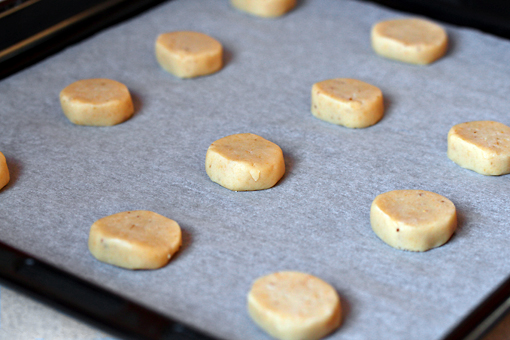
9. Place the rounds onto the sheet and bake in the preheated oven (350 °F – 175 °C) for 10 minutes.

The cookies should still be very pale in color when baked.

10. Remove from the oven and let cool completely.

Enjoy, dear friends.

(This recipe makes about 30 cookies and will take you about 40 minutes to make.)

Farfalle with Tomato and Cheese Sauce

Farfalle with Tomato and Cheese Sauce

Farfalle pasta is the best!

Don’t you think?

This kind of pasta has grown closest to my heart. For some reason it even tastes better than the other kinds.

Yum!


This time I’ve decided to prepare these lovely little bow-ties with a very simple tomato sauce.

But there’s this thing I need to own up… I saw Feta cheese in the fridge and just couldn’t resist and had to add it to the sauce. The temptation was too strong. Stronger than me.

The result?

The cheese has given a unique tang to the sauce and it was all perfectly yummilicious!

Farfalle with Tomato and Cheese Sauce

These are the ingredients that you need if you want to make your own Tomato-Feta Farfalle.

Farfalle with Tomato and Cheese Sauce

1. First, peel and slice the garlic thinly.

Farfalle with Tomato and Cheese Sauce

2. Then pour the olive oil into a pan and heat it up.


3. When the oil begins to sizzle add the garlic.

Cook for about 1 minute stirring constantly.

Farfalle with Tomato and Cheese Sauce

4. Add the crushed tomatoes, salt and sugar and stir again.

Farfalle with Tomato and Cheese Sauce

5. Now cut your Feta cheese into little cubes (or just crumble it if you feel especially mischievous)…

Farfalle with Tomato and Cheese Sauce

6. …and add it to the sauce.


Farfalle with Tomato and Cheese Sauce

7. Stir it all and let cook over medium-low heat for about 20 minutes. Stir every two minutes or so.


I wonder, will I ever tire of this color?

I don’t think so.

The color of tomato sauce might actually be the reason why I fell in love with food photography.


Farfalle with Tomato and Cheese Sauce

8. In the meantime, grab the basil leaves, give them a rough chop…

Farfalle with Tomato and Cheese Sauce

9. …and add them to the sauce about 18 minutes into the cooking process so that the basil can cook with the sauce for about two minutes.
Farfalle with Tomato and Cheese Sauce

You’ll notice that the sauce has reduced in volume a little and has become more thick.

10. Cook the bow-ties according to the package instructions.

Farfalle with Tomato and Cheese Sauce

And serve.

You can even sprinkle a little Parmesan on top. That will transfer you to heaven instantly.

Enjoy, dear friends!


(This recipe makes 6 portions and will take you about 30 minutes to prepare.)

Cauliflower Casserole

Popsicles are great but a person has to have a decent meal from time to time.

Like ice-cream, for example!

Kidding. Kidding.

The thing is that recently I felt like having some pasta.

I threw an inspecting look into the fridge, found one cute cauliflower in there and the idea was born instantly.

Cauliflower casserole!

Though I was really craving something casserole-like, I started to consider whether it wouldn’t be too rich for summer days like we are having right now.

But after I had the first bite of this dish all worries were gone.

I knew everything was perfectly all right because this dish was light, nutritious, satisfying, flavorful and delicious.

To prove it all I’ll tell you that my man loved it.

And that’s the best evidence!

For me, at least…

These are the ingredients I’ve used to prepare the dish.

Hello, elbow macaroni.

I love that name!

I think that ‘elbow macaroni’ is the cutest named pasta in the whole world.

Don’t you think?

Oh, sorry, here are the instructions!

1. Cook the pasta according to package directions.

2. This is cauliflower.

What would you do if you didn’t have me here to explain things like these?

Hmm, sorry again! You know – me and the attention span, we are not good friends.

Anyhow, trim the cauliflower, separate it into florets and wash them.

3. Chop the pepper and onions.

4. Melt 1 tablespoon (14 grams) butter in a larger pan over medium heat.
5. Place the onions, peppers and cauliflower into the pan and stir-fry for about 5 minutes.

We don’t need the vegetables to get perfectly soft – the baking will do the job.
6. Set aside.

7. In a separate pan, melt the remaining butter (2 tablespoons – 28 grams) over medium-low heat.

8. Stir in the flour and mix until smooth and bubbly.

9. Gradually add milk, stirring constantly.

10. Season with the salt and pepper.
11. Continue cooking and stirring just until the mixture becomes thicker.

12. Then grate the cheese.

You can use any cheese you like.

I’m this liberal!

13. Throw half of the cheese into the mixture.
14. Stir just until the cheese melts.

Then remove the pan from heat.

15. In a larger bowl combine the pasta, cauliflower mixture and the milk/cheese mixture.

16. Pour the mixture  into your baking dish.

17. And sprinkle with the rest of the cheese and with the bread crumbs.

18. Bake at 350 degrees F (175 degrees C) for about 30 minutes.

Yum!

This dish tastes best when served warm.

Enjoy, dear friends!

(This dish serves about 6 people.)

Send this to a friend