Crispy Chicken Breasts

crispy chicken breasts recipe, breaded chicken breasts recipe

Here’s another quick and simple recipe idea for you.

It’s chicken breasts. Because I love chicken breasts. That’s the best kind of meat for me.

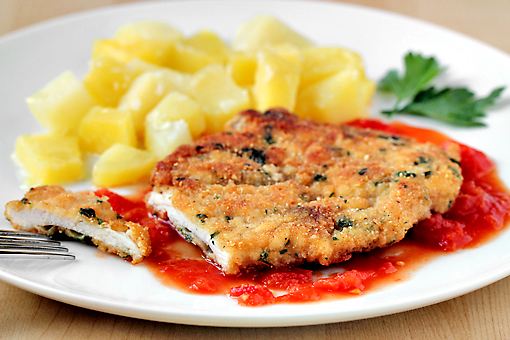
These are coated in delicious mixture of bread crumbs, ground nuts, Parmesan cheese and parsley. They are then fried to irresistible perfection.

Now I invite you to my kitchen to have a look at how I actually prepared them…
crispy chicken breasts recipe, breaded chicken breasts recipe

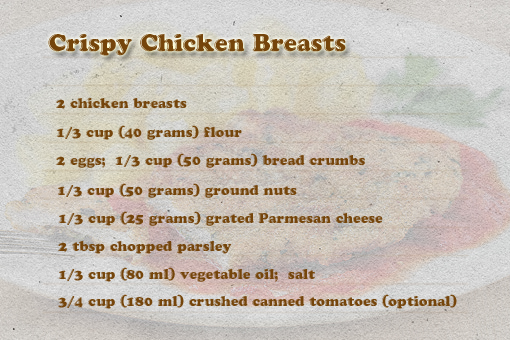
But before that, these are the ingredients.
crispy chicken breasts recipe, breaded chicken breasts recipe

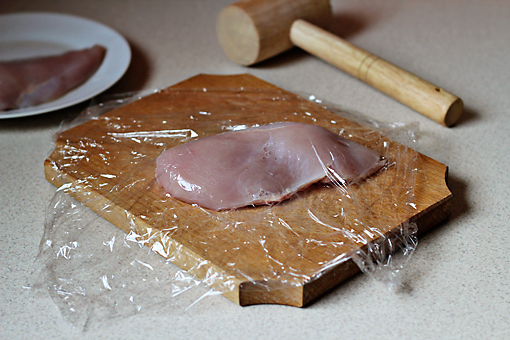
1. First, place the breasts between two layers of wax paper or plastic wrap.

Then using a meat mallet or a rolling-pin (or anything that could do the job), pound the chicken breasts so that they’re evenly thin. They will spread out to at least 2 or 3 times their size as they flatten.
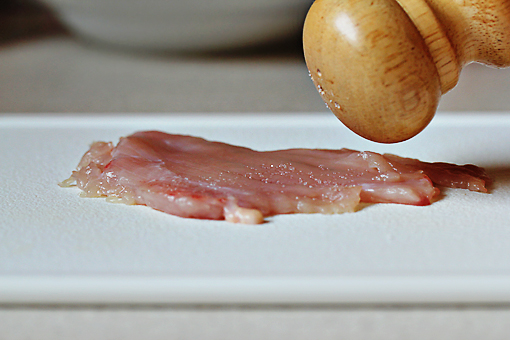
2. Slice each breast in half after flattening. That way you’ll achieve 4 nice portions.
crispy chicken breasts recipe, breaded chicken breasts recipe

3. Now salt the cutlets on both sides generously.

This is the only time we are using salt while preparing this recipe, so there’s no need to hold back.
crispy chicken breasts recipe, breaded chicken breasts recipe

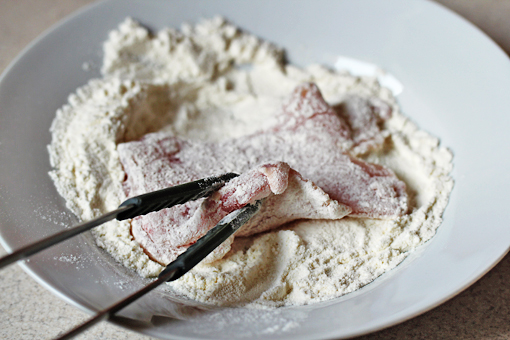
4. Now, let the dredging begin. First, dredge a piece in flour.
crispy chicken breasts recipe, breaded chicken breasts recipe

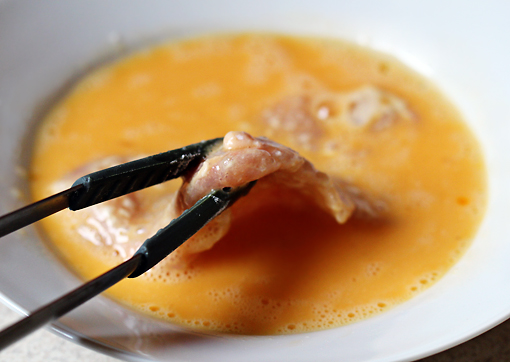
5. Then dip it in lightly beaten eggs.
crispy chicken breasts recipe, breaded chicken breasts recipe

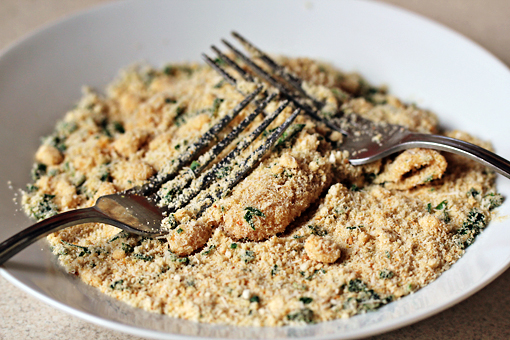
6. And finally cover your cutlet with a mixture of bread crumbs, ground nuts, Parmesan and chopped parsley.

I’ve used ground peanuts this time. But feel free to use any nuts you like and have on hand.


7. Set aside on a large platter (don’t overlap the pieces) and repeat with remaining chicken.
crispy chicken breasts recipe, breaded chicken breasts recipe

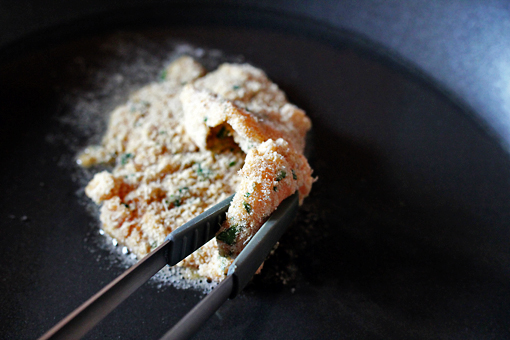
8. Pour the vegetable oil into a large skillet or pan and place over medium heat until a pinch of breading sizzles immediately when you drop it in the pan.
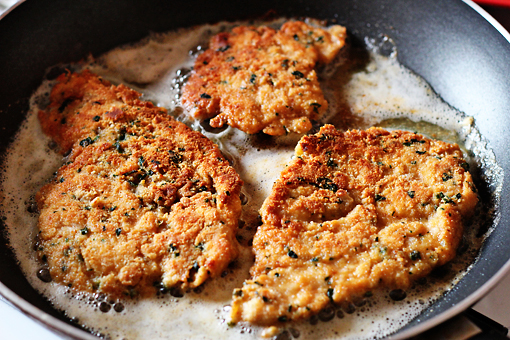
9. Place one breaded chicken cutlet into the hot oil and cook for about 4 minutes per side, turning once.
crispy chicken breasts recipe, breaded chicken breasts recipe

Both sides should be golden brown and crisp, and the chicken should be cooked through.
crispy chicken breasts recipe, breaded chicken breasts recipe

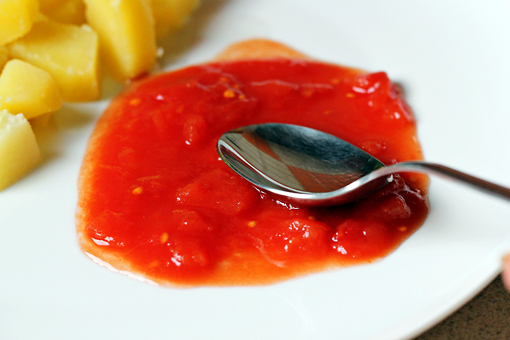
10. Now, this is optional but your chicken can be served over a nice layer of warm tomato sauce.

If you are into warm tomato sauce.
crispy chicken breasts recipe, breaded chicken breasts recipe

I’ve served this delicacy with very simple cooked potatoes.

But I can also imagine it paired with nice mashed potatoes or even fries.


Enjoy, dear friends!

This is definitely yummy!


(This recipe makes 4 portions and takes about 30 minutes to prepare.)

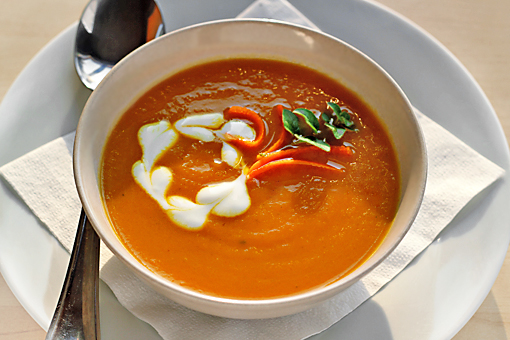
Purée of Carrot Soup with Curry and Ginger

puree of carrot soup with curry and ginger recipe with pictures, cream of carrot soup recipe with pictures

There are a lot of things that I love about this soup.

First of all, its vibrant color. Just mere looking at it gives me energy.

Then there are the layers of taste – from the soothing and sweet taste of carrots to the funky ones of ginger and curry. They make this soup a true pleasure to eat.

And on top of that all, this soup is in fact a remedy. The carrots have a very high beta-carotene content. They are alkaline, clean acidic blood, and are considered an anti-cancer food. Onions and leek are healing for the lungs.

All-in-all, this lovely soup might come in handy after all the feasting that we’ll be enjoying soon.


puree of carrot soup with curry and ginger recipe with pictures, cream of carrot soup recipe with pictures

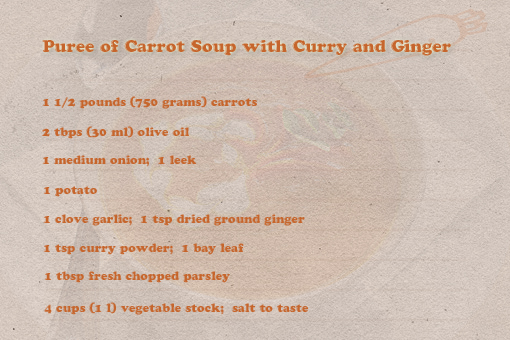
Here’s the list of ingredients.

puree of carrot soup with curry and ginger recipe with pictures, cream of carrot soup recipe with pictures

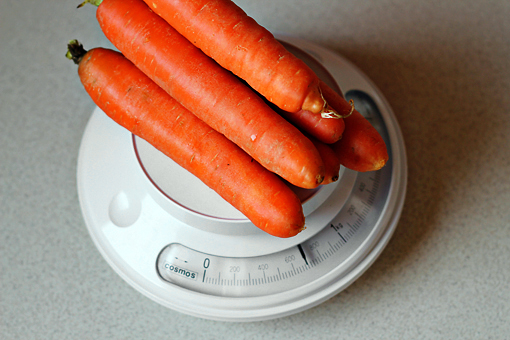
1. First, we need the carrots.

puree of carrot soup with curry and ginger recipe with pictures, cream of carrot soup recipe with pictures

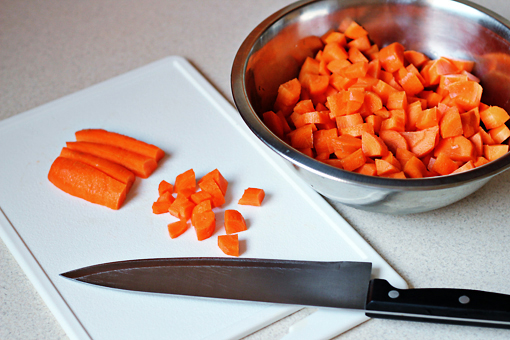
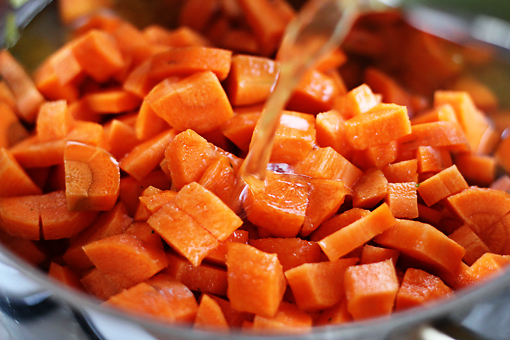
Dice ’em.

puree of carrot soup with curry and ginger recipe with pictures, cream of carrot soup recipe with pictures

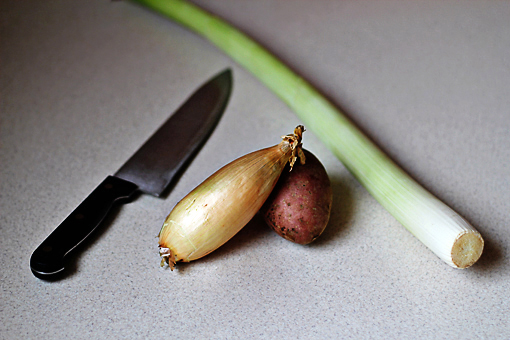
2. Then grab the onion (if you are a rebel you can use a shallot) and the leek and chop them.


3. Dice the potato.
puree of carrot soup with curry and ginger recipe with pictures, cream of carrot soup recipe with pictures

4. Heat the olive oil over medium heat.


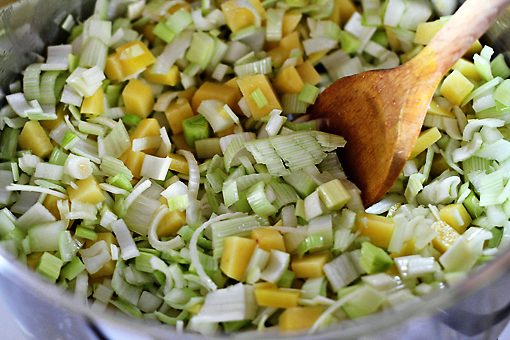
5. Throw in the onions, leek and the potato. Sauté for about 5 minutes, stirring occasionally.

puree of carrot soup with curry and ginger recipe with pictures, cream of carrot soup recipe with pictures

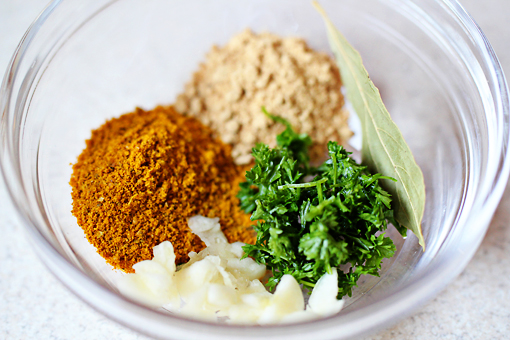
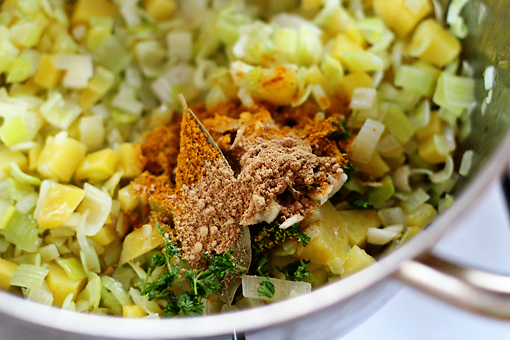
6. Then add the ginger, curry, garlic, chopped parsley and bay leaf.

puree of carrot soup with curry and ginger recipe with pictures, cream of carrot soup recipe with pictures

7. And cook for about two minutes.

puree of carrot soup with curry and ginger recipe with pictures, cream of carrot soup recipe with pictures

8. Add the carrots and the vegetable stock. Bring to a boil, reduce heat, and let simmer for 30 minutes, until carrots are very tender.

puree of carrot soup with curry and ginger recipe with pictures, cream of carrot soup recipe with pictures

9. Remove the soup from heat and discard the bay leaf (don’t be like me, please).
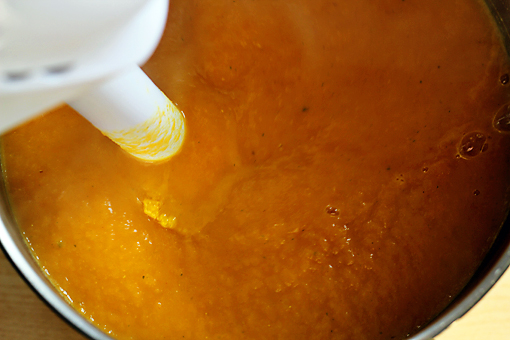
10. Puree the soup with a vertical blender until creamy.
11. Then taste and add more salt if needed.

puree of carrot soup with curry and ginger recipe with pictures, cream of carrot soup recipe with pictures

Yum!

This soup is amazing.

Enjoy it, dear friends!


(This recipe was adapted from here. The recipe makes about 6 portions and takes about 1 hour to prepare.)

Mushroom Ragout on Garlic Toast

mushroom ragout on garlic toast recipe with step by step pictures

I’ve found a gorgeous recipe!

I may also have found my favorite chef.
The recipe took me into the world of delicious mushrooms which are cooked in a creamy thyme sauce.

Yum!

As if not head-spinning enough already, it’s all served over a fragrant and scrumptious garlic toast.

I really loved being in that world.
The moment I saw the original recipe presented by John Mitzewich it became completely clear to me that I had to have that thing in my life.

And would you like to know what that lovely chef said about this recipe? Well, he said the following: “If you make this, people will think you can cook.”

Awesome, ha?

And now I completely understand what this cute and helpful guy was talking about…

mushroom ragout on garlic toast recipe with step by step pictures

These are our ingredients.
mushroom ragout on garlic toast recipe with step by step pictures

1. To make your own mushroom ragout, first slice the mushrooms.

I am using white button mushrooms (Champignons) for this recipe.
mushroom ragout on garlic toast recipe with step by step pictures

2. In a large, large (large!) pan, heat the olive oil over medium-high heat.

If you want to go super yummy, you can use 1 tablespoon of melted butter instead of the oil.


3. Place the mushrooms in the pan – just pile them up, they will fit.

mushroom ragout on garlic toast recipe with step by step pictures

4. Then add the salt and pepper, stir and sauté the mushrooms until brown.

This should take about 15 minutes.

Your mushrooms will cook down substantially.

mushroom ragout on garlic toast recipe with step by step pictures

Okay, the next step involves wine.

And this is what happens when I see wine around me.

It seems that my hands start to tremble with joy.

Or maybe it’s not joy.

Anyhow, cheers!

mushroom ragout on garlic toast recipe with step by step pictures

5. When the mushrooms are nicely sautéed, slice the garlic, throw it in and sauté for about 30 second.


6. Add the wine and let cook for another 30 seconds.


7. Then pour in the chicken stock, cream and add the thyme.

Stir and let cook for about 3 more minutes. Our ragout will slowly start to thicken up.

Then taste and add more salt if needed.


mushroom ragout on garlic toast recipe with step by step pictures

8. And since it’s done now, remove the pan from heat.
mushroom ragout on garlic toast recipe with step by step pictures

Oh, my!

mushroom ragout on garlic toast recipe with step by step pictures

9. Now we can get our garlic toasts ready.

This couldn’t be easier.

Just toast a slice of bread in the toaster and rub it with a clove of raw garlic.

And you have a quick instant garlic toast.

This is a very nice trick.

mushroom ragout on garlic toast recipe with step by step pictures

10. Finally, spoon the ragout over your freshly made garlic toast.

And enjoy!


This yummy treat can be also served in other delicious ways – with a salad or over a piece of chicken or steak.

Mmm!

Lentil Soup with Indian Spices

lentil soup with Indian spices recipe with step by step pictures

Lentils are my favorite legumes.

My body loves them and craves them very often.

Well, sometimes my body cannot decide between legumes and eggnog. But all-in-all, I really love lentils.


I’ve made this particular soup for the first time in my life.

I make lentil soups quite often but not the Indian ones.

The thing is that I had been playing with the idea of making this kind of soup for some time and all I needed and was trying to find were the right Indian spices.

The day I saw Garam Masala and Turmeric in one magical shop my vision was finally free to turn into reality – the yummy Lentil Soup with Indian Spices.

So, here’s what I did and how I improvised…

lentil soup with Indian spices recipe with step by step pictures

These are the ingredients that I’ve used.

lentil soup with Indian spices recipe with step by step pictures

And here they are again.

Mmm, this looks promising.

lentil soup with Indian spices recipe with step by step pictures

1. Firstly, let’s get some chopping done – chop the onion and the chili pepper finely. Then dice up the tomato. And give the garlic cloves a nice fine chop as well.

lentil soup with Indian spices recipe with step by step pictures

2. Rinse the lentils under cold running water. Place them into a pot and cover with water (3 1/2 cups – 870 ml).
3. Cook the lentils until just almost ‘fully tender’. We need them to be almost done.

I was using halved red lentils and this process took only about 4 minutes. If you use whole red lentils it might take a little longer. To check how tender the lentils are just eat a few. Easy!
lentil soup with Indian spices recipe with step by step pictures

4. In the meantime, heat the oil in a larger pan or pot.


5. Add the mustard seeds and watch the magic happen – they will enjoy the warmth of the oil so much that they will start to pop with joy. As a result, they will taste sweet and nutty.

Let the seeds pop for about 20 seconds.


6. Then add the cumin seeds, turmeric and chopped onions.

Cook for about 2 minutes, stirring constantly.

lentil soup with Indian spices recipe with step by step pictures

7. After that, add the garlic. Stir and cook together for about 1 minute.

lentil soup with Indian spices recipe with step by step pictures

8. Add the chopped tomato and chili pepper.

Cook for about 2 minutes, stirring every now and then.

lentil soup with Indian spices recipe with step by step pictures

9. Then add the lentils and their cooking water.


10. Add the garam masala powder and salt to taste (I used about 3/4 tsp).
lentil soup with Indian spices recipe with step by step pictures

11. Let come to a boil. Reduce heat and let simmer for about 5 more minutes.

lentil soup with Indian spices recipe with step by step pictures

And that’s it!

This is an unbelievably simple, delicious and quick-to-make soup.

Enjoy, dear friends!

It’s healthy, yummy and good for you.
(This recipe makes 3-4 portions and takes about 30 minutes to make.)

Source: Saboot Masoor Masala Dal from ItsLife.in.

Send this to a friend