Delicious Brownies

delicious brownies recipe with step by step pictures

I made these babies the other day.

Then, two days later, I made them again to make sure I hadn’t been dreaming before and they really tasted like heaven.

And they did.

Again.

Just like heaven!

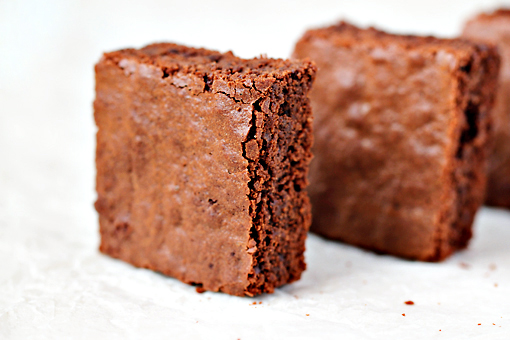
When it comes to their structure, they have it all. They are something between cakey and fudgy, slightly more on the fudgy side, with just a little chewiness to them. When I think about it (which is a little difficult after eating so many), these brownies have a strong potential to satisfy just about anyone. So any camp you are in – the cakey, fudgy or chewy one, these are great for you!

Now let me just run to the kitchen to grab another one before I show you how I was making them…
 

delicious brownies recipe with step by step pictures, ingredients

…Okay, thanks for your patience, I’m back now. YUM!

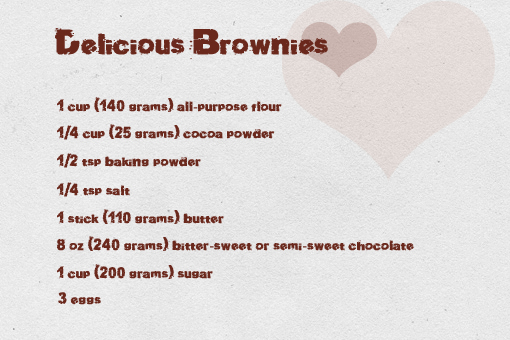
This is the list of ingredients.
 

delicious brownies recipe with step by step pictures

1. To make your own Brownies, first preheat the oven to 350 °F (175 °C).


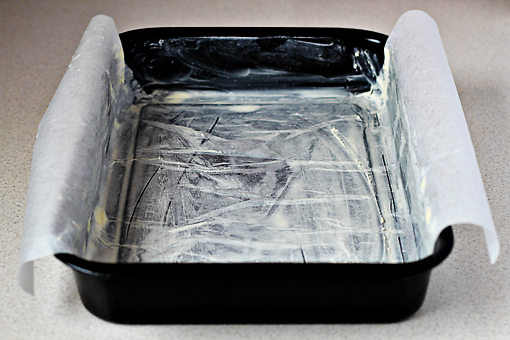
2. Line the bottom and two sides of a 13 x 9-inch (33 x 22 cm) baking pan with parchment paper, leaving a 2-inch overhang on the two sides. Butter the paper and set the pan aside.

Lining a baking pan this way is just gorgeous. It allows you to remove the baked stuff out of the pan in the most easy way. I find it the best invention right after wheel. Yes, that’s exactly what I think!
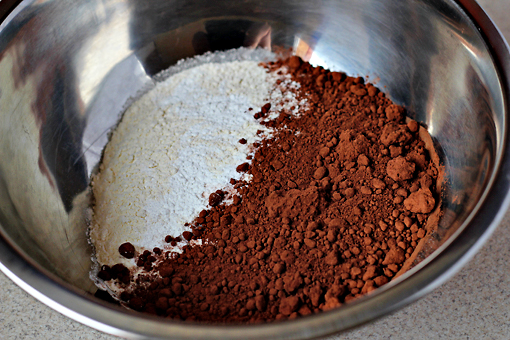
 

3. In a small bowl, whisk the flour, cocoa, baking powder, and salt. Set aside.
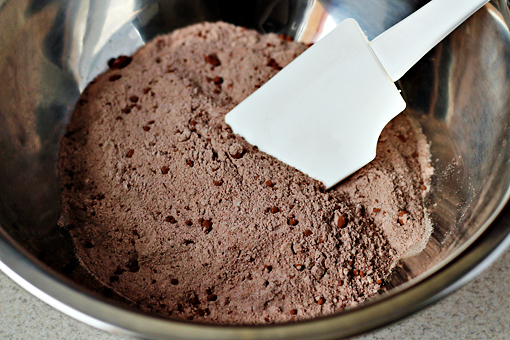
 

Just like this.

I was a naughty girl and didn’t sift the cocoa. But next time I will, I promise!
 

delicious brownies recipe with step by step pictures

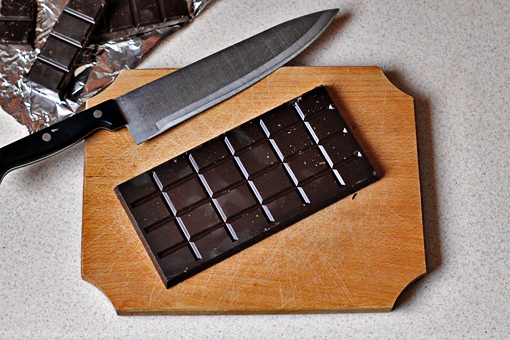
4. Now chop the chocolate roughly.

Or just brake it. Or just throw it against your counter top and watch it break into a million pieces (sorry, I just got slightly carried away).
 

delicious brownies recipe with step by step pictures

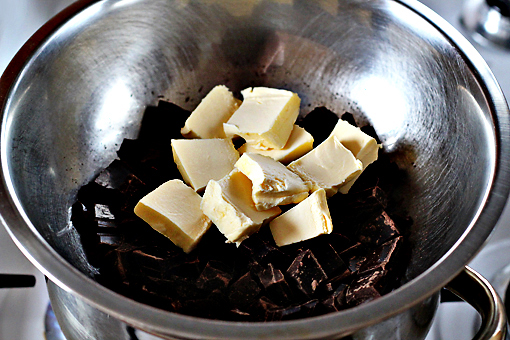
5. Now place the chocolate and the butter into a heatproof bowl and set it over a pot of simmering water.

The bottom of the bowl shouldn’t be touching the water since what we want to do here is just gently melt these two ingredients.


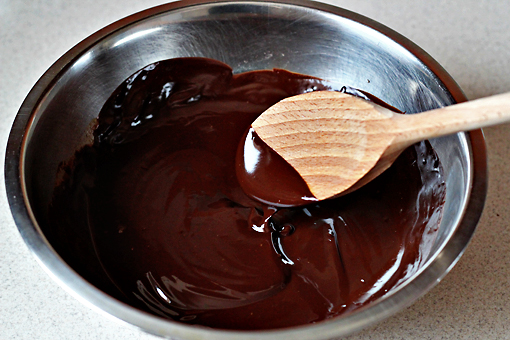
6. Heat, stirring occasionally, until smooth, for about 3 minutes. Then remove the bowl from the pot.
 

delicious brownies recipe with step by step pictures

7. Add sugar and mix to combine.


8. Then add the eggs and, again, mix to combine.
 

delicious brownies recipe with step by step pictures

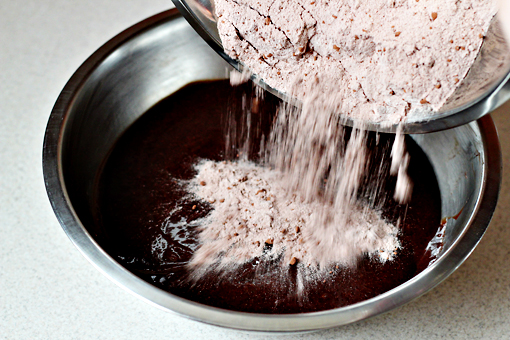
9. Finally, add the flour mixture and mix just until moistened (do not overmix).
 

delicious brownies recipe with step by step pictures

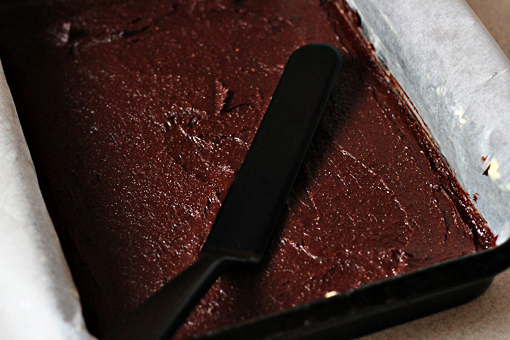
10. Transfer the batter to your prepared pan. Using and offset spatula or just a spoon, smooth the top.


11. Bake for about 20-25 minutes or until a toothpick inserted in the center of the batter/brownies comes out clean (or with a few moist crumbs attached).


12. Cool in the pan for 30 minutes. Using the paper overhang, lift brownies out of the pan and transfer to a rack to cool completely (still on the paper).


13. On a cutting board cut into squares.
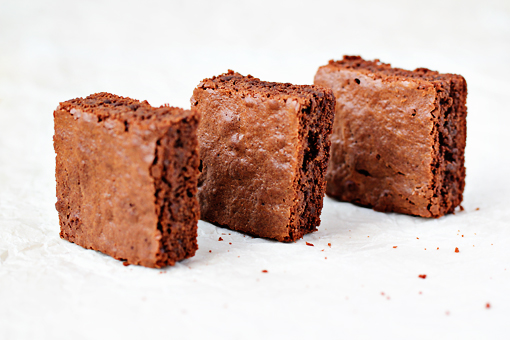
 

delicious brownies recipe with step by step pictures

Yum-yum!

Enjoy, dear friends!


And if, by any chance, you end up with some leftovers, store them in an airtight container at room temperature, up to 2 days.


(This recipe was loosely adapted from Martha Stewart. It takes about 1 hour to prepare and yields 24 2-inch/5cm squares.)

Lentil Soup with Indian Spices

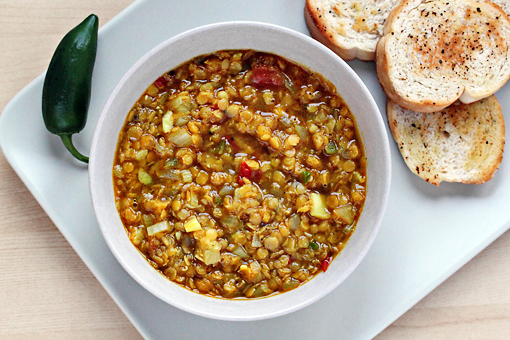
lentil soup with Indian spices recipe with step by step pictures

Lentils are my favorite legumes.

My body loves them and craves them very often.

Well, sometimes my body cannot decide between legumes and eggnog. But all-in-all, I really love lentils.


I’ve made this particular soup for the first time in my life.

I make lentil soups quite often but not the Indian ones.

The thing is that I had been playing with the idea of making this kind of soup for some time and all I needed and was trying to find were the right Indian spices.

The day I saw Garam Masala and Turmeric in one magical shop my vision was finally free to turn into reality – the yummy Lentil Soup with Indian Spices.

So, here’s what I did and how I improvised…

lentil soup with Indian spices recipe with step by step pictures

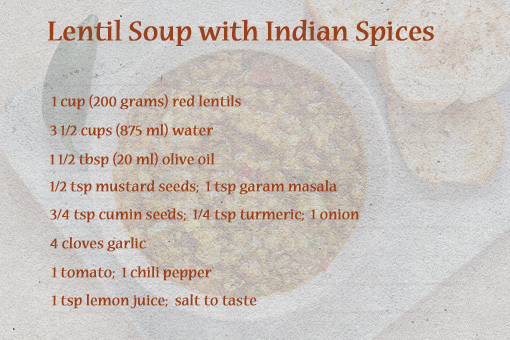
These are the ingredients that I’ve used.

lentil soup with Indian spices recipe with step by step pictures

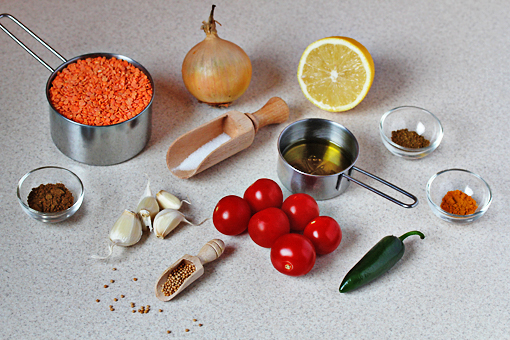
And here they are again.

Mmm, this looks promising.

lentil soup with Indian spices recipe with step by step pictures

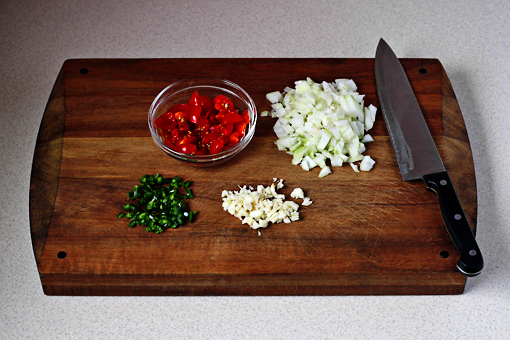
1. Firstly, let’s get some chopping done – chop the onion and the chili pepper finely. Then dice up the tomato. And give the garlic cloves a nice fine chop as well.

lentil soup with Indian spices recipe with step by step pictures

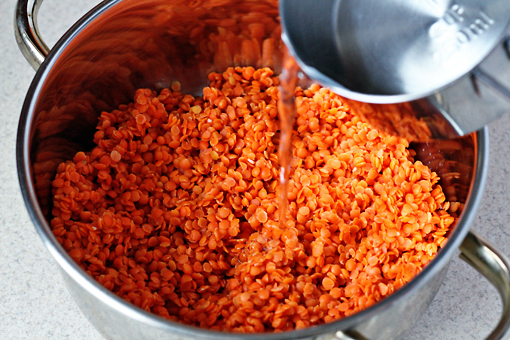
2. Rinse the lentils under cold running water. Place them into a pot and cover with water (3 1/2 cups – 870 ml).
3. Cook the lentils until just almost ‘fully tender’. We need them to be almost done.

I was using halved red lentils and this process took only about 4 minutes. If you use whole red lentils it might take a little longer. To check how tender the lentils are just eat a few. Easy!
lentil soup with Indian spices recipe with step by step pictures

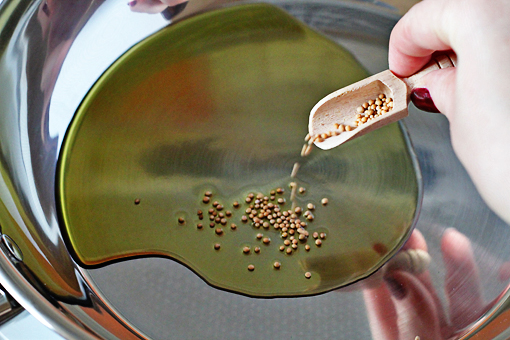
4. In the meantime, heat the oil in a larger pan or pot.


5. Add the mustard seeds and watch the magic happen – they will enjoy the warmth of the oil so much that they will start to pop with joy. As a result, they will taste sweet and nutty.

Let the seeds pop for about 20 seconds.


6. Then add the cumin seeds, turmeric and chopped onions.

Cook for about 2 minutes, stirring constantly.

lentil soup with Indian spices recipe with step by step pictures

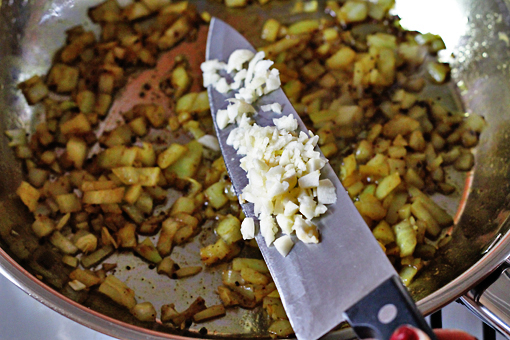
7. After that, add the garlic. Stir and cook together for about 1 minute.

lentil soup with Indian spices recipe with step by step pictures

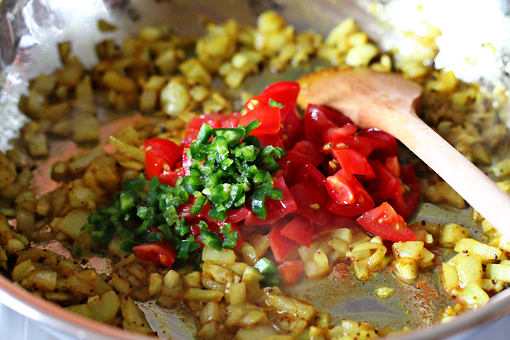
8. Add the chopped tomato and chili pepper.

Cook for about 2 minutes, stirring every now and then.

lentil soup with Indian spices recipe with step by step pictures

9. Then add the lentils and their cooking water.


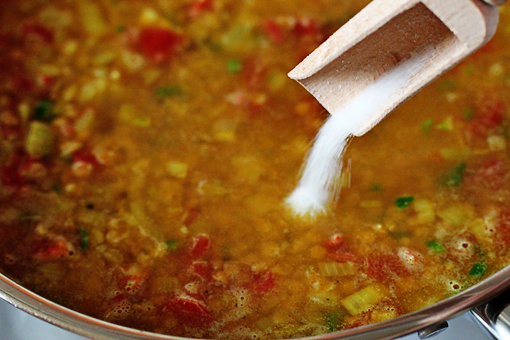
10. Add the garam masala powder and salt to taste (I used about 3/4 tsp).
lentil soup with Indian spices recipe with step by step pictures

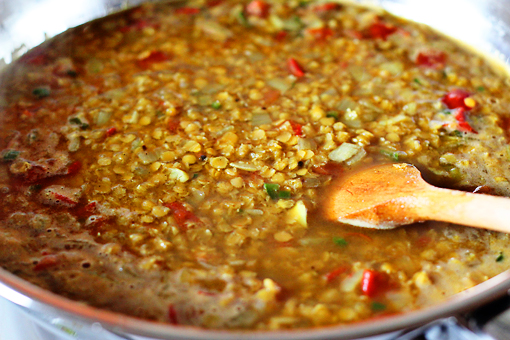
11. Let come to a boil. Reduce heat and let simmer for about 5 more minutes.

lentil soup with Indian spices recipe with step by step pictures

And that’s it!

This is an unbelievably simple, delicious and quick-to-make soup.

Enjoy, dear friends!

It’s healthy, yummy and good for you.
(This recipe makes 3-4 portions and takes about 30 minutes to make.)

Source: Saboot Masoor Masala Dal from ItsLife.in.

Crêpes with Cream Cheese Filling

crepes with cream cheese filling recipe with step-by-step images

Crepes are a beloved kind of dessert over here – in our monkey household.

They make the days brighter and happier.

I don’t really know how but it works!

Here’s a little idea on how to make crepes a little different than usual – why not fill them with a wonderful cream cheese filling!

It’s beyond delicious.

And beyond simple.

Come and have a look at how I made them…

crepes with cream cheese filling recipe with step-by-step images

These are the ingredients that I’ve used.

I bet you have them all in your pantry right now.

Right?

crepes with cream cheese filling recipe with step-by-step images

1. What I really love about making crepes is that the batter couldn’t be easier to prepare.

At least the one I make.

You just throw the eggs, flour, milk, water, sugar, and a pinch of salt into a bowl…

crepes with cream cheese filling recipe with step-by-step images

2. …and give it a good mix until it’s all incorporated and there are no lumps.

If there’s any more elaborate way how to prepare the crepe batter I never want to know.

Never!

I can perfectly survive with this amount of knowledge.

crepes with cream cheese filling recipe with step-by-step images

3. Now you need a pan. I usually use an 8-inch (20 cm) one.

Pour some vegetable oil in since we don’t want our crepes to stick to the pan.

Place the pan over medium heat and let it stay there until it’s rather hot or until a few sprinkles of water dropped on the pan splatter.

Using a ladle or scoop, pour about 1/4 cup (60 ml) of batter into the pan.

crepes with cream cheese filling recipe with step-by-step images

4. Tilt the pan with a circular motion so that the batter coats the surface evenly.

crepes with cream cheese filling recipe with step-by-step images
5. Cook the crepe for about 1 minute, or until the bottom is light brown.
6. Then loosen with a spatula, turn it and cook the other side.

crepes with cream cheese filling recipe with step-by-step images

7. Remove the crepe from the pan onto a plate.
8. Continue with the rest of the batter.

Oh, and oil the pan again before pouring the batter for another thin pancake.

crepes with cream cheese filling recipe with step-by-step images

9. And this is how I made the cream cheese filling.

All I did was that I grabbed a bowl and in it I mixed the cream cheese, confectioner’s sugar, vanilla extract, lemon zest (fresh or dried) and a pinch of nutmeg.

crepes with cream cheese filling recipe with step-by-step images

Yum!

At this point it is important to be very strong.

Very, very strong!

So try not to stick your finger in that and lick it like there’s no tomorrow.

Please!

I know what I’m talking about…

Don’t be like me!

crepes with cream cheese filling recipe with step-by-step images

10. Spread about one heaping tablespoon of the filling over the crepe.

crepes with cream cheese filling recipe with step-by-step images

11. Fold it in half…

crepes with cream cheese filling recipe with step-by-step images

12. …and then fold it in half again so that you have this cute little triangle filled with pure heaven.

crepes with cream cheese filling recipe with step-by-step images

13. You can serve the crepes with melted chocolate, whipped cream and some fruit.

Enjoy, dear friends!

(This recipe makes about 8 crepes.)

Chicken Steaks with Green Onion Potatoes

As you might have noticed, my greatest passion is to prepare simple and healthy dishes for this blog.

Okay, sometimes I just break loose and prepare a sweet little dessert.

Okay, okay …you mostly see me preparing desserts and you might have heard me saying about a million times how much I love baking and how I can’t live without it, but listen folks – I am attending a wedding this Saturday and really need to squeeze myself into that cute dress I haven’t even bought yet. That is the main reason why I’ve been treating myself to vegetable diets or lemon juice afternoons recently.

Yes, lately I’ve been determined to lose the weight of at least one well-fed elephant.

Or even more.

Because when I think, I think BIG.

So that is for the theory.

In practice, I’d like to note that chocolate has never tasted better than it does these days and I’ll also be posting about those wonderful, wonderful cream cheese crepes soon.

And you know what?

I think I’ll just blame the lack of my self-control on the full moon.

Yeah, that’s exactly what I’ll do.

Now, back to the Chicken Steaks with Green Onion Potatoes.

This dish is truly wonderful, light and the determined ones will definitely appreciate its low calorie count.

In the picture above I am showing the ingredients that I’ve used to prepare it.

1. First, grab the young, green onions.

Aren’t they just cute?

Place them on a cutting board and lop off their tops.

2. Slice the onions into little rounds.

Set aside a couple of the rounds for later.

Then play with the chopped onions – form various shapes and take pictures of it all …let this activity last for the next 30 minutes or so, then start feeling really hungry and continue the cooking process.

3. Heat up some oil in a medium pot and throw the onions in.

Fry them for a little while over medium heat.

4. Peel, wash and slice the potatoes.
5. Add the potatoes to the onions.
6. Add the salt.

7. Then add the other spices –  red sweet paprika powder, ground black pepper and the ground cumin.

Stir it all together.
8. Add a little water – about 1/2 cup (125 ml), cover and let cook.
9. Keep your eye on the potatoes while they are cooking – stir them every now and then (!) and when the water evaporates add some more (this thing likes to burn a little so make sure there’s always at least a little water in the pot).

The whole process – just until the potatoes were done – lasted (in my case) about 30 minutes.

10. In the meantime, wash the chicken breasts and slice them in half lengthwise.
11. Pound the breasts lightly so that they are of even thickness.

12. In a pan, heat up some vegetable oil.
13. Put the breasts in the pan and sprinkle them with your favorite grilling spice.
14. Fry over medium heat for about 5-7 minutes. Then turn the meat, sprinkle the other side with the grilling spice and  fry for another 5-7 minutes.

Now place your lovely, fragrant steak on a plate…

… and add the delicious, irresistible potatoes.

Yummy!

Sprinkle with the remaining onions that you’ve set aside.

And enjoy, dear friends.

It’s really good – even my man said so!

(This recipe makes 2 portions.)

Send this to a friend