There are always many questions regarding photography and photo editing running around in my head.
And that’s awesome since I always have something new to learn or find out.
For example, for quite some time now, I’ve been wondering how to apply a color tint to my pictures.
Today, maybe because I still feel a little overwhelmed by the romantic atmosphere of the wedding we attended recently, I decided to definitely learn how that thing is achieved.
Of course, as with everything in the photo-editing realm, there are about 3 gazillion ways how to achieve certain effect.
In fact, I’m glad I found at least this one.
So if you know of any other approach, feel free to let me know.
I’ll be more than happy.
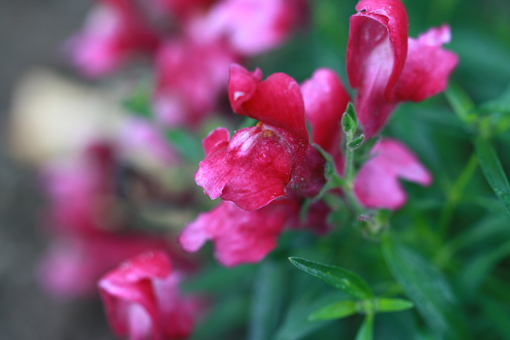
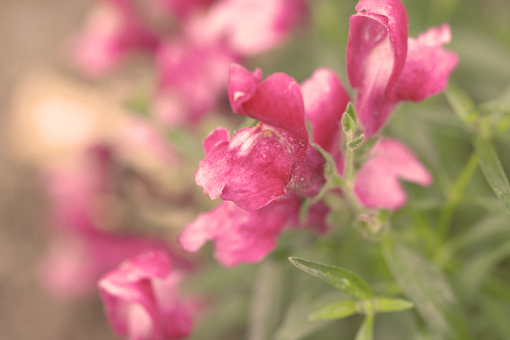
This is the original picture.
I took it while I was house sitting (and dog sitting and canary sitting) for my parents about a month ago.
Those days were long, lazy and filled with taking scandalous amounts of pictures.
Scandalous, I’m telling you!
As I was choosing the picture to play with today, I noticed these flowers. They were literally calling for some romance to be brought into their lives.
So this is what I did to help them…
Note: I am using Adobe Photoshop Elements 8 here.
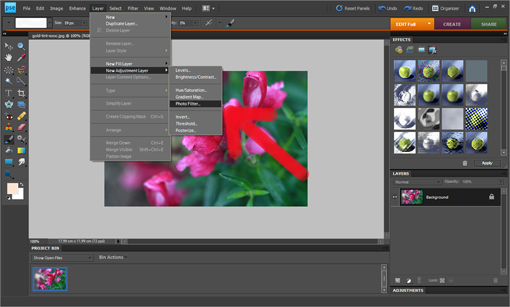
I clicked LAYER -> NEW ADJUSTMENT LAYER -> PHOTO FILTER.
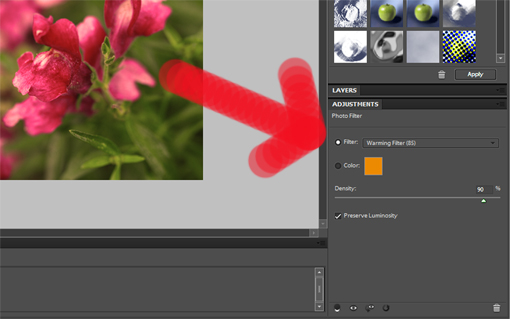
This is what appears on the lower right-hand side.
Right now, a wonderful time begins for you – just go and choose whatever color tint you want in your picture.
I went for ‘Warming Filter’ under the ‘Filter’ option. The filter option includes gorgeous preset tint colors.
Instead of the ‘Filter’ option, you can also click the ‘Color’ button (just under the ‘Filter’ button) which will allow you to choose from any color that basically exists.
Now that you have your color selected, you can adjust the intensity of the color with the ‘Density’ option. Dragging the ‘Density’ slider to the right adds more of the color to the image for a stronger amount of tinting, while dragging it to the left reduces the amount of color for a more subtle tinting effect. You can see a preview of what’s happening in your image as you drag the slider.
When I was perfectly happy with the new tint of my picture I flattened it (LAYER -> FLATTEN IMAGE).
Then I decided to do one more thing – to lighten the image up a little. I clicked ENHANCE -> ADJUST LIGHTING -> LEVELS and dragged the slider to the left until the image was as light as I wished.
Ta-da!
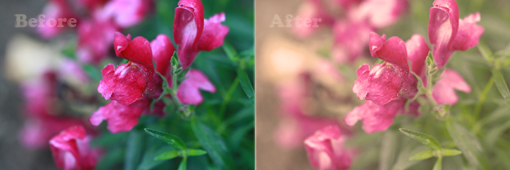
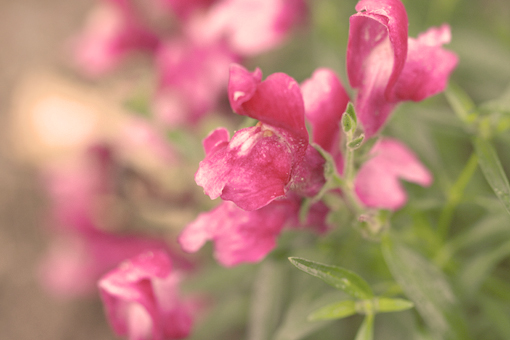
Here are both pictures side-by-side for you to compare.
Gosh, I LOVE this tinting game!
Just try it, it’s awesome!
Love,
Petra
- Like
- Digg
- Del
- Tumblr
- VKontakte
- Buffer
- Love This
- Odnoklassniki
- Meneame
- Blogger
- Amazon
- Yahoo Mail
- Gmail
- AOL
- Newsvine
- HackerNews
- Evernote
- MySpace
- Mail.ru
- Viadeo
- Line
- Comments
- Yummly
- SMS
- Viber
- Telegram
- Subscribe
- Skype
- Facebook Messenger
- Kakao
- LiveJournal
- Yammer
- Edgar
- Fintel
- Mix
- Instapaper
- Copy Link

Love the soft tones here. The tinting tutorial must work 🙂
Cool! I have a coupla flower photos I’m gonna try it on.
Can I ask you to explain flattening to me? I’ve read that you need to flatten a photo before doing “actions”? Or do you just do the “actions” and then flatten? I’m confused. What exactly is flattening?
Thank you and keep the tutorials coming! I appreciate them and find them helpful!
~ingrid
I’m really glad that this was helpful Ingrid. I really love this tinting thing, too.
When editing pictures, it is advised to open a new layer for each change you are going to make to your picture – this will allow you to come back to that change/layer later and adjust it differently, if you want to. Otherwise you’d just have to click ‘undo’, which is not very comfortable.
Flattening means merging layers into one.
So editing looks likes this most often: you open your picture in Photoshop (it consists of one layer) – > you make changes to it in separate layers -> then you flatten the image (merge those layers) -> you save the image.
But I guess your are asking more about ‘actions’ – these are pre-recorded automated steps/changes to your image. Some smart people create these for us because they know how to achieve certain effects in images. You download the actions or record them on your own. And yes, they are done to flattened images.
So it goes like this – you open your image in Photoshop (you image consists of one layer) -> you run an action (the action makes changes to your picture in a number of separate layers)-> you flatten the image (so that you have one layer again) -> you save the image.
I hope this helped, Ingrid.
In future, I’ll have a more precise post about layers. So stay tuned!
Petra 🙂
Yes! That was MOST helpful! Petra if you were a guy I’d have a serious crush on you! LOL, do you remember that from high school or was I the only one who dug the good looking AND smart guys? Thanks, again I will be on the look out for that layer post!
Hope you’re having a good one!
~ingrid
🙂 I love the compliment! You’re too cute! 🙂 Petra
I love both of the pictures! The tinted style is appealing to me more recently, and I have a few pictures I’m going to try this out on, but you started with such a lovely picture too, they are both wonderfull in kinda opposite ways. bravo!
Hi, Petra
I absolutely love your blogs. from the crocheting to the photography, by the way beautiful pictures, you have inspired me to learn my camera.