How to Tint a Photo

how to use photo filter in Photoshop step-by-step tutorial

There are always many questions regarding photography and photo editing running around in my head.

And that’s awesome since I always have something new to learn or find out.

For example, for quite some time now, I’ve been wondering how to apply a color tint to my pictures.

Today, maybe because I still feel a little overwhelmed by the romantic atmosphere of the wedding we attended recently, I decided to definitely learn how that thing is achieved.

Of course, as with everything in the photo-editing realm, there are about 3 gazillion ways how to achieve certain effect.

In fact, I’m glad I found at least this one.

So if you know of any other approach, feel free to let me know.

I’ll be more than happy.
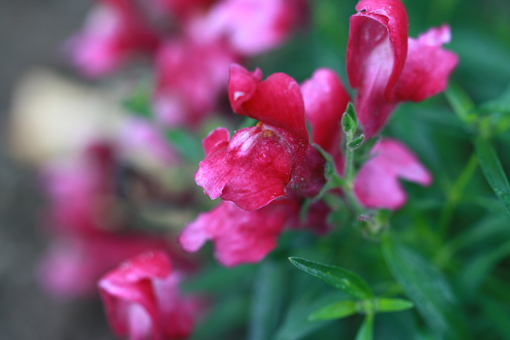
how to use photo filter in Photoshop step-by-step tutorial

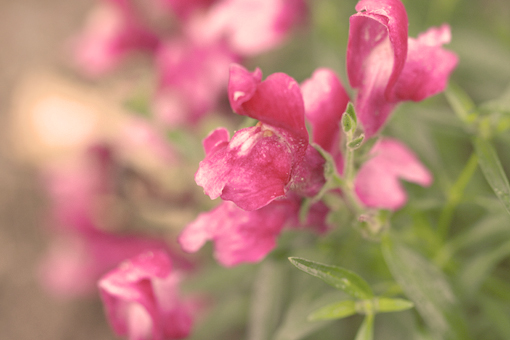
This is the original picture.

I took it while I was house sitting (and dog sitting and canary sitting) for my parents about a month ago.

Those days were long, lazy and filled with taking scandalous amounts of pictures.

Scandalous, I’m telling you!

As I was choosing the picture to play with today, I noticed these flowers. They were literally calling for some romance to be brought into their lives.

So this is what I did to help them…

Note: I am using Adobe Photoshop Elements 8 here.
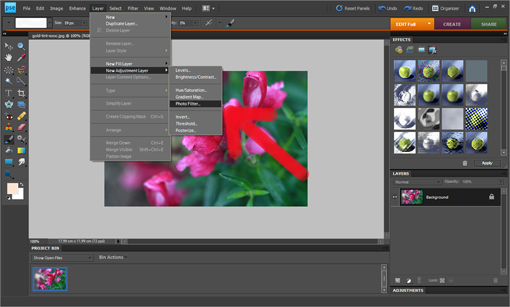
how to use photo filter in Photoshop step-by-step tutorial

I clicked LAYER  -> NEW ADJUSTMENT LAYER -> PHOTO FILTER.
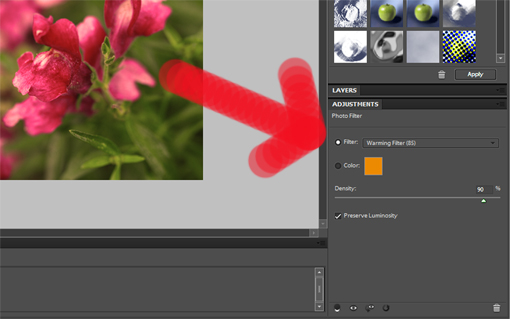
how to use photo filter in Photoshop step-by-step tutorial

This is what appears on the lower right-hand side.

Right now, a wonderful time begins for you – just go and choose whatever color tint you want in your picture.

I went for ‘Warming Filter’ under the ‘Filter’ option. The filter option includes gorgeous preset tint colors.

Instead of the ‘Filter’ option, you can also click the ‘Color’ button (just under the ‘Filter’ button) which will allow you to choose from any color that basically exists.


Now that you have your color selected, you can adjust the intensity of the color with the ‘Density’ option. Dragging the ‘Density’ slider to the right adds more of the color to the image for a stronger amount of tinting, while dragging it to the left reduces the amount of color for a more subtle tinting effect. You can see a preview of what’s happening in your image as you drag the slider.
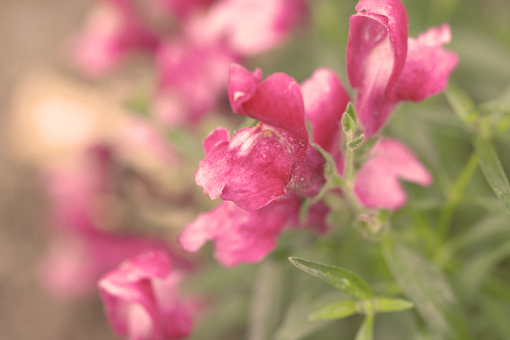
how to use photo filter in Photoshop step-by-step tutorial

When I was perfectly happy with the new tint of my picture I flattened it (LAYER -> FLATTEN IMAGE).

Then I decided to do one more thing – to lighten the image up a little. I clicked ENHANCE -> ADJUST LIGHTING -> LEVELS and dragged the slider to the left until the image was as light as I wished.

Ta-da!
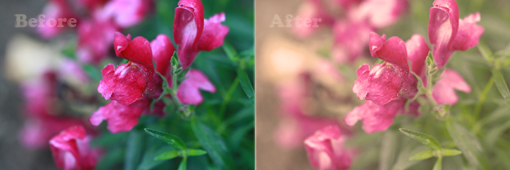
how to use photo filter in Photoshop step-by-step tutorial

Here are both pictures side-by-side for you to compare.

Gosh, I LOVE this tinting game!

Just try it, it’s awesome!

Love,

Petra

Sometimes…

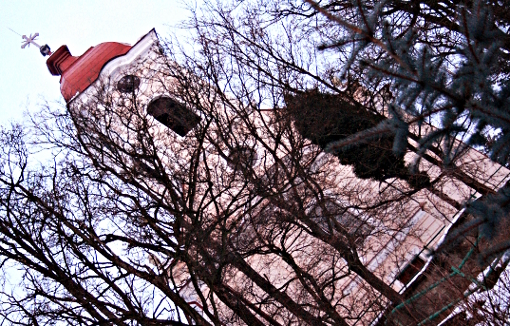
Sometimes I find myself in the mood… to put this world into a different angle.

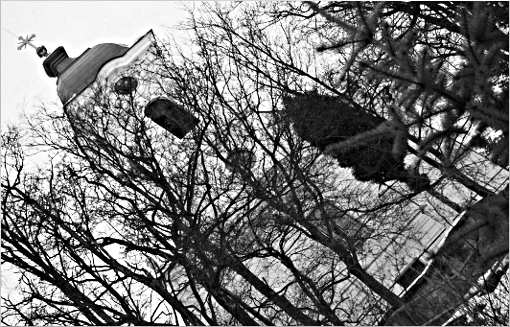
Sometimes I’m in the mood to take vengeance on this world by sucking all color out of it.

There you go…

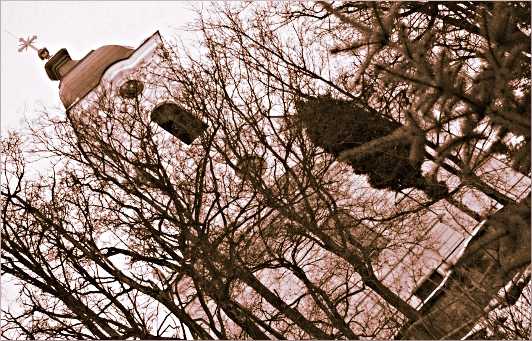
Sometimes my mood is not so harsh and I give this world a slight ‘vintage’ chance.

And sometimes I get just amazed by how much power I have over this world…

I Found Custom White Balance (… and since then my life hasn’t been the same)

Can you see any difference between…

… these two pictures?

You surely can.

The first one is cursed with some unsightly orange cast.

And let me tell you that I was struggling with that unwanted cast for quite some time.

Until one day – one lovely, sunny day – I stumbled upon an article on white balance.

And that changed my life.

Literally.

The orange cast is caused by tungsten (or bulb) light when you take pictures under… well… bulb light.

Our eyes get used to that light and see the colors the way they really are but cameras don’t.

Actually, they don’t unless you tell them to.

Which means … there IS a way how to free yourself from these orange chains.

If you really, really wish for the colors on your pictures to be more true to life, please, go into your camera settings and search for the white balance settings.

The point-and-shoot camera users can find wonderful settings not only for the tungsten (bulb or indoor) lighting but also for outdoors, cloudy, sunny, shade and other lighting conditions.

Those using DSLR cameras can find the exactly same settings in their menus.

And on top of that – there is something called CUSTOM WHITE BALANCE.

I find that setting absolutely gorgeous, amazing, awesome and great and… let me stop myself right here.

And it’s so easy to use.

Basically, what you do is that you take a picture of a white object (for example a sheet of paper, a coffee filter, a white food container lid) under the exact lighting conditions you plan to take the other pictures.

Then you go into the menu of your camera and do all the required steps to save this picture the way it should be saved (please, please – check your camera manual for the specifics because cameras vary from model to model; just be looking for the CUSTOM WHITE BALANCE).

By taking the picture of a white object you are telling your camera – “Hey,
camera, this is white, all right? Not orange, not yellow, not anything else. I’m grateful you remember that.”


… So now you have told your camera what white looks like where you are shooting.

And from now on you’ll be nothing else but happy.

I Have Always Wondered

I have always wondered what a thing like this means – an old rusty pot on a wooden pole.

Have you ever seen it?

Well, you might have, especially if you ever happened to find yourself in the country.

I suppose that a thing like this might be a tad more difficult to spot in Singapore or New York.

But there’s something else that haunts me.

What is it good for?

I remember I used to see this interesting pot-pole combination in some old movies on TV.

There were these old fences made of wooden poles and pots like these were stuck onto their tops.

Were the pots protecting the wood from rain water?

Could be.

I don’t know for sure (not that I wouldn’t be able to fall asleep without this information).

But what I know for sure is that it looks very nice in a picture.

And it absorbs various color shades perfectly, see?

Violet – no problem!

Little bit of graininess, way more contrast with some darkened edges here and there and it’s perfect – just like an old picture.

But still, why – WHY is it there?

Send this to a friend