My Lenses

how to choose camera lenses, canon kit lens, canon prime 50mm lens, tamron 2.O macroc lens

As I promised before in the post about my cameras, here I am with a couple of words about my lenses.

First of all, I love my lenses.

Very much.

Second of all, I just love them.


These are the names of the babies (from left to right): Canon 50mm F 1.8, Tamron Macro 60 mm F 2, Canon 18-55mm (which came as a kit lens with my Canon Rebel T2i camera).

I use the first one (Canon 50mm) to shoot food.

The Tamron 60 mm is great for food too, but since it is a macro lens I use it quite often outside to shoot flowers, bugs or other cute tiny things.

To capture wider angles, I use the Canon 18-55 (the kit lens).


Now let me show you and compare a few interesting features that these lenses possess.


1. Comparison with the Same Settings

how to choose camera lenses, canon kit lens, canon prime 50mm lens, tamron 2.O macroc lens

how to choose camera lenses, canon kit lens, canon prime 50mm lens, tamron 2.O macroc lens

how to choose camera lenses, canon kit lens, canon prime 50mm lens, tamron 2.O macroc lens

Each of these shots was taken with a different lens. To make the comparison most accurate I kept the same settings for each shot. All pictures were taken at 5.6 aperture and they are not edited at all.

Though that last thing was a bit hard to digest.

I find these images pretty similar in their appearance. Maybe just the last one is a little colder in colors (has more blue tones in it) than the other two.

But there’s more to compare…

2. Lowering the Aperture (Blurry Background)

Well, who doesn’t like a nice blurry background.

That really injects the magic into the pictures, doesn’t it?

The part of the lens which provides for the blurriness of the picture is called the aperture (if you are not that familiar with this term you can find a little more about it here).

I love to use low aperture settings, especially for the food shots.

The kit lens that came with the camera (Canon 18-55mm) has the lowest aperture number of 5.6 (the second picture of this post shows you the result).

But I knew that there was a whole new world of possibilities when you go lower than 5.6.

So there came a moment in my life when I felt that I couldn’t go a day longer without a proper low aperture lens. That was when I got these two:

how to choose camera lenses, canon kit lens, canon prime 50mm lens, tamron 2.O macroc lens

This picture was taken with the Canon 50mm at its lowest aperture – F 1.8.

See the blurry background? And how little portion of the picture is actually in focus? So that is caused by the low 1.8 aperture setting.

Again, this picture could really benefit from some vigorous Photoshop treatment, but this post is not about that.

how to choose camera lenses, canon kit lens, canon prime 50mm lens, tamron 2.O macroc lens

This is a shot taken with the Tamron 60mm at 2.0 aperture (which is its lowest aperture number).

I like the blurriness of the background a lot.

In this aspect, these two lenses produce very similar results.


Also, these two lenses are prime, which means that you cannot zoom in or zoom out. In other words, they have fixed focal length. But that thing is perfectly all right – it makes you move a little more and stretch your body quite often which, I guess, is a nice health supporting benefit.


If the low aperture setting had been the only feature that I wanted for my pictures I would only have acquired the Canon 50mm lens. That one was much cheaper than the Tamron 60mm.

But I also needed Tamron. Have a look why…

3. Getting Closer to the Subject

This is closest that the Canon 50mm allows you to get to the subject.

If you go closer, the lens cannot focus anymore.

This is how close the Tamron 60mm allows you to get.

Amazing detail!

I often use this feature when taking pictures in my kitchen – spices, sugar or cake structure, that all looks perfectly detailed.

I love it!


So these are my beloved lenses.

I hope this information helped you.

At least a little.

… and psst, don’t tell this to my boyfriend
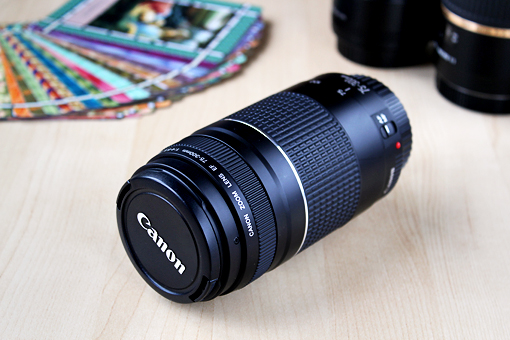
There’s also this cutie!

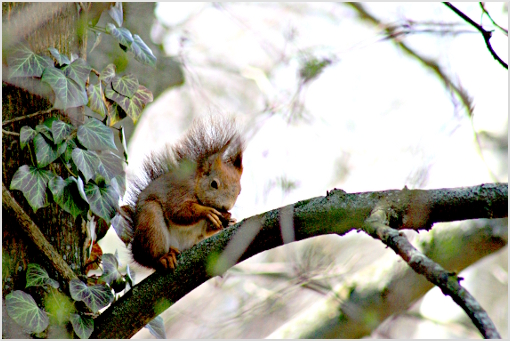
It’s the Canon 75-300mm telephoto zoom lens.

I frequently steal this one from my boyfriend to capture…
how to choose camera lenses, canon kit lens, canon prime 50mm lens, tamron 2.O macroc lens

… squirrels …

how to choose camera lenses, canon kit lens, canon prime 50mm lens, tamron 2.O macroc lens

… or baby orangutans, or basically anything that happens to be far away from me.

I think I love this lens much more than my boyfriend does and I also use it way more often.

So who really has the moral right to own it, I ask?

I think it’s me, I answer.

Definitely, it’s me!
how to choose camera lenses, canon kit lens, canon prime 50mm lens, tamron 2.O macroc lens

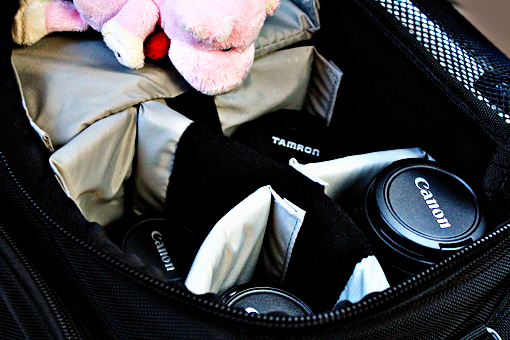
It fills the last free space in my camera bag perfectly, anyway.

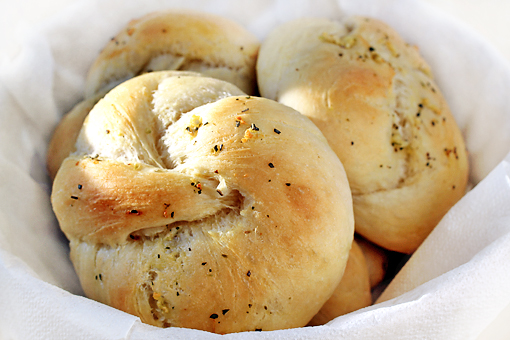
Soft Garlic Knots

soft garlic knots recipe with step by step pictures, soft buns, homemade buns

I’ve been craving nice homemade rolls for quite some time.

The instant I saw the recipe for these heavenly Soft Garlic Knots over at AnniesEats I knew my fate was sealed.

With the recipe as flawless as this one, everything went perfectly.

Oh, and yes, there’s yeast. Please, don’t let that fact scare you off. The yeast in this recipe is nothing more than one of a few ingredients that creates the dough and that’s it. The magic will happen by itself, dear friends, there are no special tricks of trade involved.

This is a simple recipe which yields amazing results.

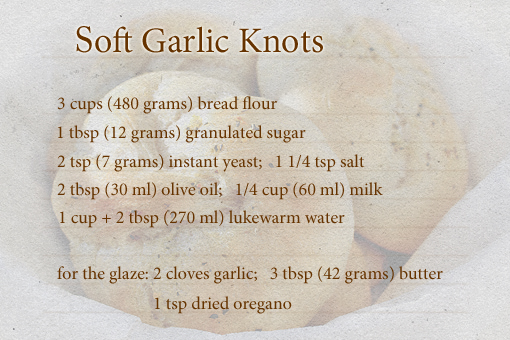
oft garlic knots recipe with step by step pictures, soft buns, homemade buns, ingredients

In case you really need to have these knots too, of which I am just sure, here are the ingredients.


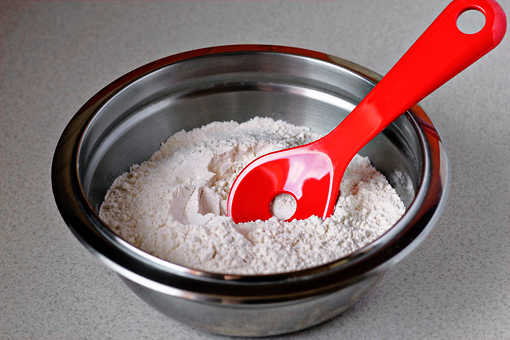
oft garlic knots recipe with step by step pictures, soft buns, homemade buns, place the dry ingredients into a bowl and stir them to combine

These knots can be kneaded in an electric mixer or simply just by hand. That really depends on your decision.

1. To start, place the dry ingredients (flour, sugar, yeast and salt) into a bowl and stir them to combine.

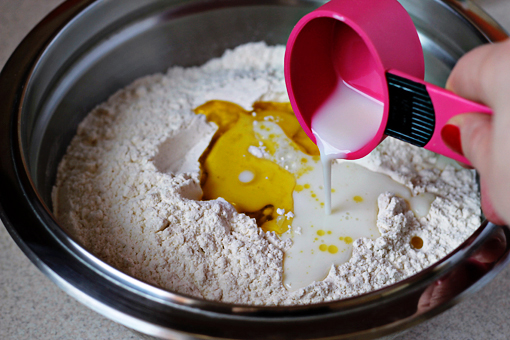
2. Then add the wet ingredients (olive oil, milk and water) and stir again just to combine.

oft garlic knots recipe with step by step pictures, soft buns, homemade buns, using the dough attachment of your electric mixer, mix the dough for about 8 minutes

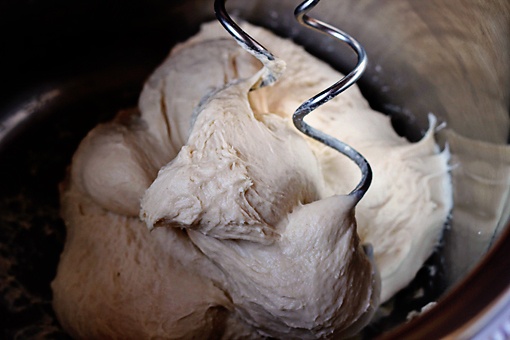
3. Now, using the dough attachment of your electric mixer, mix the dough for about 8 minutes.

If you want to do this by hand, the process will last a little longer.

What we are going for here is a smooth and elastic dough.

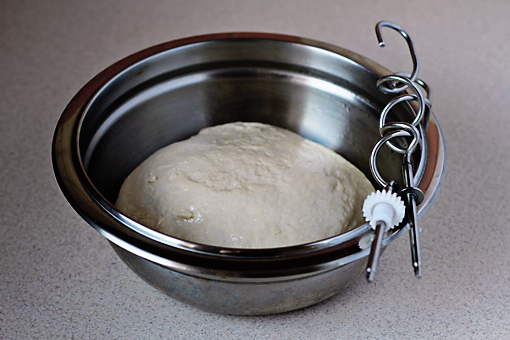
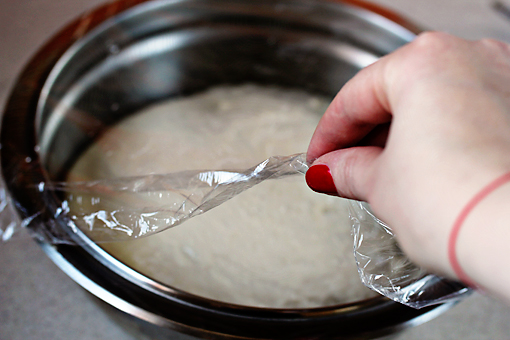
4. Transfer the dough to a lightly oiled bowl, turn once to coat…

oft garlic knots recipe with step by step pictures, soft buns, homemade buns, cover with plastic wrap

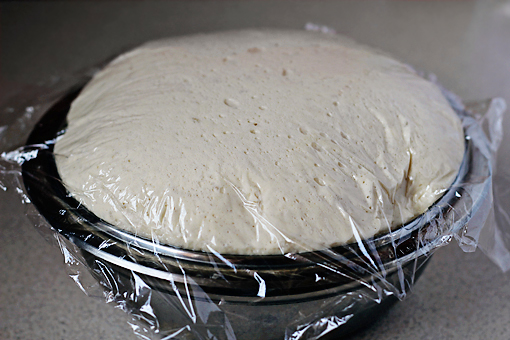
…and cover with a plastic wrap.

5. Allow to rise for about 1 hour, or until doubled in bulk.

oft garlic knots recipe with step by step pictures, soft buns, homemade buns, turn the dough onto a very lightly floured surface and divide the dough

6. Turn the dough onto a very lightly floured surface and divide it into 8 equal pieces.

To do that I used a knife. I first divided the dough into halves. Then I cut each half into halves again so I had 4 pieces. And finally I cut each piece into halves again which resulted in 8 equal pieces.


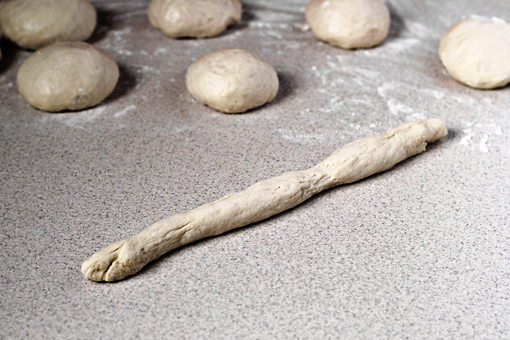
7. Use the palms of your hands to roll each ball into a 10-inch (26 cm) long rope.

If the dough is too sticky then use a little flour to dust it with. The ropes can’t be sticky because you wouldn’t be able to form the knots.

oft garlic knots recipe with step by step pictures, soft buns, homemade buns, tie the rope into a knot, let rise

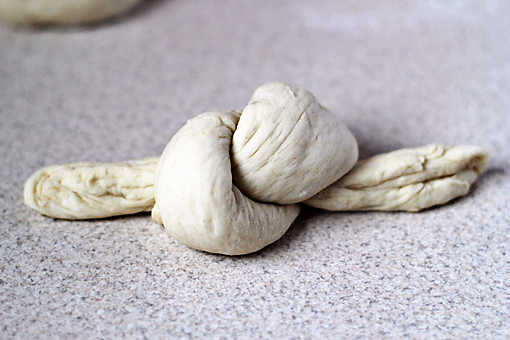
8. Now tie the rope into a knot.

oft garlic knots recipe with step by step pictures, soft buns, homemade buns

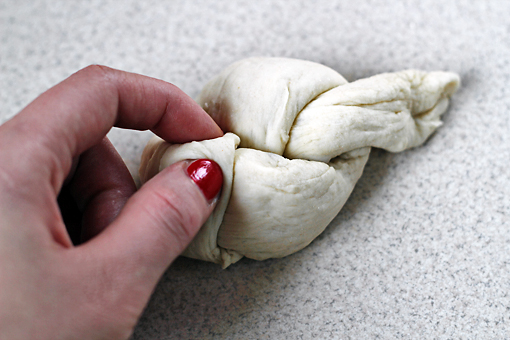
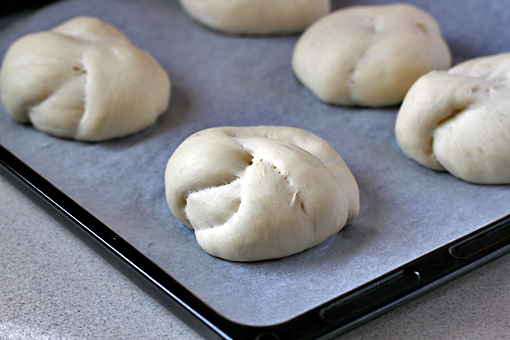
9. Take the end lying underneath the knot and bring it over the top, tucking it into the center and take the end lying over the knot and tuck it underneath and into the center.

oft garlic knots recipe with step by step pictures, soft buns, homemade buns, transfer the knots on a baking sheet lined with parchment paper and cover with a clean kitchen towel

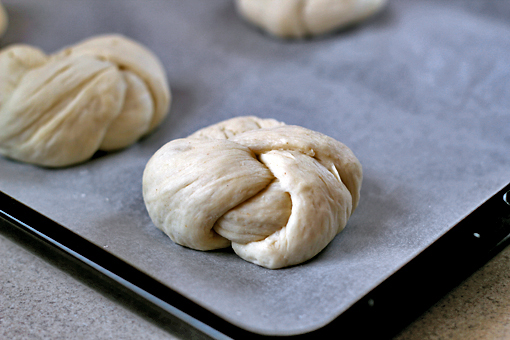
10. Transfer the knots on a baking sheet lined with parchment paper and cover with a clean kitchen towel.


11. Let the knots rise for another 45 minutes.

oft garlic knots recipe with step by step pictures, soft buns, homemade buns, prepare the glaze, melt the butter and press the garlic into it

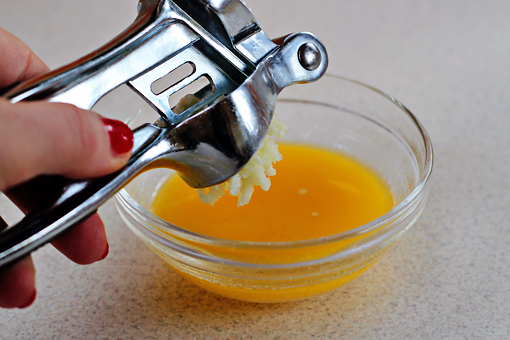
12. In the meantime you can prepare the glaze.

Melt the butter (microwave is perfectly okay) and press the garlic into it.

Instead of pressing the garlic through the press you can just mince it finely.

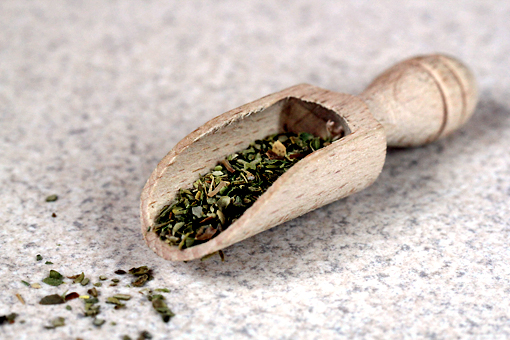
oft garlic knots recipe with step by step pictures, soft buns, homemade buns, glaze, add dried oregano

13. Add the dried oregano…

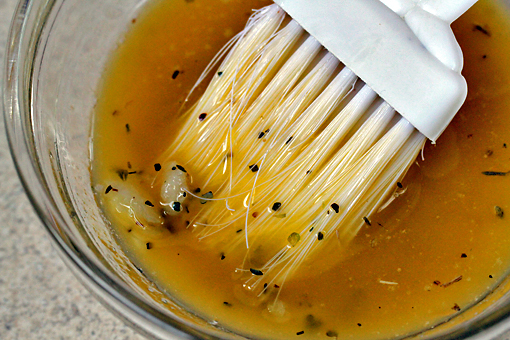
oft garlic knots recipe with step by step pictures, soft buns, homemade buns, mix the glaze

14. …and mix it all together.

oft garlic knots recipe with step by step pictures, soft buns, homemade buns

15. When your knots are nice and puffy…

oft garlic knots recipe with step by step pictures, soft buns, homemade buns, brush the glaze onto them

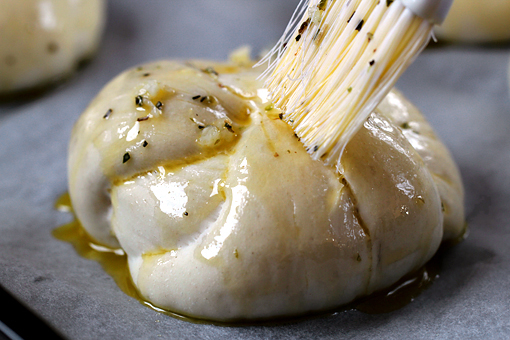
…brush the glaze onto them.


oft garlic knots recipe with step by step pictures, soft buns, homemade buns, bake

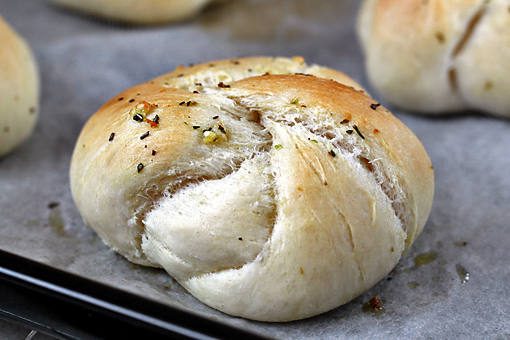
16. Place the knots into a preheated oven (350 °F – 175 °C) and bake for about 15-18 minutes.

This will smell like heaven, I’m telling you.

It’s amazing!

Your neighbors will come knocking on your door begging for the recipe.

oft garlic knots recipe with step by step pictures, soft buns, homemade buns

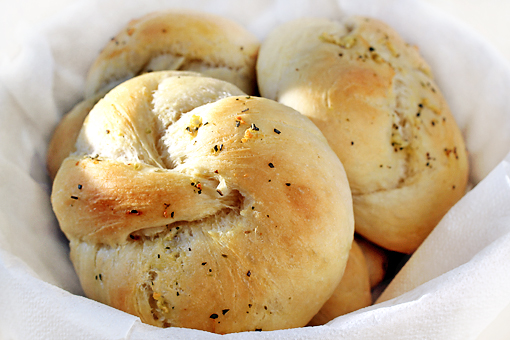
These cuties taste best when still a little warm.

They perfectly accompany a delicious soup, or, when I think about it, they perfectly accompany just anything.

Enjoy, dear friends!

Send this to a friend