How To Make A Simple Round Crochet Rug

round crochet cushion tutorial

Hi friends!

In the past few months I’ve been really eager to pour more color into the place where I live. Just for fun. To make us feel better. And while doing that I learned one big thing about me – I can find a good excuse to use PINK in every project, for every room (I honestly did not know that about myself, but now I do…) 🙂

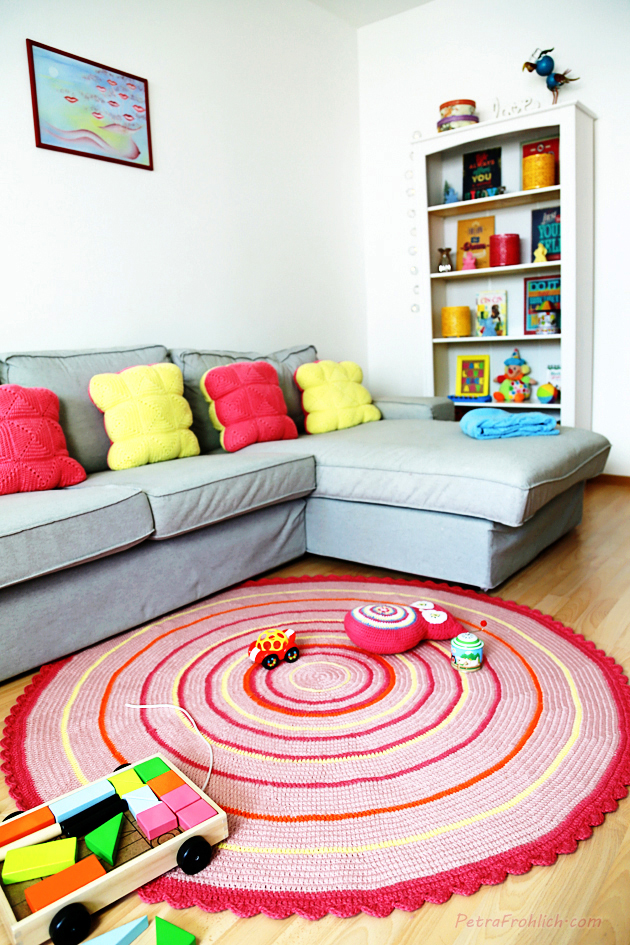
With this and this happy project under my belt, I am super-excited to share with you another thing I made, my newest darling, the crochet round rug.

And it’s pink. Yes. What else is new, you might ask. 🙂

Anyways, I had been planning to make a big area rug for quite some time. The only thing that was holding me back was the fact that I did not really know how to prevent the rug from slipping (with a little baby in the house, that was my top priority).


how to make a round crochet rug

This issue was miraculously solved one day when I stumbled upon this Ikea product. The Stopp unti-slip underlay keeps the rug in place, which reduces the risk of slipping and makes it easier to vacuum. Awesome, huh?


how to make a round crochet rug

If you’d like to make something similar, I am happy to describe for you what I did:

I used bulky yarn (this, this, this and this) and 6 mm crochet hook (J-10).

PATTERN

In Round 1, I made a magic ring and crocheted 13 double crochet stitches into it.

Note: If you’d like to make your rug with single crochet stitches (US), starting with 6-8 stitches is recommended in round 1.

If you’d like to make make your rug with half double crochet stitches (US), 10 stitches are recommended.

Round 2: Make two stitches into each stitch of Round 1.
Round 3: Make two stitches into the first stitch of the previous round, one stitch into the next. Repeat this pattern.
Round 4: Make two stitches into the first stitch of the previous round, then one stitch into the next two stitches. Repeat all the way around.
Round 5: Make two stitches into the first stitch, then one stitch into the next three stitches. Repeat this pattern all the way around.

You now see a pattern emerging. In every round, the number of stitches between increases increases by one. To continue making your rug, increase the number of stitches between increases by one.

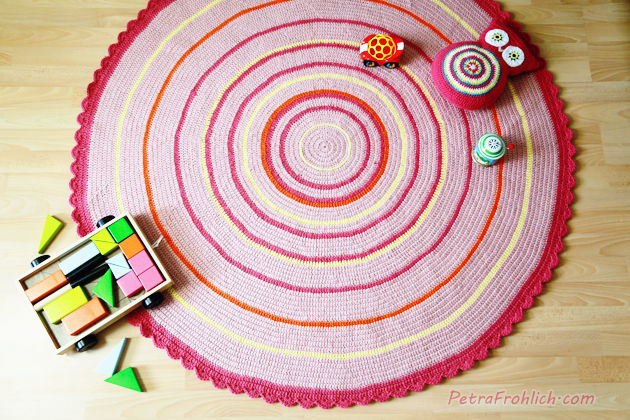
My rug has 53 rounds. And then the scalloped edging as Round 54.

Tip: If your rug starts to WAVE, that means you have too many stitches in the last round. To help that, make one round without any increases.

If your rug starts to look like a BOWL, that means that the number of stitches in the last round is too little. To help that, make one round with double the amount of increases.

Edging:

I ended my round 53 with 570 stitches (I think I officially ended with 571 stitches but since I needed to have a number of stitches which would be dividable by 6 to make the edging work, in round 53 I ‘got rid’ of 1 stitch by making 1 dc decrease in two last stitches. It is not noticeable at all).

To make the edging I made this: ‘6 double crochet stitches – chain 1 – skip 2 stitches – 1 slip stitch in following stitch – chain 1 – skip 2 stitches’ and then continued repeating it all the way round.

And that pretty much concludes how the rug was made.


how to make a round crochet rug

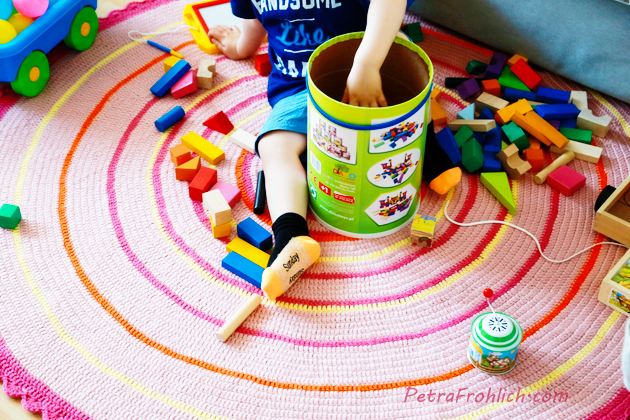
And here it is in full action.

The round rug currently resides in our living room, serving mostly as playing headquarters.


how to make a round crochet rug

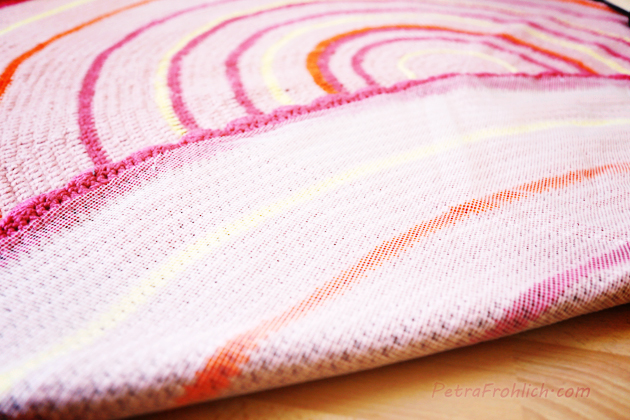
After sewing the unti-slip underlay to the underside of the rug, it works just like a charm.

Thanks for letting me share.

See ya!

With love,

Petra


Painting Furniture With Chalk Paint

renovating furniture with chalk paint

Hello everybody? How are you doing this very fine day?

Today I am excited to share with you a few words about painting with chalk paint.

First of all, chalk paint is GORGEOUS!

I have been toying with the idea of using this kind of paint for for quite some time. The internet is just flooded with beautiful chalk paint projects. When I stumbled across a chalk paint video tutorial one day and realized that applying this kind of paint is actually BEYOND EASY, I just knew this needed to be done.


renovating furniture with chalk paint

So, what is chalk paint then, you might ask… It is a kind of paint mostly used for furniture refinishing to give it that beautiful, aged, rustic, dreamy, milky, matte, slightly distressed appearance which is often used to create a Shabby Chic look.

Chalk paint can pride itself by adhering to almost any surface (no priming or sending necessary), it is extremely easy to apply, it dries very quickly (like 20 minutes quickly), it can be applied as a thin wash or in thicker layers, it is non toxic and is easily distressed.

Perfect, right?


renovating furniture with chalk paint

So, being eager to give this paint a try, I scoured our flat for the right item and found a victim.

This chest of drawers.

We bought this chest a couple of years ago for our son (well, actually, my husband bought it while I was still in the hospital with the little one after he was born). Although I really liked the shape of this piece of furniture, I never was a big fan of the image (dear teddy, I have nothing against you, I just never really understood why is your star inverted, that’s no bueno, nah-uh).


renovating furniture with chalk paint

When choosing the color, I actually had a few choices in my mind – pink, yellow and turquoise. Since this chest will have its place in the bedroom where the color scheme is golden, pink and purple mostly, I thought that this nice fuchsia shade could work nicely there. And then, you can never go wrong with pink, right? (… no matter what a husband might say, just tell him he’ll learn to appreciate it… one day… for sure… the beauty will reveal itself to him…)

So, there I was, with a lovely fuchsia color.

The fun about painting with chalk paint is that you most usually combine two colors, with the bottom color peeking slightly through the top layer.

So, for the bottom layer I chose dark brown, just the same shade as the top and sides of the chest.

I also used a brush, a fine sanding sponge block, matte varnish and wax (I used that to refinish the top and sides of the chest only).

Oh, and I used much less paint and varnish then I thought I would – about 3 1/2 oz (100 ml) brown paint (the jars in the picture are 5 oz – 150 ml), 2 3/4 oz (80 ml) pink paint and about 6 3/4 oz (200 ml) varnish (the can in the picture is 17 oz – 500 ml).

And here’s what I did…


renovating furniture with chalk paint

First I applied a layer of brown paint.


renovating furniture with chalk paint

I found out that the painting worked best for me when I applied only small amounts of paint at a time and after each addition, I kept brushing and thinning the paint until the result was milky and rather thin.

I let the first layer dry and applied a second brown layer.


renovating furniture with chalk paint

After the second brown layer was nice and dry, I applied the lovely fuchsia. I was impressed by how easy it was to work with this paint and how lovely it looked immediately.

Since I was going for a shabby look, and let considerable patches of brown color rather visible.


renovating furniture with chalk paint

After the pink layer had dried, I sanded the surface here and there for a slightly more distressed look (I especially worked on the edges and corners, but not much, just a little).

I then cleaned the surface thoroughly with a clean cloth.


renovating furniture with chalk paint

Finally, I applied a matte varnish.

To be frank, I am not really sure about this product. It had little lumps in it and after I initially freaked out, I realized that brushing thoroughly makes them kind of melt and disappear.

Next time, I might just finish with transparent wax, which, as I hear, is an alternative to a varnish.


renovating furniture with chalk paint

So, here’s our new chest…

My heart is happy! 🙂

Next up: living room – TV table, from white to rustic blue. Cannot wait. I will definitely share the project with you.

Take care.

With love,

Petra


Send this to a friend