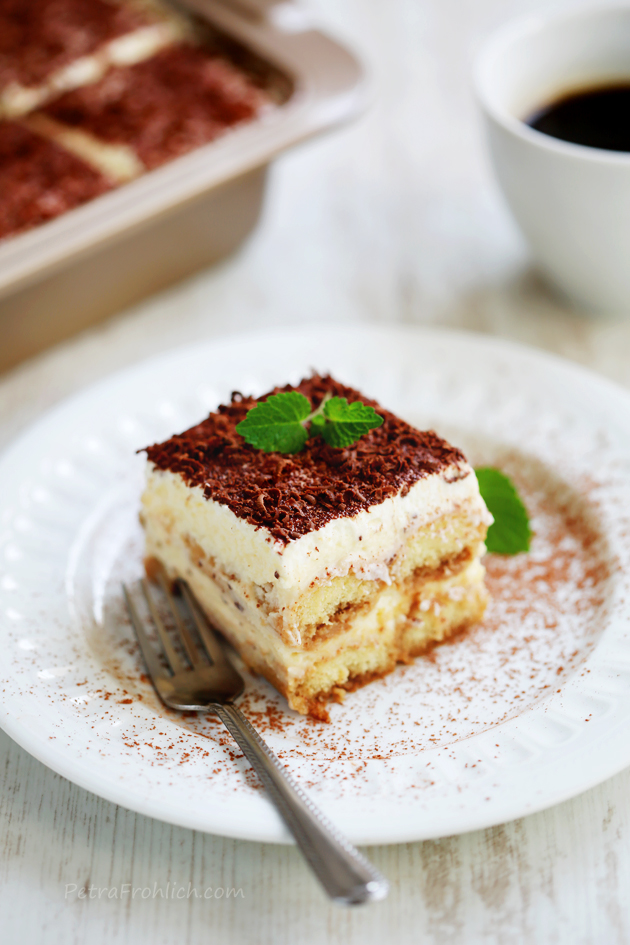
Tiramisu is one the most famous Italian desserts. It’s literal translation is ‘pick me up’ for the coffee that it contains.
With its luscious layers of whipped cream, sweetened mascarpone mixture and ladyfingers softened by their dip in liqueur-spiked esspresso, it is a dream of a dessert indeed.
There are many versions of this favorite no-bake treat… and this is the one that I like very much.
Would you like to know more about how to make this? Then I sure have all the details ready for you…
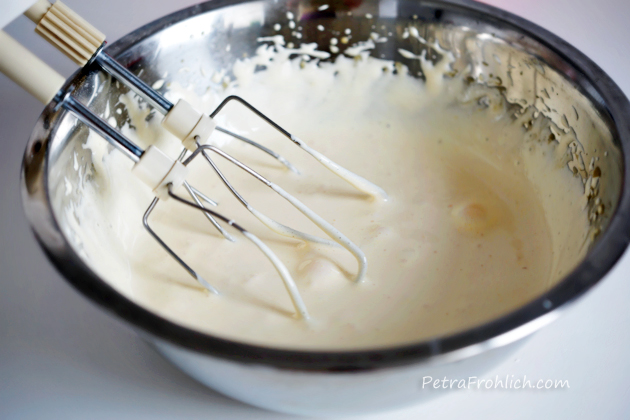
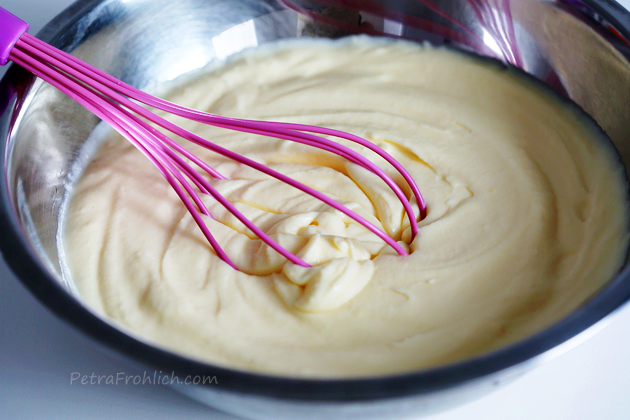
To make Tiramisu, in a large heatproof bowl or pot, whisk the egg yolks and 1 cup (115 grams) of sugar until smooth and pale in color.
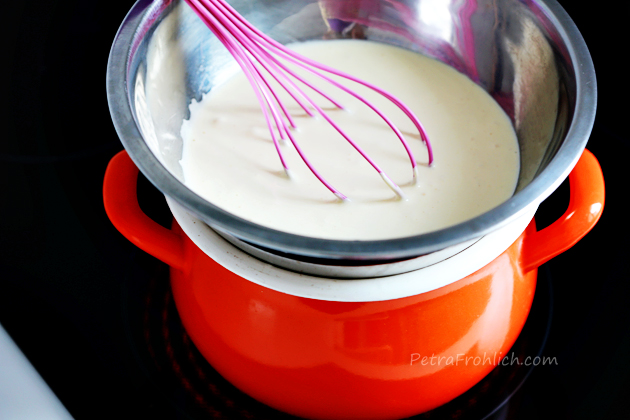
Place the bowl/pot containing the egg yolk-sugar mixture over a pot of boiling water (so that the bottom of the bowl does not touch the water) and cook for about 5 minutes, stirring constantly. Transfer the mixture into a larger bowl and allow to cool.
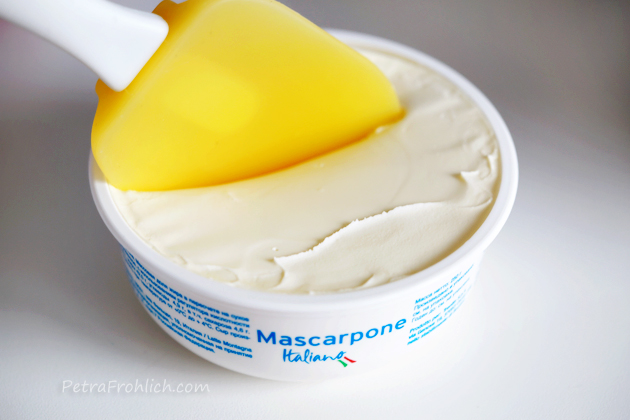
Now we need our softened mascarpone cheese.
Fold the mascarpone cheese into the egg-sugar mixture.
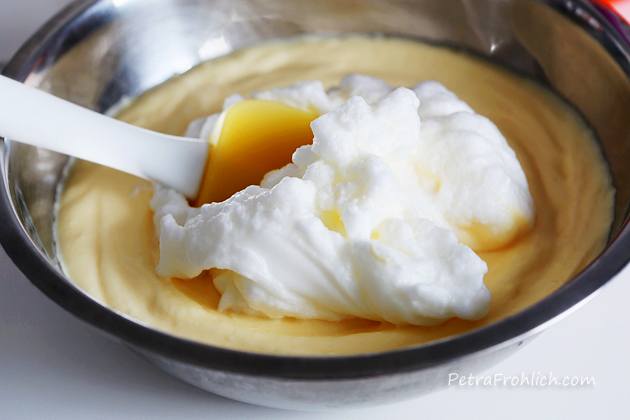
Beat the egg whites to soft peaks and gently fold it into the egg-sugar-mascarpone mixture.
*Please note that the egg whites in this recipe are uncooked. It is recommended that those who are very old, very young, pregnant, or have a compromised immune system should avoid raw eggs.
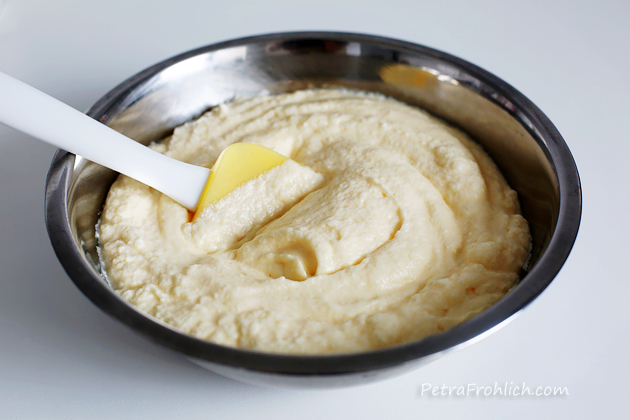
Place in the fridge until needed again.
And now let the ladyfingers join the game.
Yum.
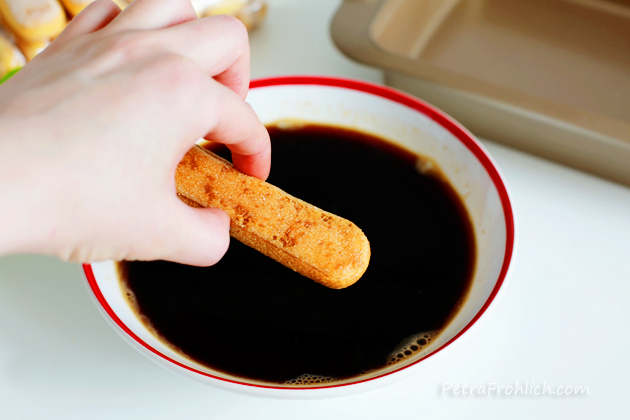
In a smaller bowl, combine the strong brewed coffee and liqueur. Let cool completely.
Dip the ladyfingers in the coffee-liqueur mixture (they are very absorbent, a little while will do)…
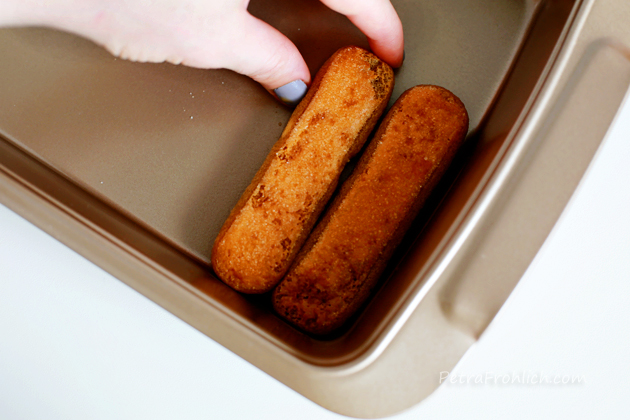
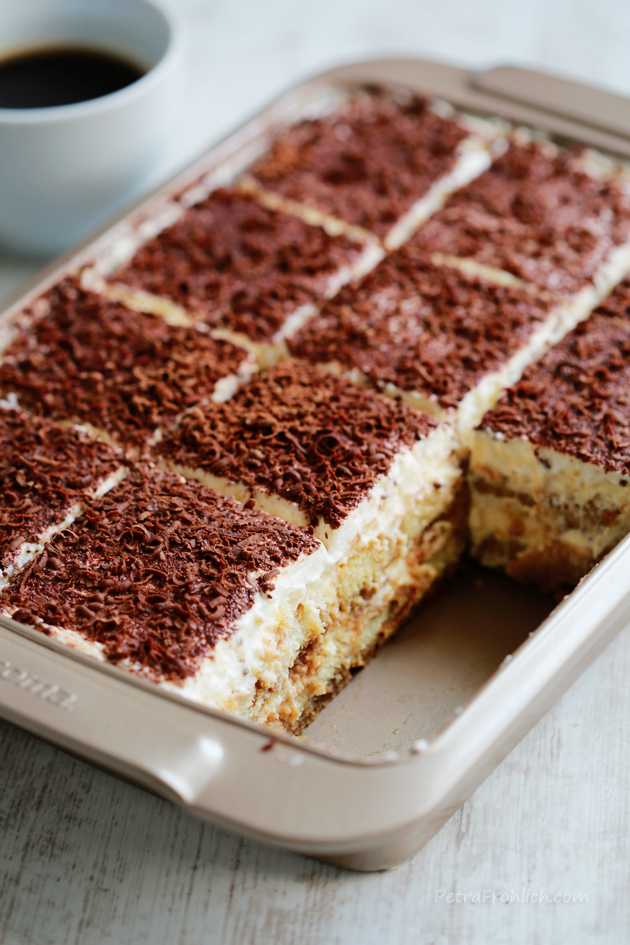
… and lay them in rows in the bottom of a 9 x 13-inch (23 x 33 cm) dish.
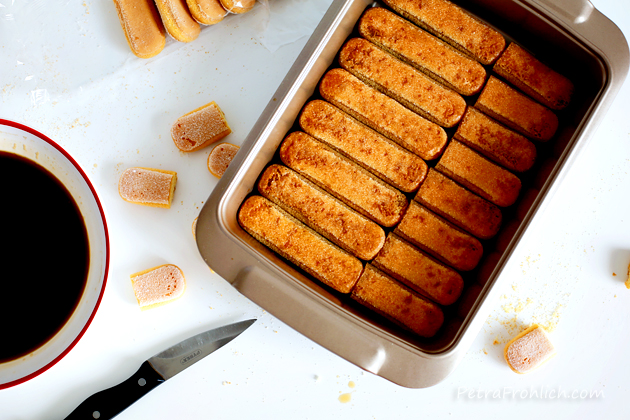
You may need to cut some ladyfingers with a knife to fit the size of the pan.
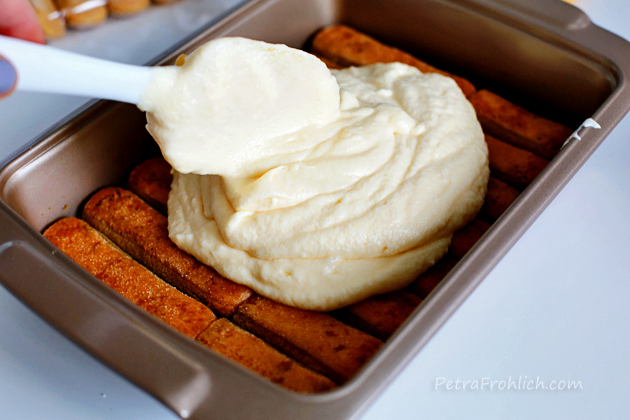
Spread half of the mascarpone cream on top.
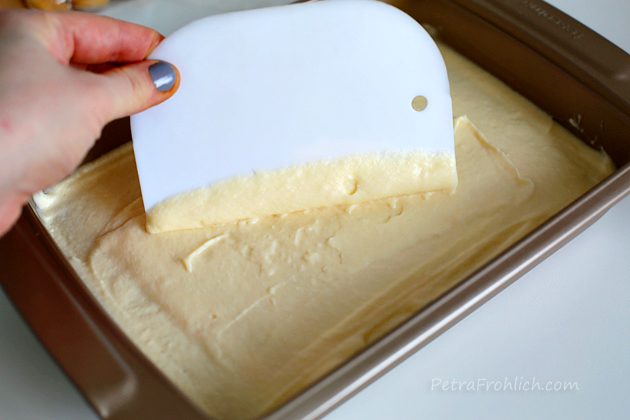
Even out the surface.
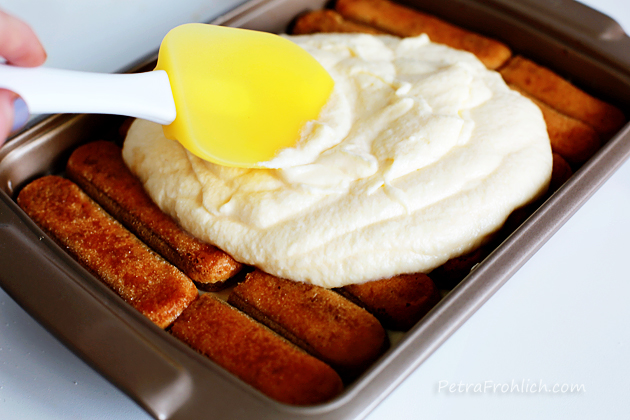
Cover the mascarpone cream with another layer of coffee-dipped ladyfingers. Then cover the ladyfingers with the other half of the mascarpone cream.
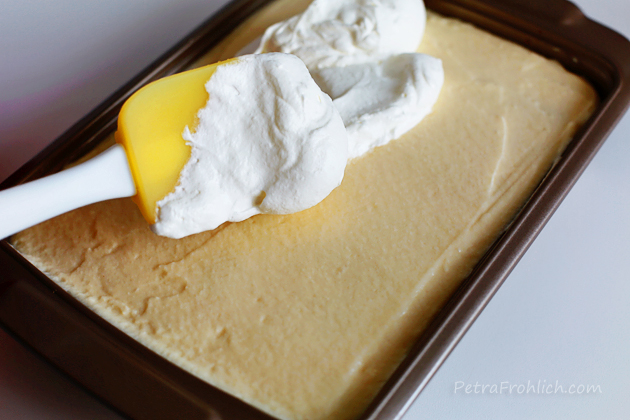
In a bowl of your electric mixer, place the heavy cream and 1 tbsp sugar. Whip until stiff peaks form. Spread the whipped cream over the mascarpone cream layer.
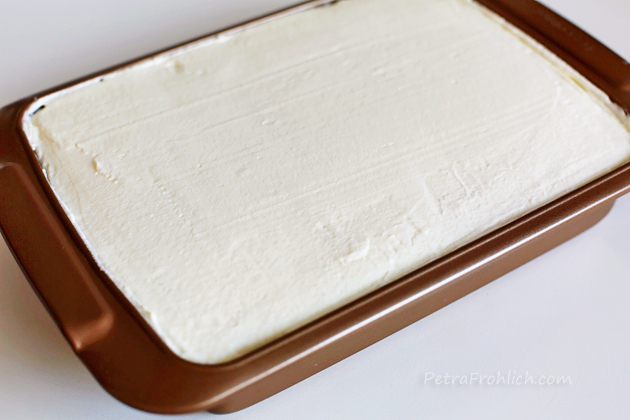
And even out nicely.
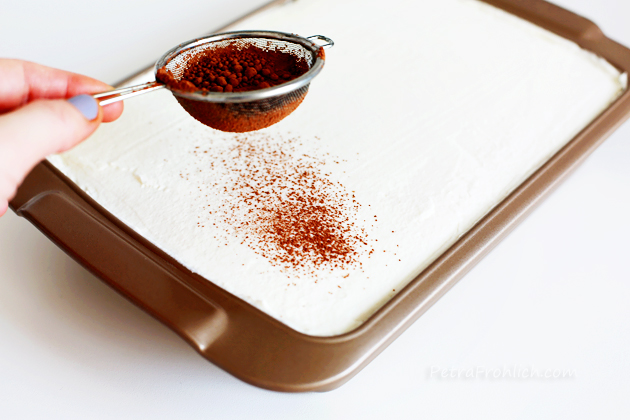
Dust the surface generously with sifted cocoa powder.
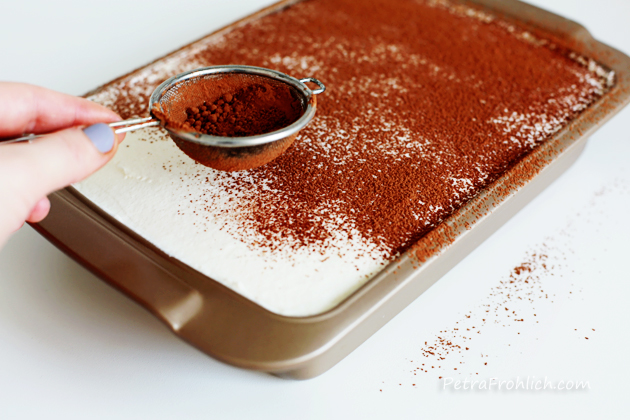
Just like this.
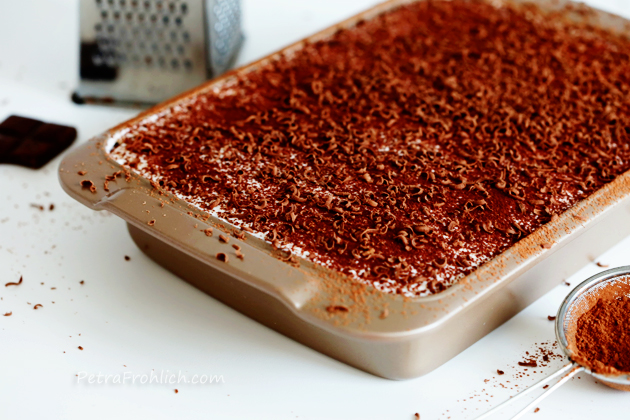
And add some chocolate shavings as well.

Refrigerate for at least 2 hours, preferably overnight.

Cut into squares.
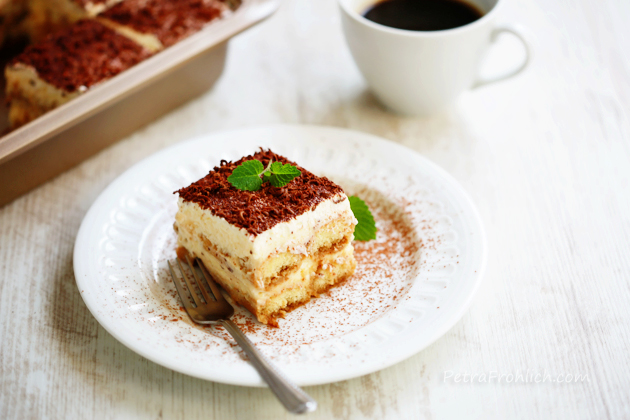
And serve.
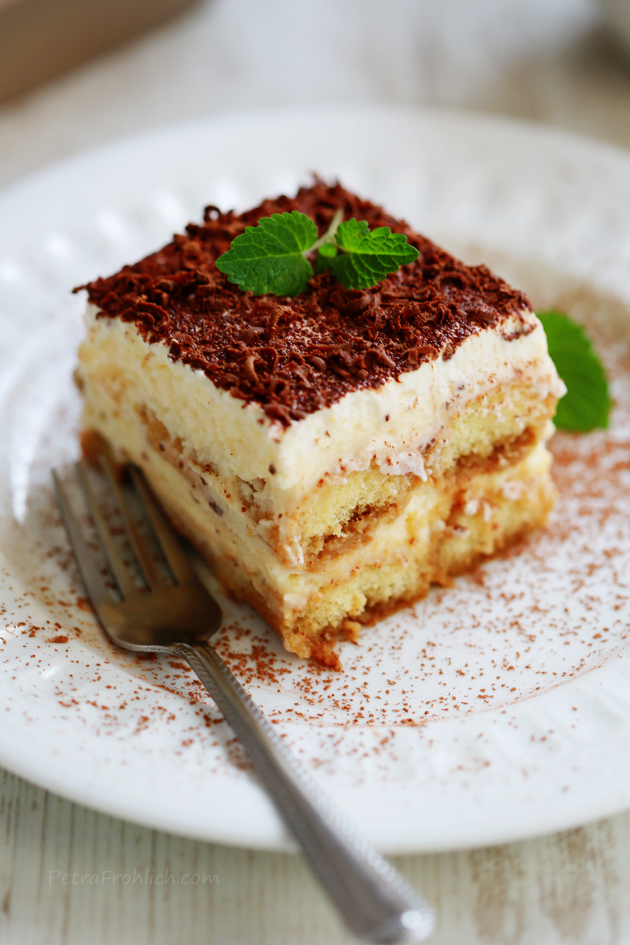
Enjoy!
With love,
Petra
- 5 eggs, separated
- 1 cup (115 grams) + 1 tbsp confectioners sugar, sifted
- 16 ounces (450 grams) mascarpone cheese, at room temperature
- 1 cup (240 ml) strong brewed coffee
- ½ cup (120 ml) coffee liqueur or rum
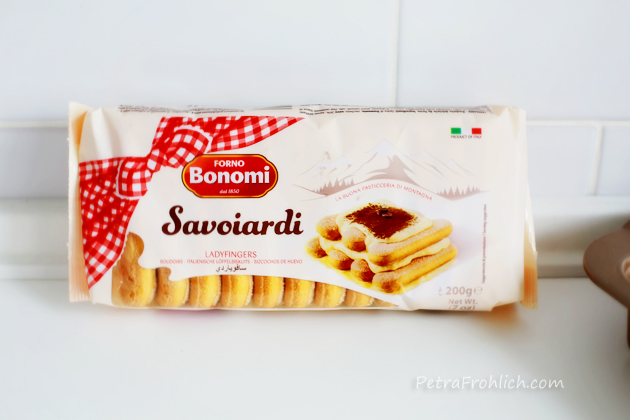
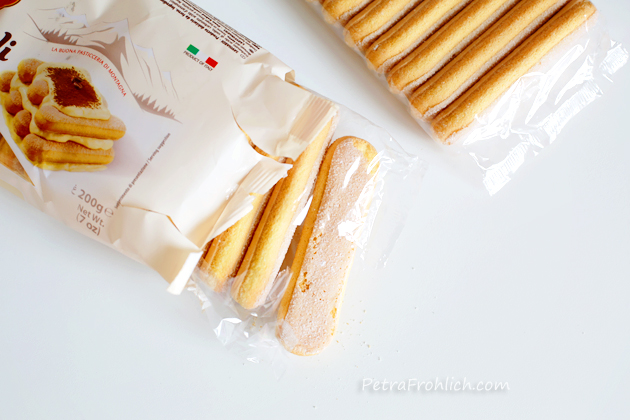
- 40 store bought lady fingers (like Savoiardi)
- 1 cup (240 ml) heavy cream
- cocoa powder (for garnish)
- chocolate shavings (for garnish)
- bittersweet chocolate (for garnish)
- In a large heatproof bowl or pot, whisk the egg yolks and 1 cup (115 grams) of sugar until smooth and pale in color.
- Place the bowl/pot containing the egg yolk-sugar mixture over a pot of boiling water (so that the bottom of the bowl does not touch the water) and cook for about 5 minutes, stirring constantly.
- Transfer the mixture into a larger bowl and allow to cool.
- Fold the mascarpone cheese into the egg-sugar mixture.
- Beat the egg whites to soft peaks and gently fold it into the egg-sugar-mascarpone mixture. Place in the fridge until needed again.
- In a smaller bowl, combine the strong brewed coffee and liqueur. Let cool completely.
- Dip the ladyfingers in the coffee-liqueur mixture and lay in rows in the bottom of a 9 x 13-inch (23 x 33 cm) dish (you might need to cut some ladyfingers with a knife to fit the size of the pan).
- Spread half of the mascarpone cream on top.
- Cover the mascarpone cream with another layer of coffee-dipped ladyfingers.
- Cover the ladyfingers with the other half of the mascarpone cream.
- In a bowl of your electric mixer, place the heavy cream and 1 tbsp sugar. Whip until stiff peaks form. Spread the whipped cream over the mascarpone cream layer.
- Dust generously with sifted cocoa powder and chocolate shavings.
- Refrigerate for at least 2 hours, preferably overnight.
- Cut into squares and serve.
- Enjoy!
This recipe was adapted from www.gastronomersguide.com.

- Like
- Digg
- Del
- Tumblr
- VKontakte
- Buffer
- Love This
- Odnoklassniki
- Meneame
- Blogger
- Amazon
- Yahoo Mail
- Gmail
- AOL
- Newsvine
- HackerNews
- Evernote
- MySpace
- Mail.ru
- Viadeo
- Line
- Comments
- Yummly
- SMS
- Viber
- Telegram
- Subscribe
- Skype
- Facebook Messenger
- Kakao
- LiveJournal
- Yammer
- Edgar
- Fintel
- Mix
- Instapaper
- Copy Link