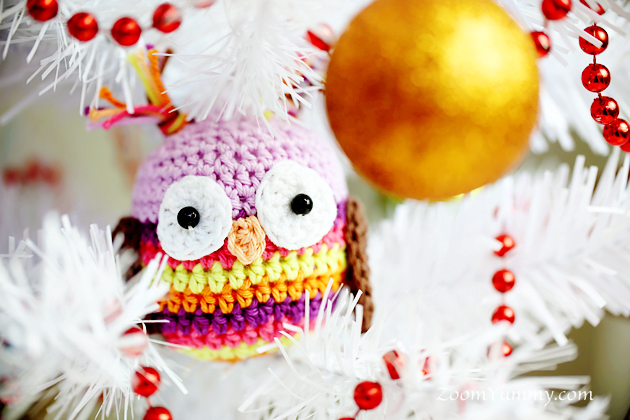
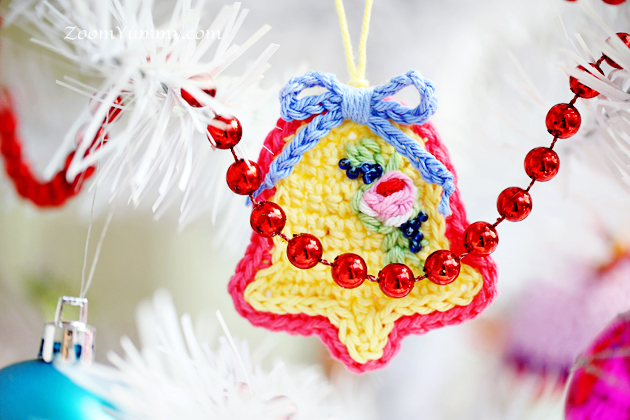
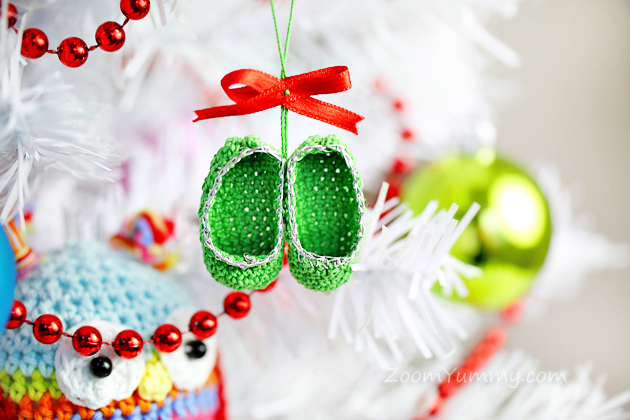
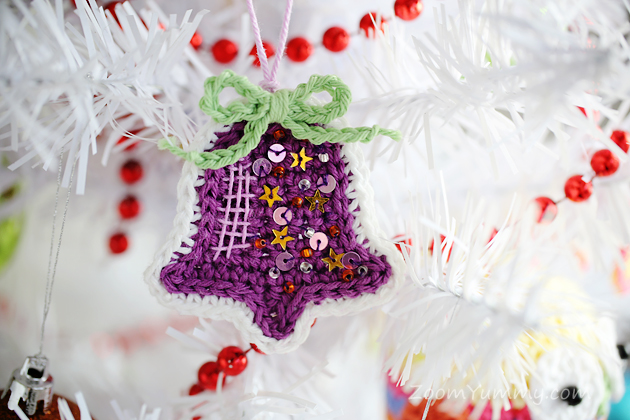
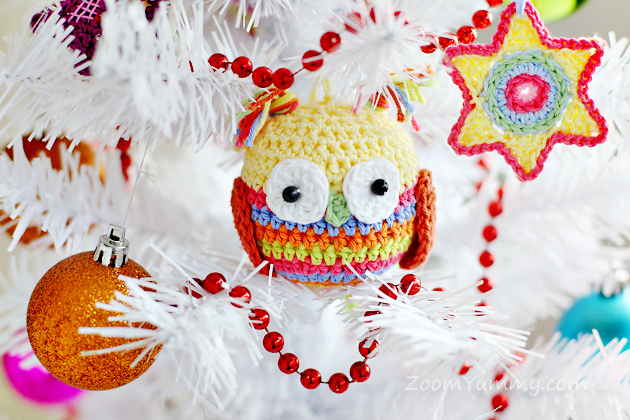
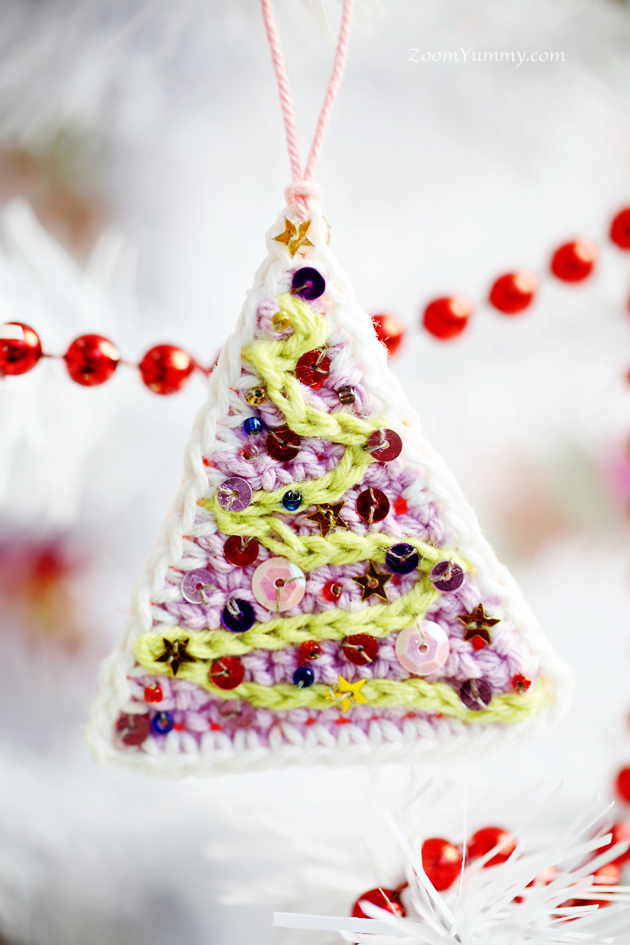
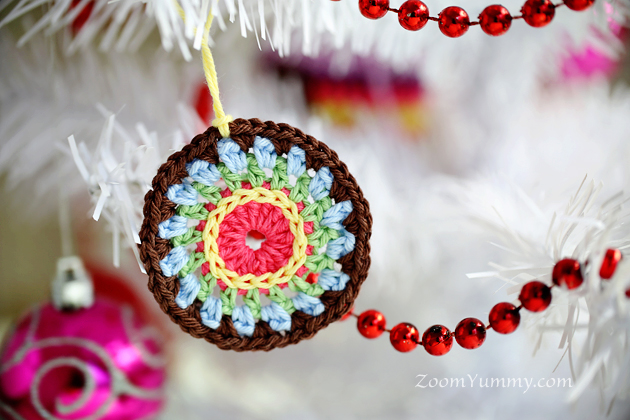
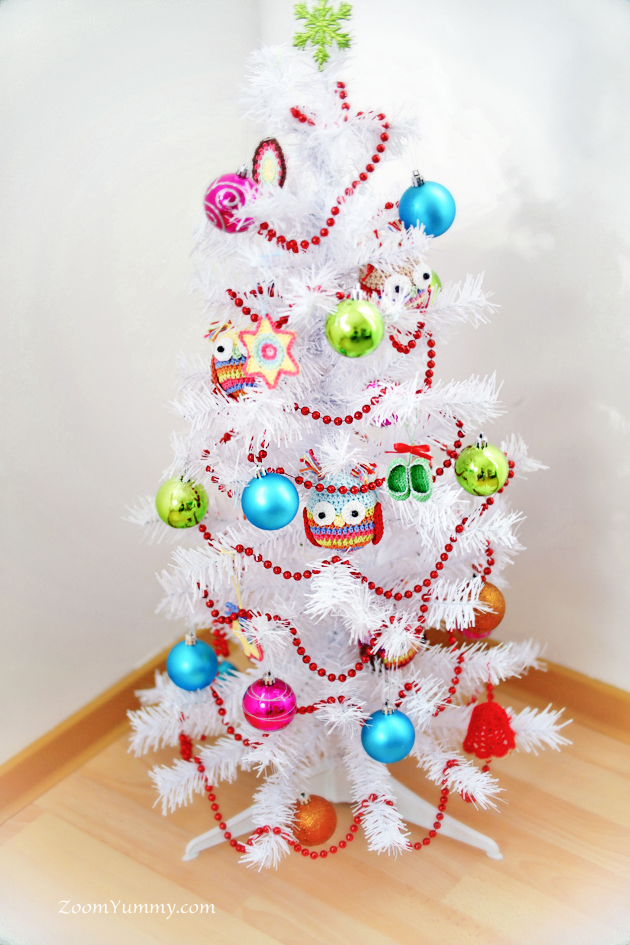
Visiting the annual Christmas market here in Bratislava, Slovakia has become one of the highlights of my year. The colors, the smells, the happy people, the cheerful atmosphere – what a delightful experience it is indeed. It definitely is one of my most favorite traditions.
Today I would like to share a few of my favorite snaps from this year’s market with you.
I have a new crochet idea for you today. It’s Crochet Christmas Trees With Buttons – a cute little decor piece to prepare your home for the upcoming holiday season.
These trees are very simple to make, a perfect project for all crochet lovers who are acquainted with the basics of crochet.
To help you with this project, I have put together a pattern. It’s spread over 21 pages, containing both written instructions and a photo tutorial with 37 detailed step-by-step pictures.
You can find the pattern and more info about it HERE and HERE.
Yesterday I found myself in the mood for some festive baking.
Wanting to do so, I remembered a picture that I accidentally found in the deep deep waters of the internet a couple of weeks ago. It was a picture of cute bear cookies with each little bear holding a treat in its arms. How adorable!
To replicate the cookies I used a very simple sugar cookie dough that does not change the shape that much while baking. As an item for the bears to hug 🙂 I chose almonds and golden jumbo raisins (I have to admit that I liked the latter a little better).
Here’s all that followed…
1. Preheat the oven to 350 °F (175 °C).
2. In the bowl of your mixer cream butter and sugar until smooth.
3. Beat in vanilla extract and egg.
4. In a separate bowl combine baking powder with flour and add a little at a time to the wet ingredients. The dough will be rather stiff. If it becomes too stiff for your mixer, turn out the dough onto a countertop surface. Wet your hands and finish off kneading the dough by hand.
5. Divide into workable batches, roll out onto a floured surface into about 1/8 inch
(0.3 cm) thickness.
6. Cut out bear cookie shapes and place them on a cookie sheet that you’ve lined with parchment paper. Insert an almond or a raisin on top of each cookie.
Here’s a selection of the treats I’ve chosen – almonds and golden jumbo raisins.
7. Finally fold the arms into a hugging position (press the arms firmer so they don’t open while baking). You can use a wooden skewer to indent eyes and nose for each bear.
8. Bake at 350 °F (175 °C) for 6-8 minutes. Let cool on the cookie sheet until firm enough to transfer to a cooling rack.
In the bowl of your mixer cream butter and sugar until smooth.
Beat in vanilla extract and egg.
In a separate bowl combine baking powder with flour and add a little at a time to the wet ingredients. The dough will be rather stiff. If it becomes too stiff for your mixer, turn out the dough onto a countertop surface. Wet your hands and finish off kneading the dough by hand.
Divide into workable batches, roll out onto a floured surface into about ⅛ inch (0.3 cm) thickness.
Cut out bear cookie shapes and place them on a cookie sheet that you've lined with parchment paper. Insert an almond or a raisin on top of each cookie.
Fold the arms into a hugging position (press the arms firmer so they don't open while baking). You can use a wooden skewer to indent eyes and nose for each bear.
Bake at 350 °F (175 °C) for 6-8 minutes. Let cool on the cookie sheet until firm enough to transfer to a cooling rack.
I am super happy today because I can present to you my newest pattern – the Mini Crochet Pouches.
I designed this project with mostly Christmas on my mind. I just loved the idea of decorating a Christmas tree with these mini pouches and filling them with little treats. But mostly, I thought they could look super-sweet when used as Advent calendar sacks that hide small surprises to celebrate the days before Christmas. But, all-in-all, I think they can work just great for carrying small gifts for any occasion. Yay!
If you like this idea and would like to create the colorful pouches as well, you can find the pattern and all the necessary info here and here. The pattern, as always, includes many step-by-step pictures to make the project as easy to follow as possible.
I had a blast making this simple project, I hope you will too.
This website uses cookies to improve your experience. We'll assume you're ok with this, but you can opt-out if you wish.AcceptRead More
Privacy & Cookies Policy
Privacy Overview
This website uses cookies to improve your experience while you navigate through the website. Out of these, the cookies that are categorized as necessary are stored on your browser as they are essential for the working of basic functionalities of the website. We also use third-party cookies that help us analyze and understand how you use this website. These cookies will be stored in your browser only with your consent. You also have the option to opt-out of these cookies. But opting out of some of these cookies may affect your browsing experience.
Necessary cookies are absolutely essential for the website to function properly. This category only includes cookies that ensures basic functionalities and security features of the website. These cookies do not store any personal information.
Any cookies that may not be particularly necessary for the website to function and is used specifically to collect user personal data via analytics, ads, other embedded contents are termed as non-necessary cookies. It is mandatory to procure user consent prior to running these cookies on your website.