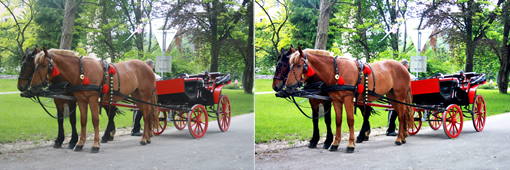
Have you ever considered increasing contrast in your photos?
If I should speak for myself, I clearly remember the days when I was looking at the pictures I’d made and thought:‘Why, oh why does there have to be that ugly gray cast over my photos? I don’t want it to be there. I want my pictures to be vibrant and crisp!’
To solve this problem I first decided to pray and cry and scream and kick around and then cry some more (because that is the usual way how I solve my problems)…and then I remembered that times have changed and all that one needs to do to solve all the problems is to sit on her butt and start googling.
So I googled.
And did I find gorgeous things!
Basically, I came across three ways to increase contrast.
They can be used separately or all together.
Just have a look:
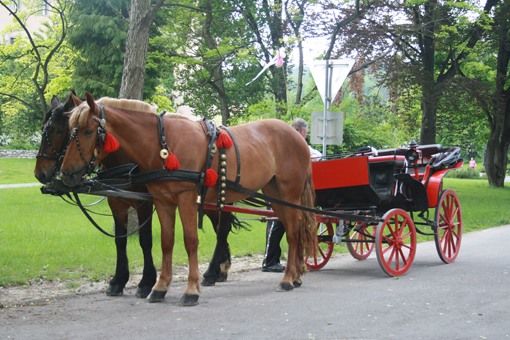
This is a SOOC (straight out of camera) picture that I made a couple of months ago on one of our trips.
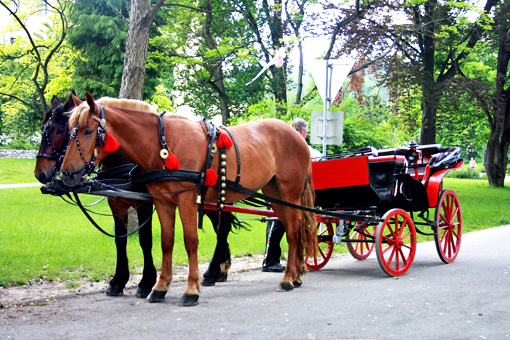
And this is what I got after I opened my Photoshop and played for a while.
Note: I am using Photoshop Elements 8.
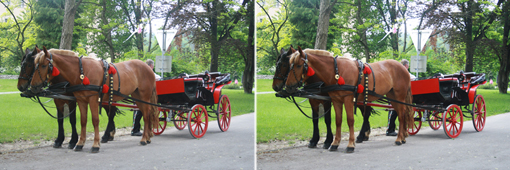
1. This is the first way to achieve better contrast in your pictures.
The change is rather subtle here – the final picture is a bit more defined and also slightly more vibrant.
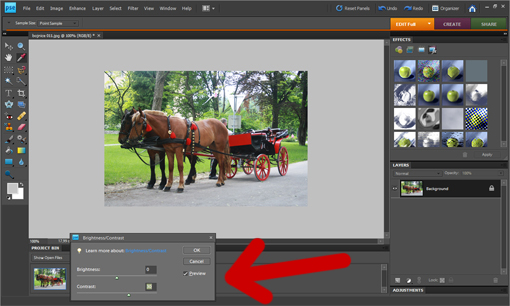
To use the first method go to ENHANCE (situated in the tool menu on top of your screen) -> ADJUST LIGHTING -> BRIGHTNESS/CONTRAST.
A small window will pop up.
In that window, drag the Contrast slider to the right just until you like the picture.
Try to be gentle since this method is rather strong.
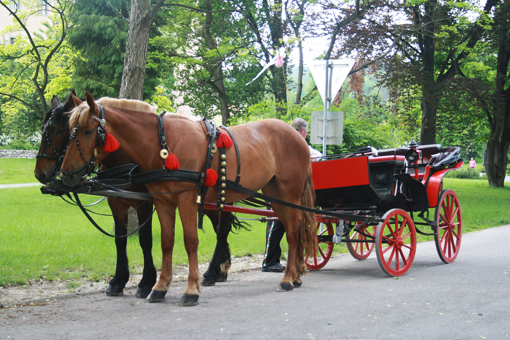
And here we are with a tad better contrast.
But we want more, right?
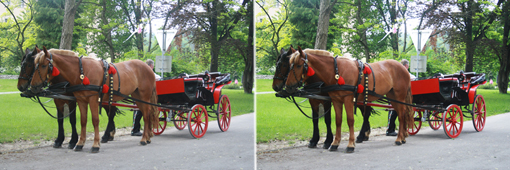
2. This is the second method I’ve found.
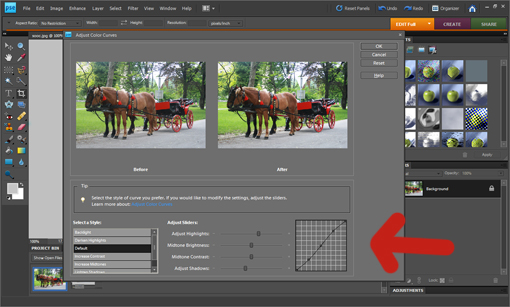
In this case, go to ENHANCE -> ADJUST COLOR -> ADJUST COLOR CURVES.
A big window will pop up.
In this window you’ll see four sliders. Drag them so that you achieve a slight S-shaped curve on the graph.
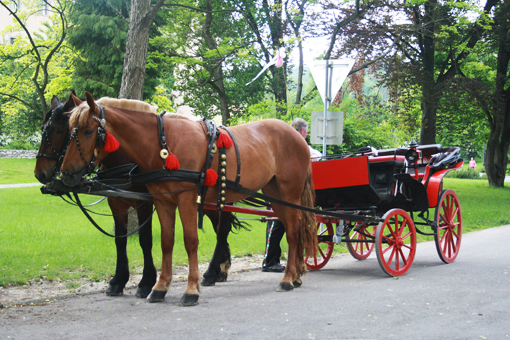
This method is very effective, very gentle to the picture and it also pumps up your colors a little.
You just have to love it.
But there’s something that you’ll love even more…you’ll actually love it more than anything in this world…
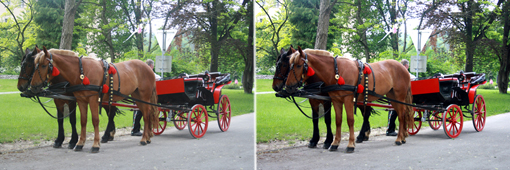
3. And this is it – raising contrast with UNSHARP MASK.
Yes, I hear you – you use unsharp mask to sharpen your images.
And that is precisely what its primary purpose is.
But if you happen to adjust it ‘crazily’ – you’ll witness a miracle.
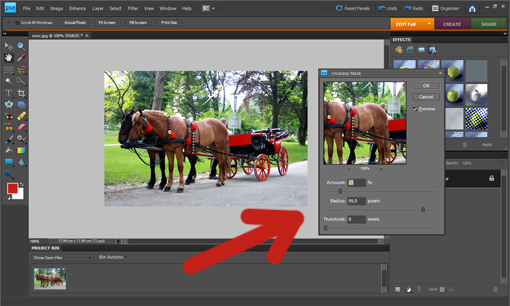
Just try it for yourself…go to ENHANCE -> UNSHARP MASK.
Now you’ll see a small window with three sliders – Amount, Radius and Threshold.
We are going to work with first two only.
With the first slider (Amount) go somewhere from 10 to 25 and with the second one (Radius) go almost to the end of the line.
And get amazed!
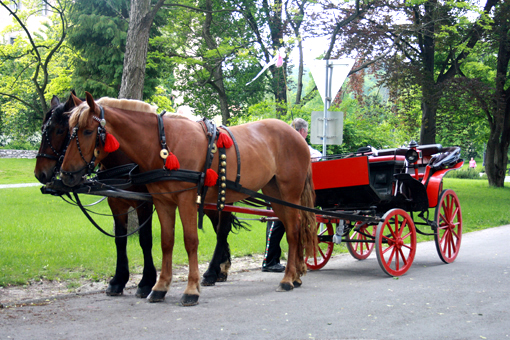
A am not lying when I say that I nearly shed a tear when I saw the result of this method for the first time.
It’s breathtaking.
The image is so much crisper, vibrant and more real.
I just love it!

Okay, being gentle with photo processing is one thing.
And I highly recommend that.
But being so greedy that you can’t help yourself from applying all the contrast increasing ways you know to one picture is something totally different.
I think that it’s done by people who want their images to be obnoxiously soaked up with everything there is to get.
I don’t know people like that.
All I know is that the picture above has all three methods applied to it.
(Oh, and in the last picture, that ‘someone’ also freed the horses’ heads from the shadow by going to ENHANCE -> ADJUST LIGHTING -> SHADOWS/HIGHLIGHTS.)
- Like
- Digg
- Del
- Tumblr
- VKontakte
- Buffer
- Love This
- Odnoklassniki
- Meneame
- Blogger
- Amazon
- Yahoo Mail
- Gmail
- AOL
- Newsvine
- HackerNews
- Evernote
- MySpace
- Mail.ru
- Viadeo
- Line
- Comments
- Yummly
- SMS
- Viber
- Telegram
- Subscribe
- Skype
- Facebook Messenger
- Kakao
- LiveJournal
- Yammer
- Edgar
- Fintel
- Mix
- Instapaper
- Copy Link

