
Hi friends!
Today I would like to introduce a very special person to you.
This person has been my web developer and adviser for all things computer and internet related for quite some time.
I have recently asked him if he could share some of his knowledge and valuable ideas with you, my dear readers. And I am beyond happy and excited that he said yes to being a special contributor on this site.
This friend’s name is Peter and today he would like to share with us How to Attract Traffic to a WordPress Blog by Making it Mobile Friendly…
Petra
Guest Post by Peter.
Traffic is the blogger’s lifeblood. Not only does traffic bring in ad revenue, it also creates a community around the blog.
Many bloggers started out a few years ago when smartphones and tablets were rare. But in today’s world, these devices are present everywhere and are used intensively. So it is very important to enable easy access to your blog for these mobile users.
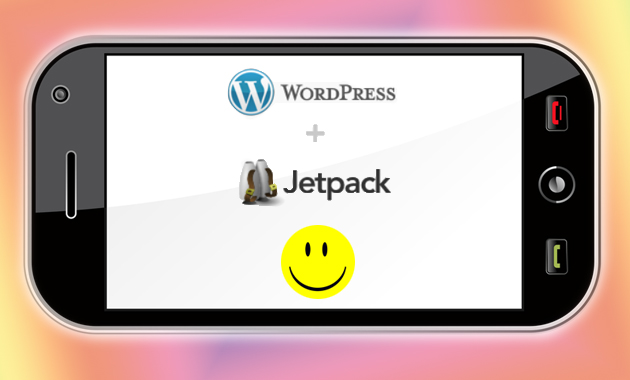
Since WordPress is the best and most used blogging platform, I will show you how to make your WordPress blog responsive. Responsiveness is that quality of a website which automatically changes its layout, so it is optimized for various devices. In other words, a responsive site is easily readable on a cell phone, a tablet, a laptop, and a desktop computer.
The following tutorial is intended for self-hosted WordPress blogs (wordpress.org) like the one that Petra uses.
The whole process consists of only six easy steps. And here they are…
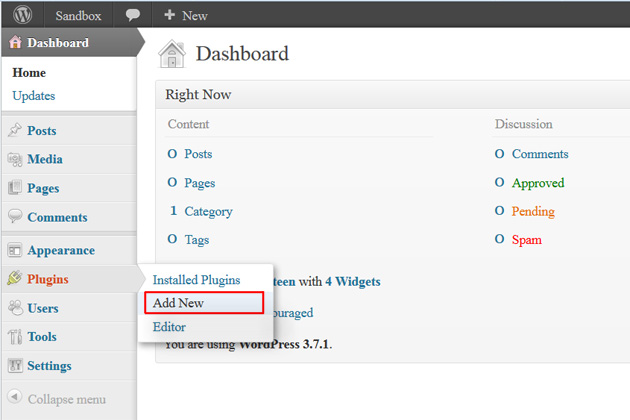
STEP ONE
Go to your WordPress dashboard. Click Plugins, click Add New.
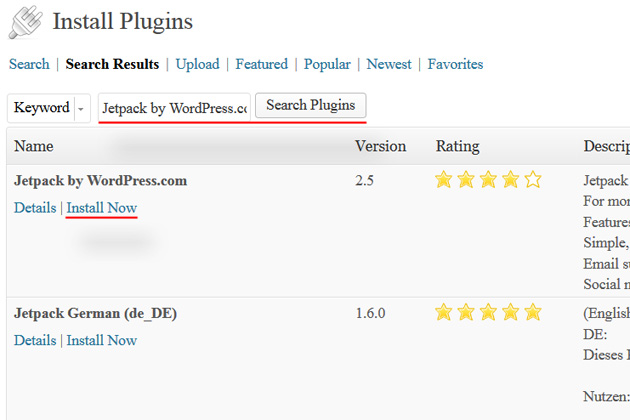
STEP TWO
Search for a plugin called Jetpack by WordPress.com authored by Automattic. Install the plugin.
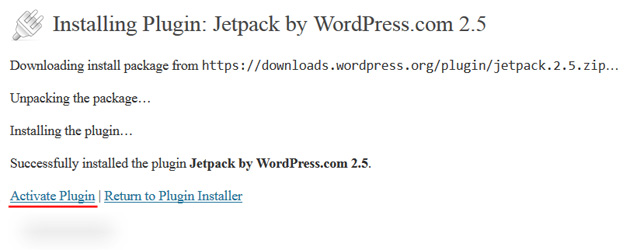
STEP THREE
Activate the plugin.
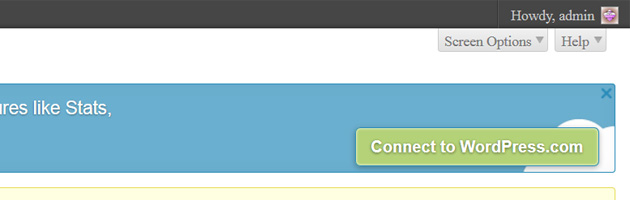
STEP FOUR
Click Connect to WordPress.com in order to enable all the nice features of this plugin.
STEP FIVE
If you already have an account with wordpress.com, just enter your username and password, then click Authorize Jetpack.
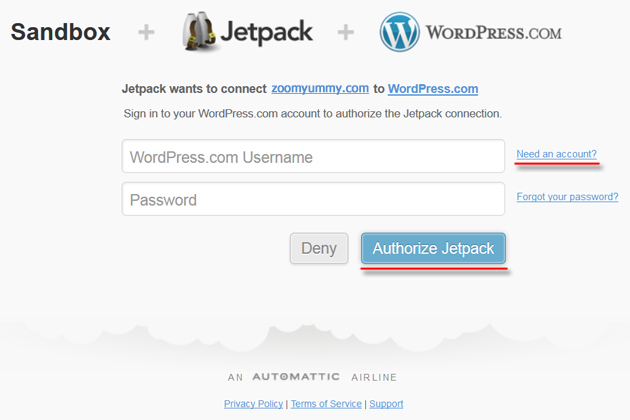
If you don’t have an account yet, you can create one by clicking Need an Account?. After signing up by entering your email address and selecting a username and a password, WordPress will swiftly send you an email with an activation link. By clicking on that link in the email, a new browser window will open, where you will be able to click Authorize Jetpack.

STEP SIX
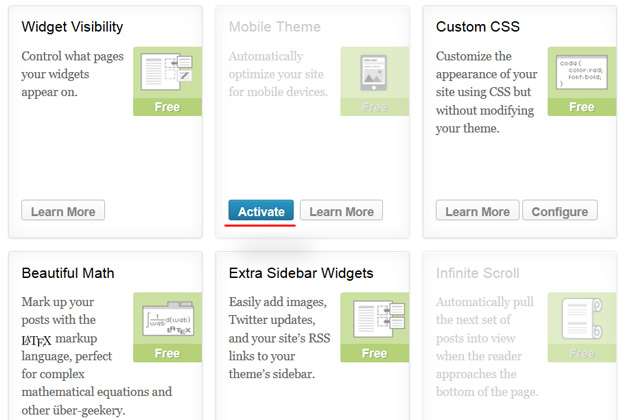
Activate the Mobile Theme feature in WordPress Dashboard > Jetpack.
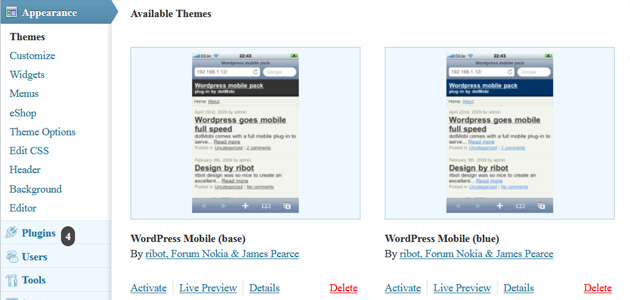
At this moment, you may check out how your blog looks like on mobile devices. If you are not completely satisfied, choose one of Jetpack’s four available mobile themes that best suits your blog. You can find Jetpack’s themes in WordPress Dashboard > Appearance > Themes.
Easy and beautiful, isn’t it? 🙂
Please, let me know in your comments whether your blog is already responsive or if you found this tutorial useful to make your blog responsive.
Happy blogging!
Peter
(Note: Mobile support is also available for wordpress.com users. It can be easily set up via the wordpress.com Dashboard in Appearance > Mobile.)
- Like
- Digg
- Del
- Tumblr
- VKontakte
- Buffer
- Love This
- Odnoklassniki
- Meneame
- Blogger
- Amazon
- Yahoo Mail
- Gmail
- AOL
- Newsvine
- HackerNews
- Evernote
- MySpace
- Mail.ru
- Viadeo
- Line
- Comments
- Yummly
- SMS
- Viber
- Telegram
- Subscribe
- Skype
- Facebook Messenger
- Kakao
- LiveJournal
- Yammer
- Edgar
- Fintel
- Mix
- Instapaper
- Copy Link


