Photography ~ How To Create White Vignette

how to add white misty border to a picture Photoshop tutorial

Because many of you, my dear readers, liked my last article on adding more light to your pictures during these tough months of winter, I decided to share another one of my light finding tricks with you.

I call it ‘white vignette’, despite the fact that the word vignette is usually used to describe dark blurred border around the picture.

I like adding dark vignette to my pictures. I find them cute because they nicely draw attention to the center of an image. I even wrote a tutorial about it once.  But my winter photos, oh my winter photos do not need it that much, they need more light, that’s what they need.

Long story short, one day it occurred to me that  – maybe – if I used white color instead of black one while creating the vignette, it could help my darker pictures to look better.

I liked the idea, and I loved the result.

Just have a look…
 

how to add white misty border to a picture Photoshop tutorial

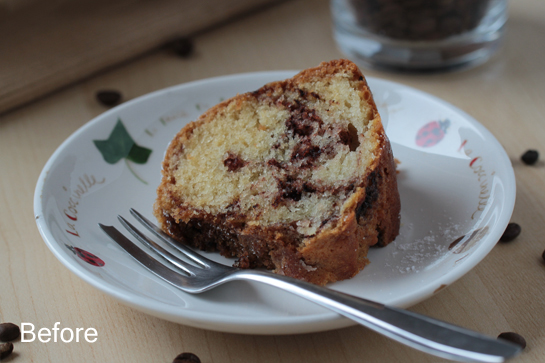
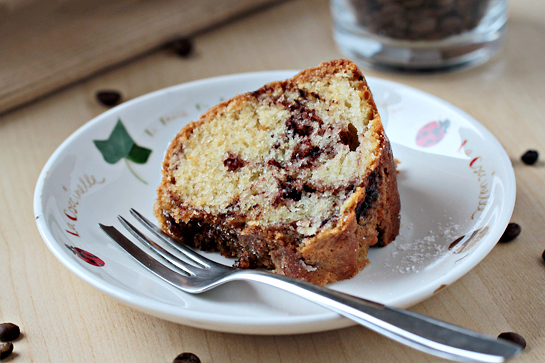
This is the before picture.

When I was taking this picture, the display of my camera was saying it looked alright and that it was properly exposed.

But I did not think so when I saw it on the screen of my laptop.


how to add white misty border to a picture Photoshop tutorial, unsharp mask to add contrast, sharpening with unsharp mask, light with levels

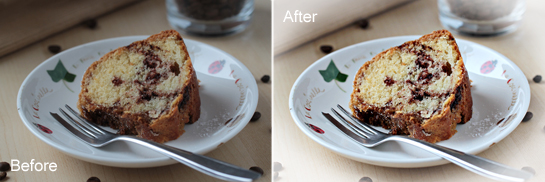
This is the same picture after a little bit of editing in Photoshop Elements 8 has been done (no vignette yet).

Much better, I think.

I corrected exposure with levels (tutorial here).

I improved contrast with unsharp mask (tutorial here).

And I sharpened the picture a little (tutorial here).
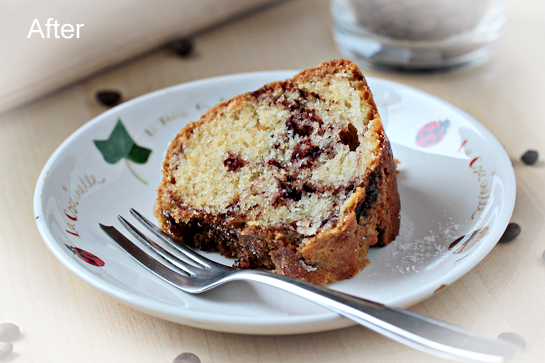


how to add white misty border to a picture Photoshop tutorial, white vignette

And then I added my white vignette.

I like how it creates an illusion of more light coming in.

These are the steps that I took:

How to Sharpen Your Images

how to sharpen images with Photoshop step by step tutorial with pictures

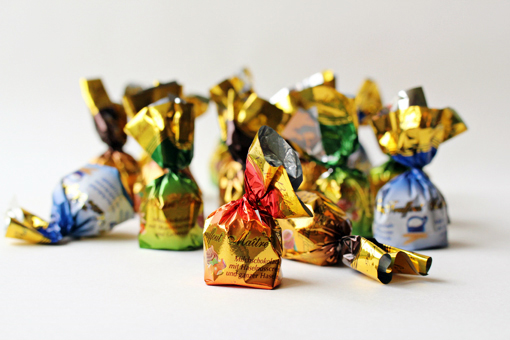
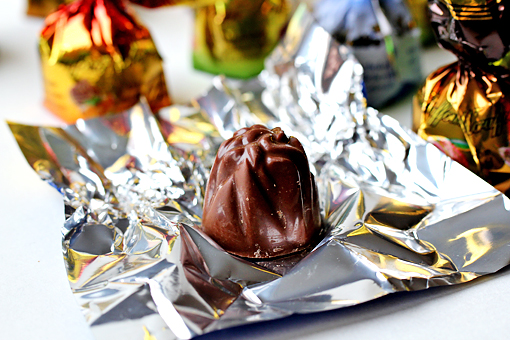
This picture has been sharpened.


how to sharpen images with Photoshop step by step tutorial with pictures

This picture has not been sharpened.


Can you spot the difference?

You surely can.

Especially if you compare the bonbon in the front.


I love sharp, well-defined images.

I want all of my pictures to look that way.

But the fact is that the images that come straight out of my camera are usually rather far from being sharp. Partially it’s caused by my shaky hands. And additionally, cameras themselves usually don’t produce very sharp images… for some specific reason… that I once read somewhere… but have already forgotten.


Luckily, there’s good news. Photo editing software has been sent to this planet to save us.

Whoever or whatever has sent it, THANK YOU SO MUCH for that.


To edit my pictures, I love to use Photoshop Elements 8.

It’s simple and fun to use.

And this is what I do to make my pictures sharper:


how to sharpen images with Photoshop step by step tutorial with pictures

1. I open the picture in Photoshop (File -> Open…).
 

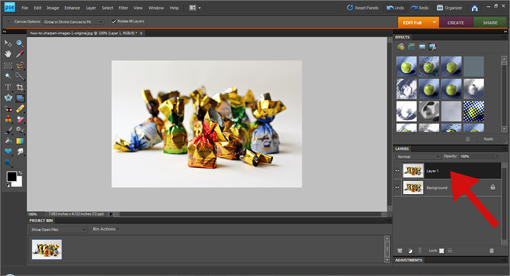
2. Duplicate the background layer (‘Ctrl + J’ on PC or ‘Command J’ on Mac).

Make sure that the newly created layer stays highlighted.


how to sharpen images with Photoshop step by step tutorial with pictures

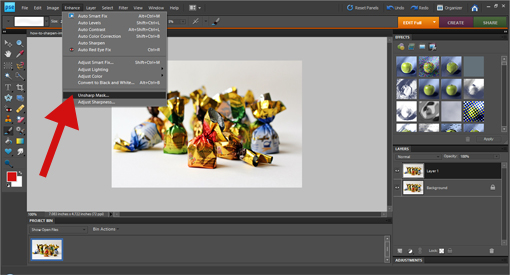
3. In the upper bar, press Enhance -> Unsharp Mask.


how to sharpen images with Photoshop step by step tutorial with pictures

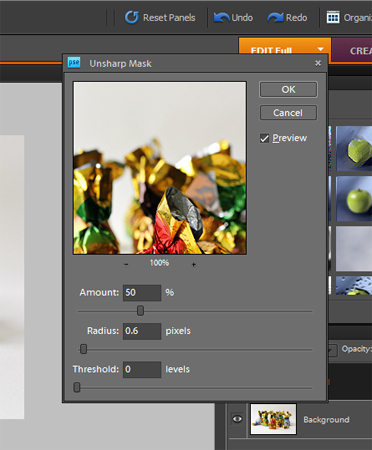
4. A window will pop up.

We have three sliders here: Amount, Radius and Threshold.

Frankly, I was looking for a way to use these sliders for quite some time. Until, after about 6 months of using Photoshop, I’ve learned that:


Amount – shouldn’t be lower than 50. I like to start with 50 and increase it if necessary. But most of the times, 50 works just fine.

Radius – I almost always use 0.6 setting.

Threshold – I usually keep this one at 0. Only sometimes, when I think the picture looks a bit too harsh, I increase this setting to 1 or 2.


So, once again, I usually go by 50 – 0.6 – 0 formula.

My blog-sized pictures seem to be happy with it.


5. Once you are satisfied with the Amount-Radius-Threshold setting, press OK.


how to sharpen images with Photoshop step by step tutorial with pictures

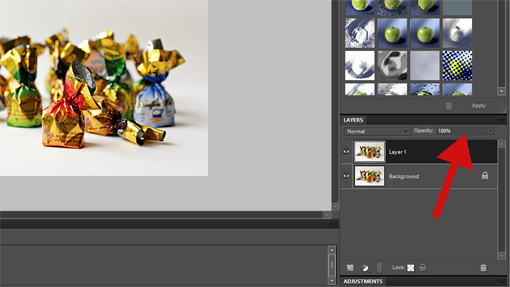
6. Then, have a look at the Layers Palette.

Here’s a little thing that you can use, but definitely don’t have to if you are perfectly okay with the way your picture looks like now.


In step 2 we duplicated the background layer and since then we’ve only worked with this duplicated layer. Which means that we’ve only made changes to the duplicated layer, leaving the background layer untouched. The good thing about working this way is that now you have a very precious chance to adjust the opacity of the changes that you’ve made. You have the whole scale of 0 – 100% here for you to play with. So if you think that your sharpening should be about 20% less strong, you can easily achieve that by using the opacity slider and setting it to 80%.

Awesome, isn’t it?


7. In the upper bar, press Layer -> Flatten Image.


8. And finally save the image (File -> Save as…).


Again:

how to sharpen images with Photoshop step by step tutorial with pictures

Before.


how to sharpen images with Photoshop step by step tutorial with pictures

And after.


I hope you’ve enjoyed this tutorial as much as I’ve enjoyed this bonbon.

Mmm.

It had milk filling, my favorite.


Love,

Petra


Send this to a friend