Photo Set (Bundt Cake)

Right now I am preparing a yummy recipe that I’ll be posting here tomorrow. Meanwhile I have something else you might want to see.
Over the past few months some of you asked me how this or that photo had been taken. Your questions gave me an idea that you might find interesting to see how several of my sets looked like. I myself love this kind of information and seek it eagerly wherever possible.

So, from now on, if I find the photo set that I’ve created interesting in a certain way I’ll show it to you.

If it helps at least one of you then my mission was worth it.


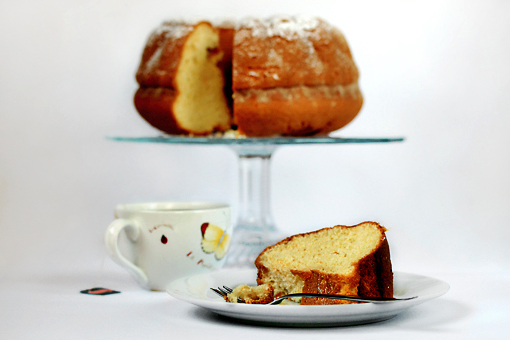
The picture above is by far not perfect or exquisite or anything. But what I find interesting about it is the lighting. You might be wondering how on earth that set was lit and whether I used artificial lights or not. And how I dare own photography lighting without letting you know.
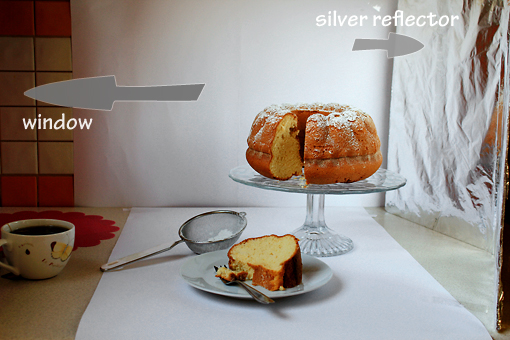
So, this is what the set looked like.

I don’t use lights since I don’t own photography lights.

But what I own is my home-made silver reflector (you can find its heart-touching story here). And then I have one window. And then I have some white paper that I duct taped to the wall and to my kitchen countertop. And that’s it!

Very, very simple.
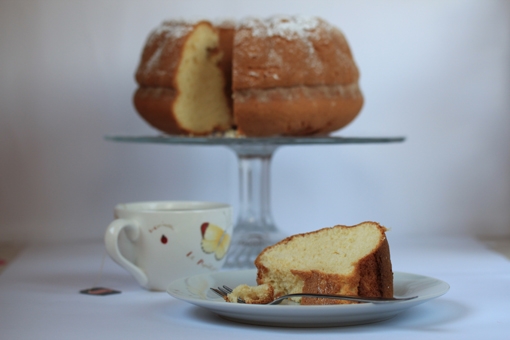
This is the job that my camera did.

Well, she was really trying.

I still love her dearly.

And yes, I refer to my camera as her. It’s my best friend after all. Actually, I might start calling her Amelie.

And this is how Photoshop helped.

Needless to say, I love Photoshop.

I might start calling it Fred.


See you soon!

Love,

Petra

How to Tint a Photo

how to use photo filter in Photoshop step-by-step tutorial

There are always many questions regarding photography and photo editing running around in my head.

And that’s awesome since I always have something new to learn or find out.

For example, for quite some time now, I’ve been wondering how to apply a color tint to my pictures.

Today, maybe because I still feel a little overwhelmed by the romantic atmosphere of the wedding we attended recently, I decided to definitely learn how that thing is achieved.

Of course, as with everything in the photo-editing realm, there are about 3 gazillion ways how to achieve certain effect.

In fact, I’m glad I found at least this one.

So if you know of any other approach, feel free to let me know.

I’ll be more than happy.

how to use photo filter in Photoshop step-by-step tutorial

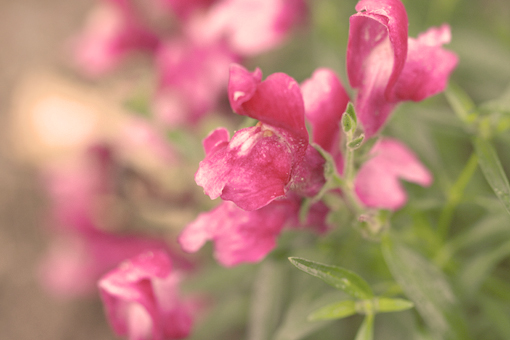
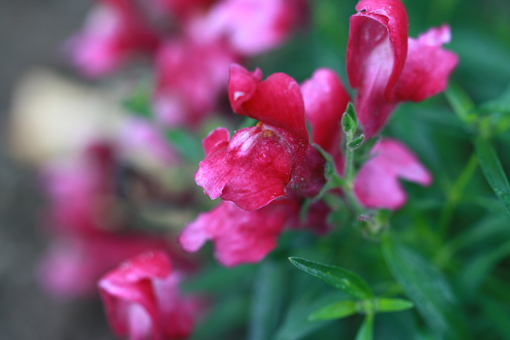
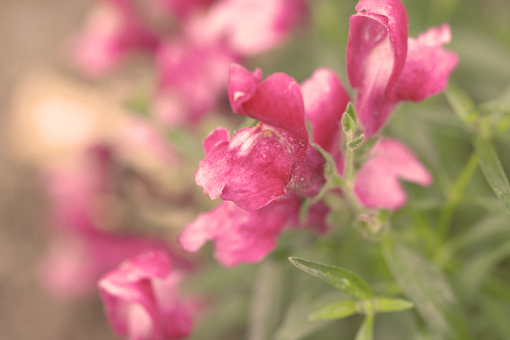
This is the original picture.

I took it while I was house sitting (and dog sitting and canary sitting) for my parents about a month ago.

Those days were long, lazy and filled with taking scandalous amounts of pictures.

Scandalous, I’m telling you!

As I was choosing the picture to play with today, I noticed these flowers. They were literally calling for some romance to be brought into their lives.

So this is what I did to help them…

Note: I am using Adobe Photoshop Elements 8 here.

how to use photo filter in Photoshop step-by-step tutorial

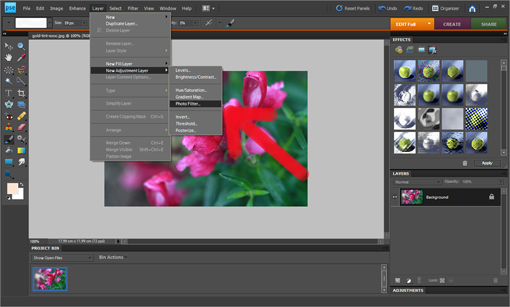
I clicked LAYER  -> NEW ADJUSTMENT LAYER -> PHOTO FILTER.

how to use photo filter in Photoshop step-by-step tutorial

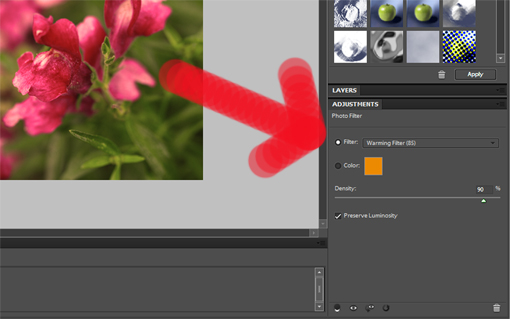
This is what appears on the lower right-hand side.

Right now, a wonderful time begins for you – just go and choose whatever color tint you want in your picture.

I went for ‘Warming Filter’ under the ‘Filter’ option. The filter option includes gorgeous preset tint colors.

Instead of the ‘Filter’ option, you can also click the ‘Color’ button (just under the ‘Filter’ button) which will allow you to choose from any color that basically exists.


Now that you have your color selected, you can adjust the intensity of the color with the ‘Density’ option. Dragging the ‘Density’ slider to the right adds more of the color to the image for a stronger amount of tinting, while dragging it to the left reduces the amount of color for a more subtle tinting effect. You can see a preview of what’s happening in your image as you drag the slider.

how to use photo filter in Photoshop step-by-step tutorial

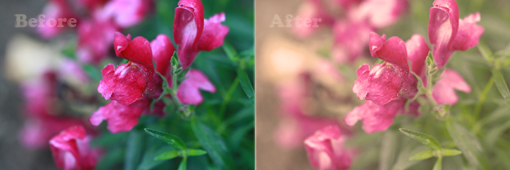
When I was perfectly happy with the new tint of my picture I flattened it (LAYER -> FLATTEN IMAGE).

Then I decided to do one more thing – to lighten the image up a little. I clicked ENHANCE -> ADJUST LIGHTING -> LEVELS and dragged the slider to the left until the image was as light as I wished.

Ta-da!

how to use photo filter in Photoshop step-by-step tutorial

Here are both pictures side-by-side for you to compare.

Gosh, I LOVE this tinting game!

Just try it, it’s awesome!

Love,

Petra

Send this to a friend