Aren’t galettes just the cutest things ever?
That is probably the reason number one why I love making them so much.
I also adore their rustic and simple look – there’s something very romantic about it. When I make galettes I like to imagine I am going back in time and meet some of my ancestors who definitely must have made zillions of pastries like this.
In addition, galettes always amaze me by their wonderful contrasty taste and countless variations.
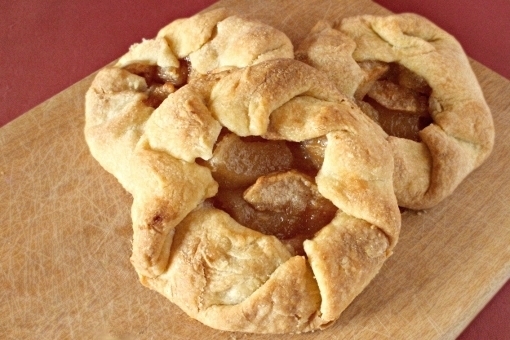
So far, for this site, I’ve already made two galette recipes – savory Cabbage Galettes and sweet Apple Galettes.
Both tasted heavenly.
Yum!
For some reason, up till now, I thought galettes are the perfect fall or winter treat. Well, was I surprised when I came across this wonderful recipe at Smitten Kitchen. Things clicked and from now on I am a huge ‘galette-as-a-perfect-summer-treat’ propagator.
Just imagine: chilled, tart ricotta filling infused with flavorful spices meets refreshing, slightly crunchy zucchini and that is all lovingly wrapped in irresistible, flaky, fragrant crust.
Mmmm.
Definitely worth trying.

This is the yummy stuff I’ve used.

1. To make your own galette, first whisk together the flour and salt in a larger bowl.
2. Sprinkle bits of the butter over the flour mixture.

3. Using a pastry blender (or just a simple fork), cut the butter in until the mixture resembles a coarse meal.

4. In a small bowl, whisk together the sour cream, lemon juice and water…

5. …and add this to the flour/butter mixture.

6. Now use a rubber spatula to gather and combine the mixture into a ball-like shape.

7. Then bath your hands in flour up to your shoulders (kidding! palms are enough!) and form a nice ball out of the dough.
You don’t need to knead or work too much on this dough – it’s perfect when it just holds together.
8. Refrigerate the dough for about 1 hour.

9. Meanwhile, slice the zucchinis into 1/4 inch thick rounds.

10. Spread the rounds out over two layers of paper towels.
11. Sprinkle with 1/2 teaspoon salt and let drain for 30 minutes.

These are our lovely zucchini rounds after 30 minutes. See how the towels are all wet?

12. Blot the tops of the rounds dry with paper towels before using.

13. Now, press the garlic into a small bowl.
14. Add the olive oil and whisk together.

15. Here the lovely ingredients can’t wait to meet each other and coexist in a perfect harmony.
I am namely talking about the ricotta, sour cream, Parmesan cheese, olive/garlic mixture, sweet paprika powder, black pepper and salt.

In other words, mix the filling ingredients just until combined.
Set aside some olive/garlic mixture to drizzle on top of the galette.

16. To assemble the galette, remove the dough from the fridge and place it on a well floured surface.
17. Roll the dough out into a 14-inch (35 cm) round.

18. Transfer to an ungreased, round 6 x 2 inches (15 x 5 cm) baking dish.

19. Spread the ricotta mixture evenly over the bottom of the galette dough,…

20. …leaving a 2-inch border.
I’ve used a little more ricotta than the recipe called for because, hm…, because I don’t even know why. I just probably couldn’t stop adding it in. Yeah, the control thing – I should work on that. But I’ll definitely follow the given ricotta measurement next time – now I see that the proportions are perfect.

21. Shingle the zucchini attractively on top of the ricotta in concentric circles, starting at the outside edge.
22. Drizzle the remaining garlic and olive oil mixture evenly over the zucchini.
23. Fold the border over the filling, pleating the edge to make it fit (the center will be open).
24. Brush crust with egg yolk glaze.

25. Bake at 375 degrees F (190 degrees C) for about 1 hour (or until the zucchini is slightly wilted and the galette is golden brown).

Although you can serve this wonderful galette at any temperature, I loved it best refrigerated.
Enjoy, dear friends!
- Like
- Digg
- Del
- Tumblr
- VKontakte
- Buffer
- Love This
- Odnoklassniki
- Meneame
- Blogger
- Amazon
- Yahoo Mail
- Gmail
- AOL
- Newsvine
- HackerNews
- Evernote
- MySpace
- Mail.ru
- Viadeo
- Line
- Comments
- Yummly
- SMS
- Viber
- Telegram
- Subscribe
- Skype
- Facebook Messenger
- Kakao
- LiveJournal
- Yammer
- Edgar
- Fintel
- Mix
- Instapaper
- Copy Link