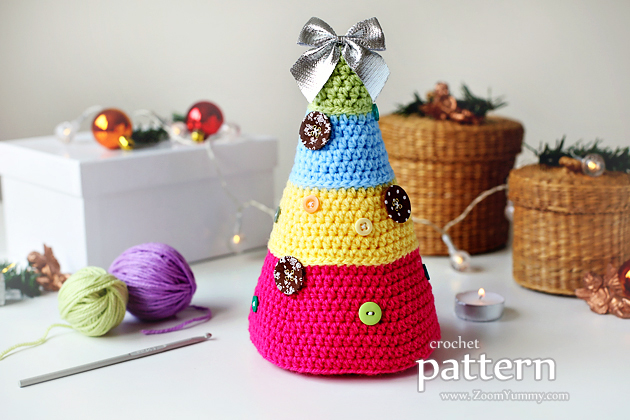
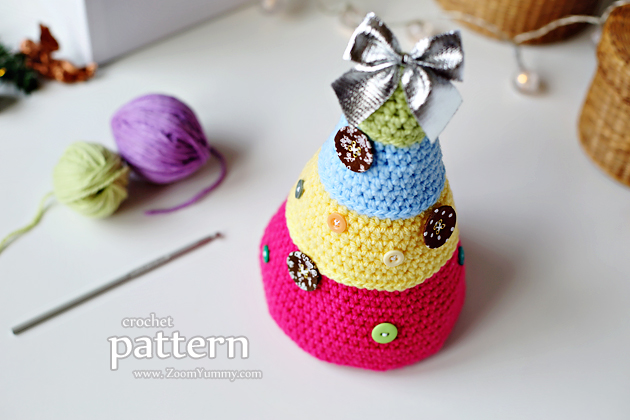
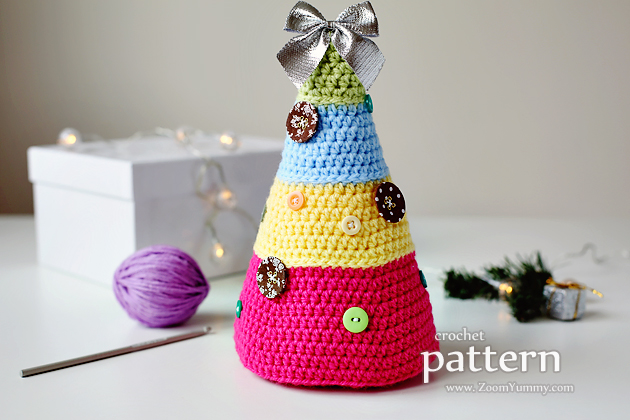
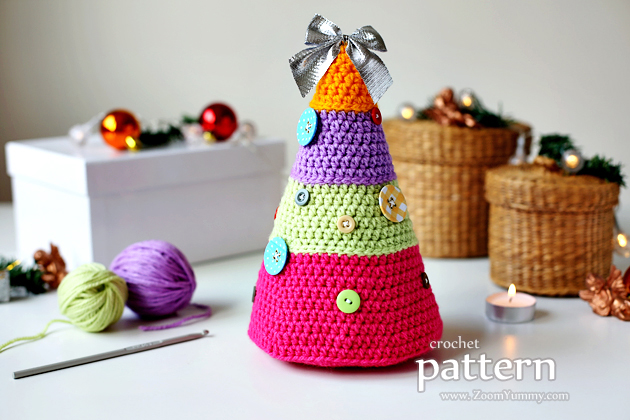
I have a new crochet idea for you today. It’s Crochet Christmas Trees With Buttons – a cute little decor piece to prepare your home for the upcoming holiday season.
These trees are very simple to make, a perfect project for all crochet lovers who are acquainted with the basics of crochet.
To help you with this project, I have put together a pattern. It’s spread over 21 pages, containing both written instructions and a photo tutorial with 37 detailed step-by-step pictures.
You can find the pattern and more info about it HERE and HERE.
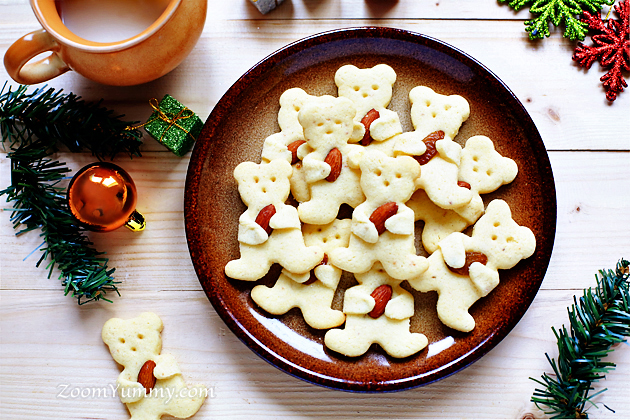
Yesterday I found myself in the mood for some festive baking.
Wanting to do so, I remembered a picture that I accidentally found in the deep deep waters of the internet a couple of weeks ago. It was a picture of cute bear cookies with each little bear holding a treat in its arms. How adorable!
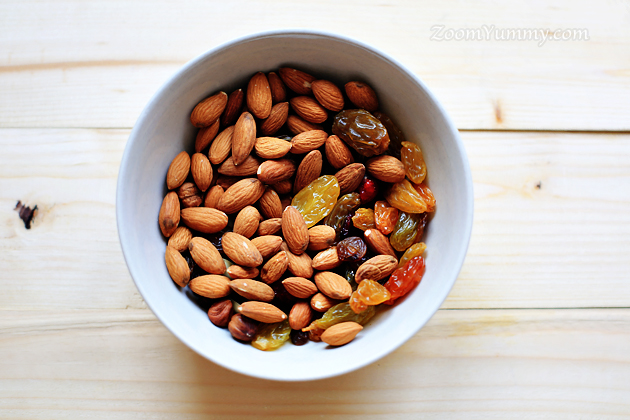
To replicate the cookies I used a very simple sugar cookie dough that does not change the shape that much while baking. As an item for the bears to hug 🙂 I chose almonds and golden jumbo raisins (I have to admit that I liked the latter a little better).
Here’s all that followed…
1. Preheat the oven to 350 °F (175 °C).
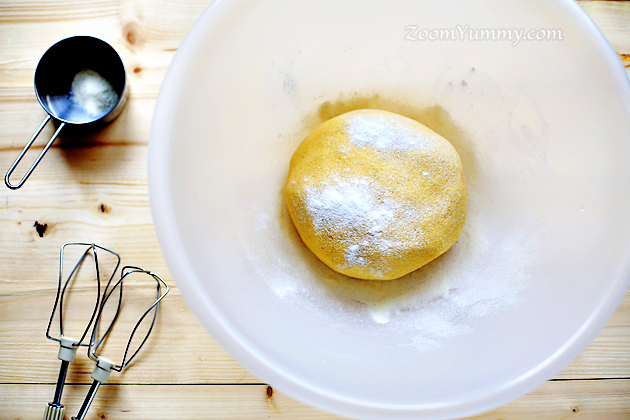
2. In the bowl of your mixer cream butter and sugar until smooth.
3. Beat in vanilla extract and egg.
4. In a separate bowl combine baking powder with flour and add a little at a time to the wet ingredients. The dough will be rather stiff. If it becomes too stiff for your mixer, turn out the dough onto a countertop surface. Wet your hands and finish off kneading the dough by hand.
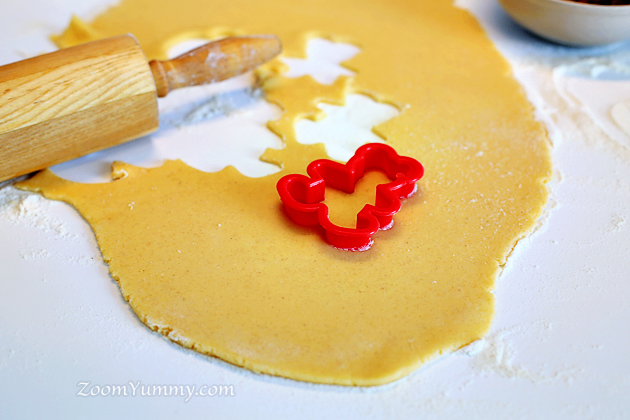
5. Divide into workable batches, roll out onto a floured surface into about 1/8 inch
(0.3 cm) thickness.
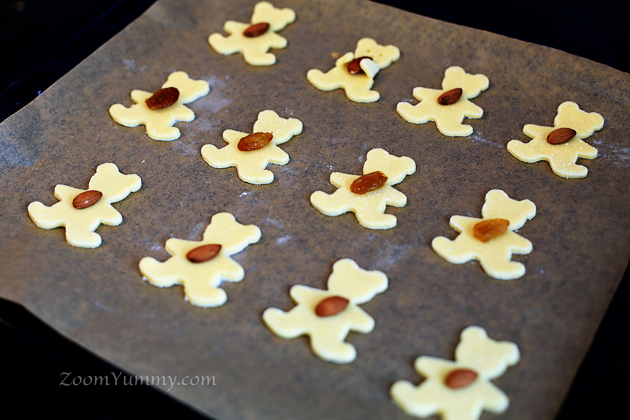
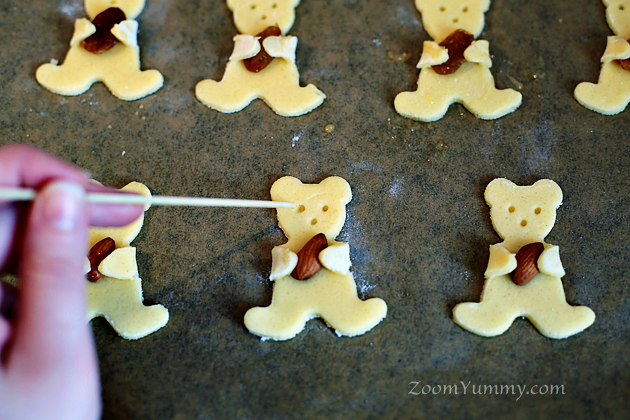
6. Cut out bear cookie shapes and place them on a cookie sheet that you’ve lined with parchment paper. Insert an almond or a raisin on top of each cookie.
Here’s a selection of the treats I’ve chosen – almonds and golden jumbo raisins.
7. Finally fold the arms into a hugging position (press the arms firmer so they don’t open while baking). You can use a wooden skewer to indent eyes and nose for each bear.
8. Bake at 350 °F (175 °C) for 6-8 minutes. Let cool on the cookie sheet until firm enough to transfer to a cooling rack.
In the bowl of your mixer cream butter and sugar until smooth.
Beat in vanilla extract and egg.
In a separate bowl combine baking powder with flour and add a little at a time to the wet ingredients. The dough will be rather stiff. If it becomes too stiff for your mixer, turn out the dough onto a countertop surface. Wet your hands and finish off kneading the dough by hand.
Divide into workable batches, roll out onto a floured surface into about ⅛ inch (0.3 cm) thickness.
Cut out bear cookie shapes and place them on a cookie sheet that you've lined with parchment paper. Insert an almond or a raisin on top of each cookie.
Fold the arms into a hugging position (press the arms firmer so they don't open while baking). You can use a wooden skewer to indent eyes and nose for each bear.
Bake at 350 °F (175 °C) for 6-8 minutes. Let cool on the cookie sheet until firm enough to transfer to a cooling rack.