Pull-apart breads are a great love of mine.
They look amazing, they are so much fun to make and the actual ‘pulling apart’ while you eat them is an immensely enjoyable and exciting thing too.
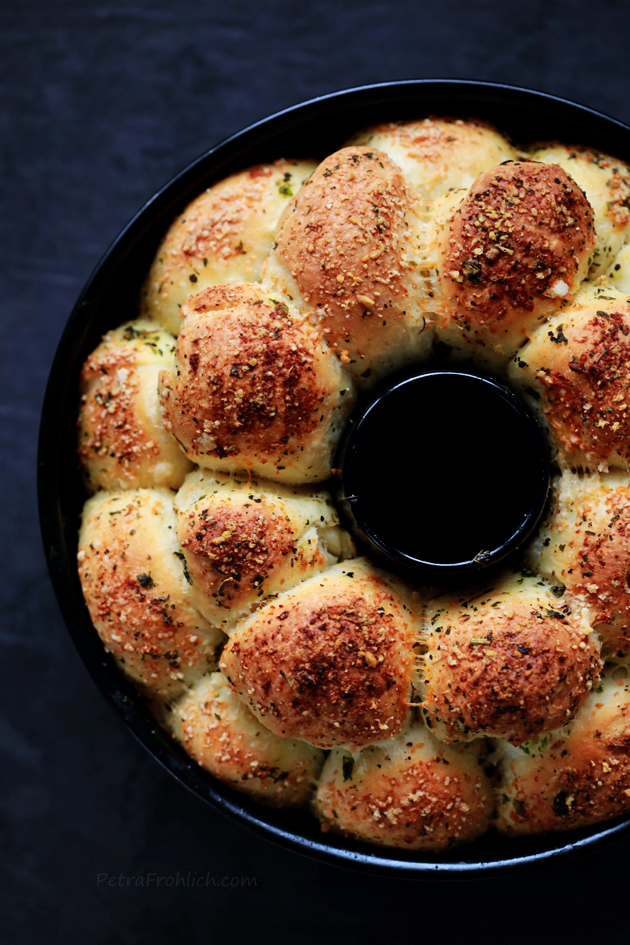
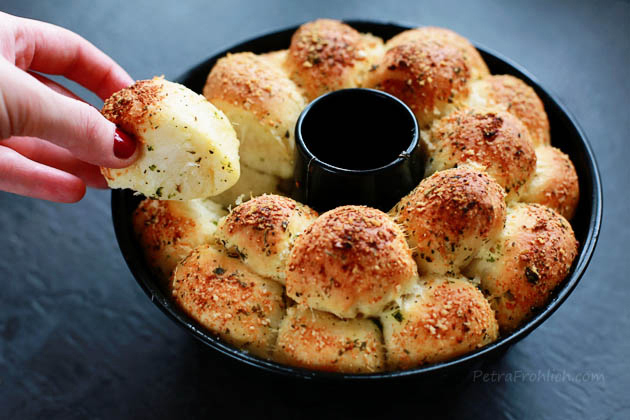
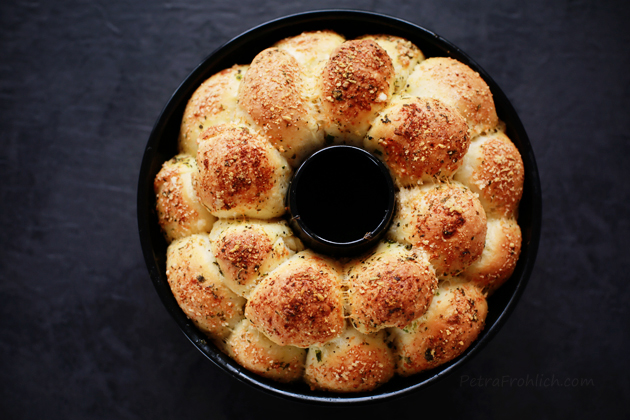
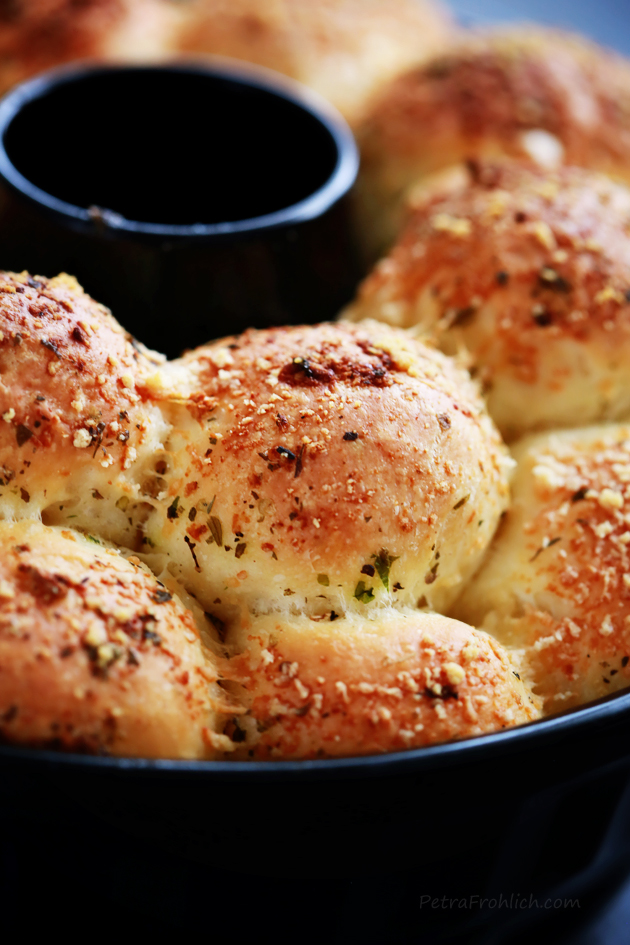
This Garlic Parmesan Pull-Apart Bread is as light as a feather, with each piece covered in a heavenly mixture of butter, herbs, garlic and Parmesan.
It’s a real treat!
Here are all the details that you need to bring this beauty on your table…
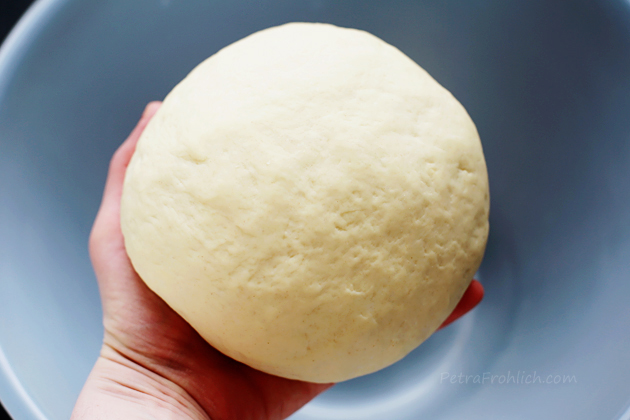
To make the Garlic Parmesan Pull-Apart Bread, first, in the bowl of your electric mixer, stir together the yeast and warm milk. Let the mixture sit for 5 minutes. Mix in the olive oil, 2 tsp salt and flour. Using the dough hook, knead the dough for 5 minutes, or until elastic (alternatively, you can mix the ingredients in a large bowl and knead by hand until it is elastic, about 10 minutes, which is what I did… there’s something very magical and therapeutic in working with dough).
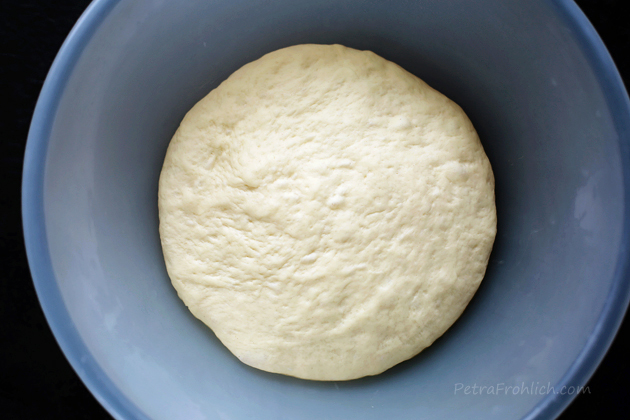
Transfer the dough to a lightly oiled bowl and cover with a clean kitchen towel or plastic wrap. Allow the dough to rise for 1 to 1 ½ hours, or until it has doubled in size.
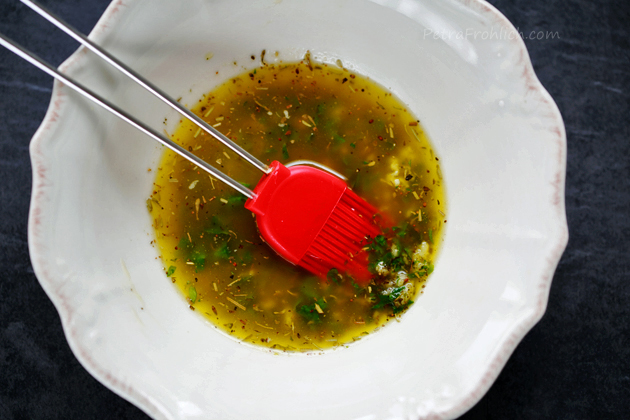
In a small bowl, combine melted butter, parsley, ½ tsp salt, Italian seasoning and minced garlic. Set aside.
Preheat oven to 350 °F (175 °C).
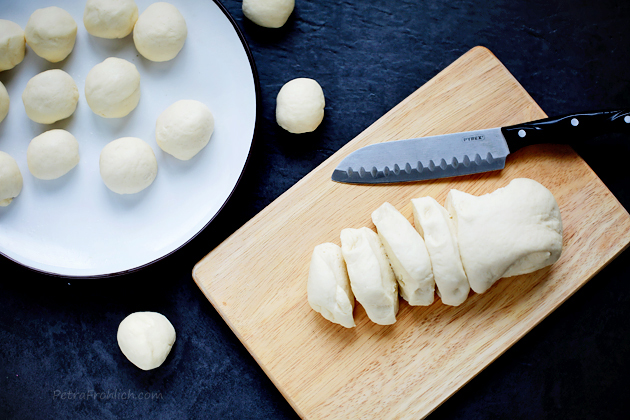
Gently push the air out of the dough. Roll the dough into a long log and cut it into about 27 pieces. Roll each piece into a ball (or just simply tear off golf ball-sized pieces of dough and roll them into balls).
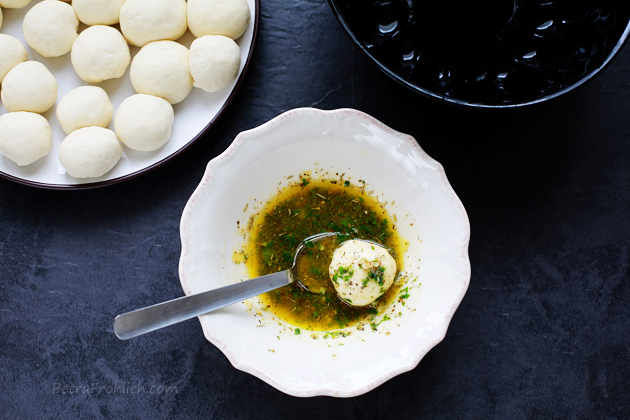
Then, one by one, roll each ball in the butter mixture…
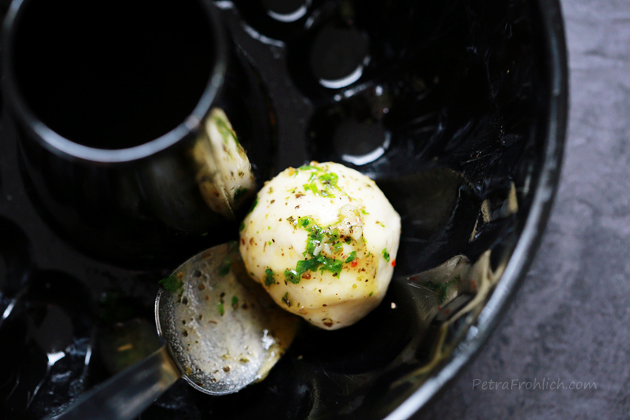
…and place in the bundt pan.
…so often, when I think about a bundt pan, this scene from ‘My Big Fat Greek Wedding’ comes to my mind (love that movie!)… 🙂
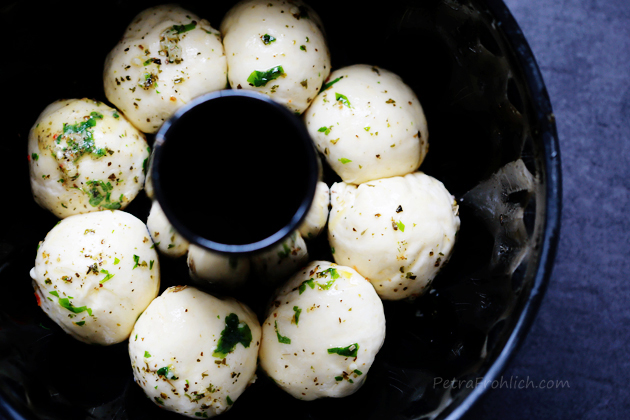
Anyway, arrange the dough balls in three layers. This is the first one.
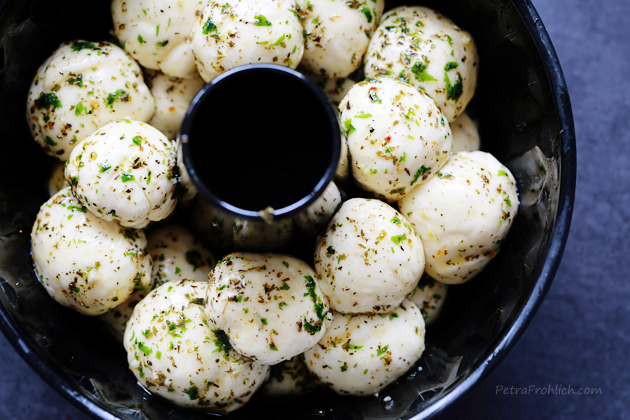
And this is all three of them.
Give each layer a nice sprinkling of Parmesan cheese (someone, who will remain nameless, forgot to do that with her/his first 2 layers… do not be like her/him please).
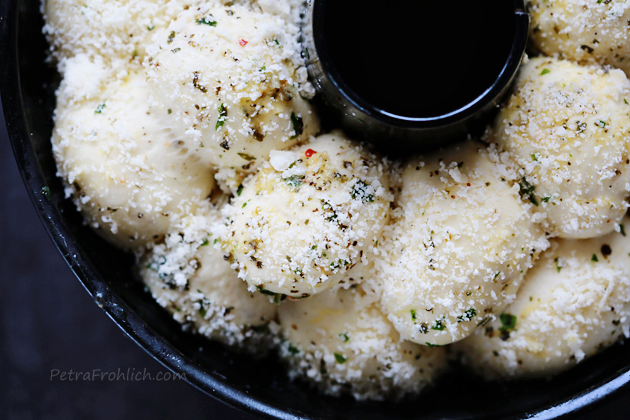
Cover the pan with a clean towel or plastic wrap and allow the dough to rise for about 20-30 minutes.
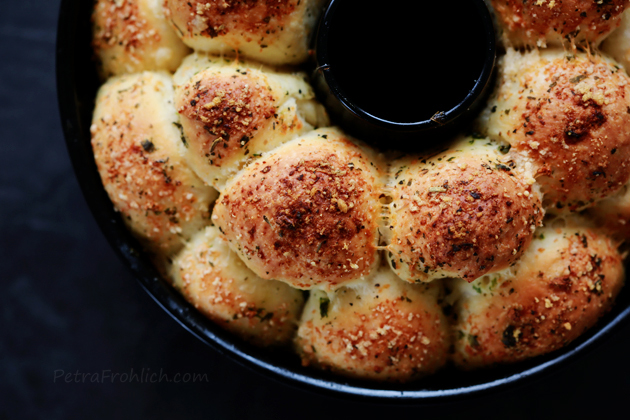
Bake for 25 to 30 minutes, or until the bread is golden brown.
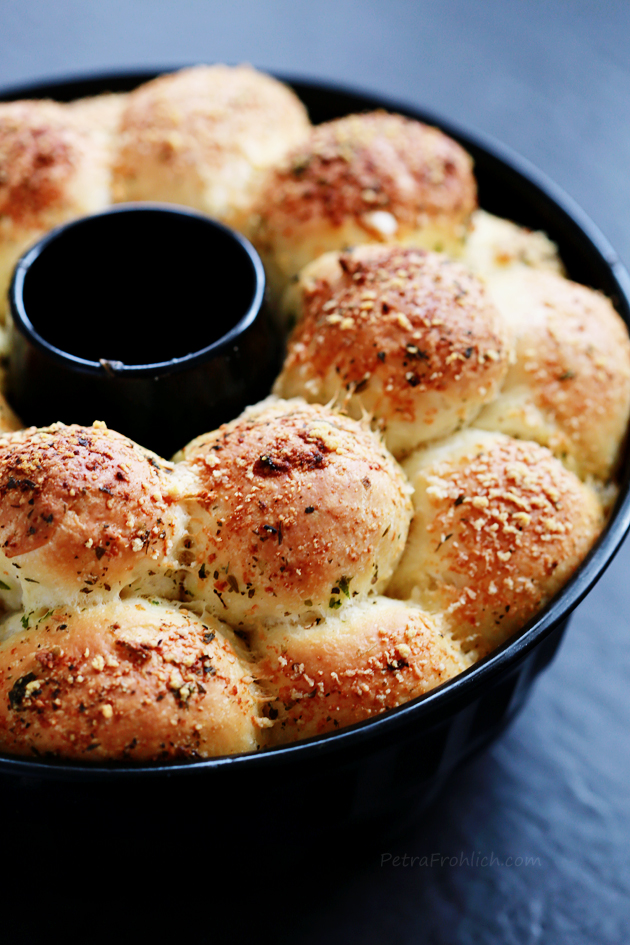
Mmmmmmm. The wonderful smell of freshly baked bread, cheese and garlic will fill your house.
Let the pan cool on the wire rack for about 5 minutes. Serve directly from the pan or invert the pan onto a large serving plate and let the bread fall out of the pan.
Serve hot.
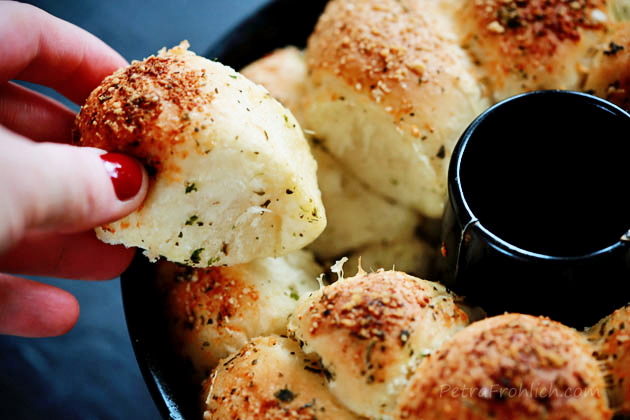
Pulling the bread apart is so much fun! It definitely was for me.
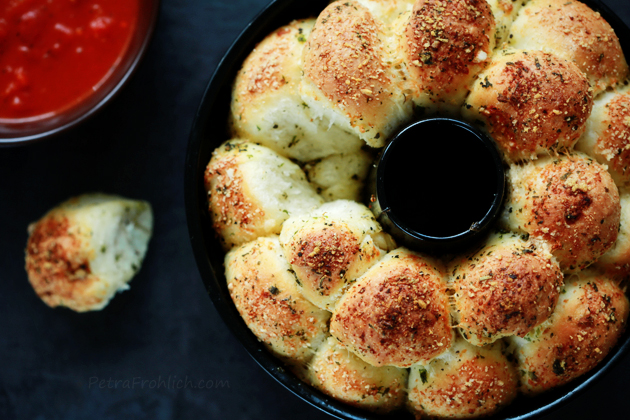
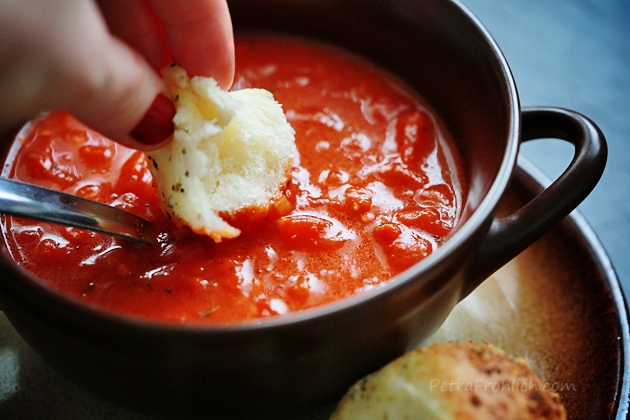
I served my pull-apart bread with this yummy tomato soup.
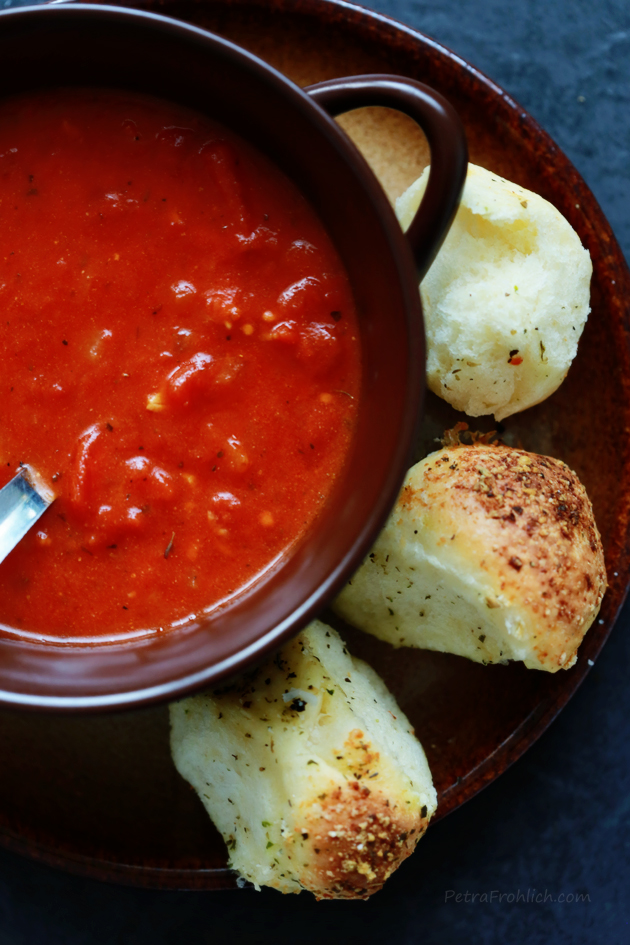
They made a great pair together.
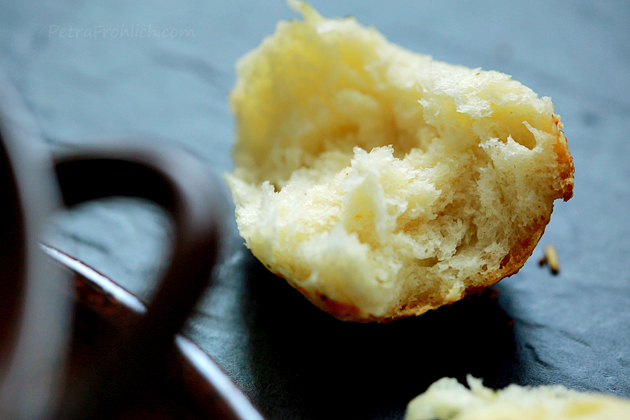
The bread was soft and light as a feather.
And each piece was full of amazing flavors.
Enjoy!
With love,
Petra… If you find it handy, here’s the recipe in the printable form.
- 2 ¼ tsp (1 packet) instant yeast
- 1⅓ cups (315 ml) warm milk
- 2 tbsp extra-virgin olive oil
- 2 tsp salt
- 3 ½ cups (455 grams) all-purpose flour
- 8 tbsp (110 grams) unsalted butter, melted
- 2 tbsp fresh parsley, finely chopped
- ½ tsp salt
- 1 tsp Italian seasoning
- 4 cloves garlic, minced
- ¼ cup freshly grated Parmesan cheese
- In the bowl of your electric mixer, stir together the yeast and warm milk. Let the mixture sit for 5 minutes. Mix in the olive oil, 2 tsp salt and flour. Using the dough hook, knead the dough for 5 minutes, or until elastic (alternatively, you can mix the ingredients in a large bowl and knead by hand until it is elastic, about 10 minutes). Transfer the dough to a lightly oiled bowl and cover with a clean kitchen towel or plastic wrap. Allow the dough to rise for 1 to 1 ½ hours, or until it has doubled in size.
- In a small bowl, combine melted butter, parsley, ½ tsp salt, Italian seasoning, and minced garlic. Set aside.
- Preheat oven to 350 °F (175 °C).
- Gently push the air out of the dough. Roll the dough into a long log and cut it into about 27 pieces. Roll each piece into a ball (or just simply tear off golf ball-sized pieces of dough and roll them into balls). Then, one by one, roll each ball in the butter mixture and place in the bundt pan in 3 layers, sprinkling each layer with about ⅓ of Parmesan. Cover the pan with a clean towel or plastic wrap and allow the dough to rise for about 20-30 minutes.
- Bake for 25 to 30 minutes, or until the bread is golden brown. Let the pan cool on the wire rack for about 5 minutes. Serve directly from the pan or invert the pan onto a large serving plate and let the bread fall out of the pan. Serve hot.
- Enjoy!
(This yummy recipe was loosely adapted from www.pastryaffair.com.)

- Like
- Digg
- Del
- Tumblr
- VKontakte
- Buffer
- Love This
- Odnoklassniki
- Meneame
- Blogger
- Amazon
- Yahoo Mail
- Gmail
- AOL
- Newsvine
- HackerNews
- Evernote
- MySpace
- Mail.ru
- Viadeo
- Line
- Comments
- Yummly
- SMS
- Viber
- Telegram
- Subscribe
- Skype
- Facebook Messenger
- Kakao
- LiveJournal
- Yammer
- Edgar
- Fintel
- Mix
- Instapaper
- Copy Link